Trying Some Recipes

Next month, my fellow Craftsy Review bloggers and I will be covering Vietnamese Classics: Pho, Noodles & Beyond. We thought in the time between now and then, we’d each review a recipe or two from the class.

pho-class

This is really exciting for me as my favorite restaurant is a Vietnamese restaurant. I hope I can learn to make a few of my favorites.  Here are the recipes I tried, and Marsha and Naomi will be in the next couple of weeks. I’m making Goi Cuon or Rice Paper Rolls, and Pho Bo (Traditional Beef Pho). Yum! One of my standard orders at the restaurant is for Salad Rolls, so the Rice Paper Rolls are perfect for me.

First up was a shopping trip. Andrea gives you all the ingredients and supplies you’ll need to make these recipes. Oh darn. I had to go buy more fun kitchen supplies. I think kitchen utensils are the cooking equivalent of a sewing stash!

I needed a skimmer for making my broth. Unfortunately, I bought a skimmer that looks like this:

chinese-wire-skimmer-chinese-spider-803-p

It didn’t do a thing. Then watching the video again, Andrea is using a skimmer that looks like this:

sms-7f

This is a fine mesh skimmer and it actually skims. I don’t have that exact one, but I do have a fine mesh skimmer that worked a lot better than the one I just bought.

Something I had to search for were the spices. I could not find them at my local grocery store. However, I did find them at a local Bistro. They have a whole wall of spices.

img_0817

They had everything I needed.

As far as the recipes go, I’ve made Rice Paper Rolls before. I really love some of the tips for making them more presentable that Andrea shares. Edible is one thing, pretty and appetizing is taking it to a new level.

For both of the recipes I’m trying, I’m using screen shots from Andrea’s Craftsy class and then comparing them to my makes.

Here is one of Andrea’s Rice Paper Rolls:

andrea-rice-paper-roll

And here are mine:

I had a little more trouble with my second roll (top in the photo) than my first one. This is definitely a skill one would need to practice. My husband had no complaints though. He enjoyed them and said the recipe is a keeper.

I can’t have seafood, so I left out the shrimp and added some seasoned chicken, but everything else that’s yummy is included. They were a wonderful lunch.

Next up is some yummy Pho. Again, I’ll start with Andrea’s beautiful Pho Bo. Hmm. Maybe I need new Pho bowls…

beef

I decided I didn’t need new bowls. I’m using the bowls I have now.

Here is my Pho stock simmering away. My house smelled wonderful while it was simmering.

Pho Ba stock

I’ll skim it again when I’m straining it. There are too many flavorful goodies floating on the top too. I want them in there adding flavor.

Just before I show you the finished Pho Bo, I want to show you my assembled bowls. My son decided he wanted a small bowl, so he got a small one.

Here they are waiting for the broth to be added.

In this next photo the broth has been added to the small bowl. Can you see the difference in the color of the meat and how the hot broth cooks the meat? That was fun to see. It happens right away too.

Here’s the second bowl all ready. I’ll warn you right here; there’s no photo of all three bowls. Once that third bowl was ready, we were all ready to eat. In fact, my hubby started eating right at the counter! We had to call him over to the table to join us.

Check out Marsha’s post next week on Flying by the Seam of my Pants for her recipes makes from this same class.

 Happy creating!

A Dress Form Cover

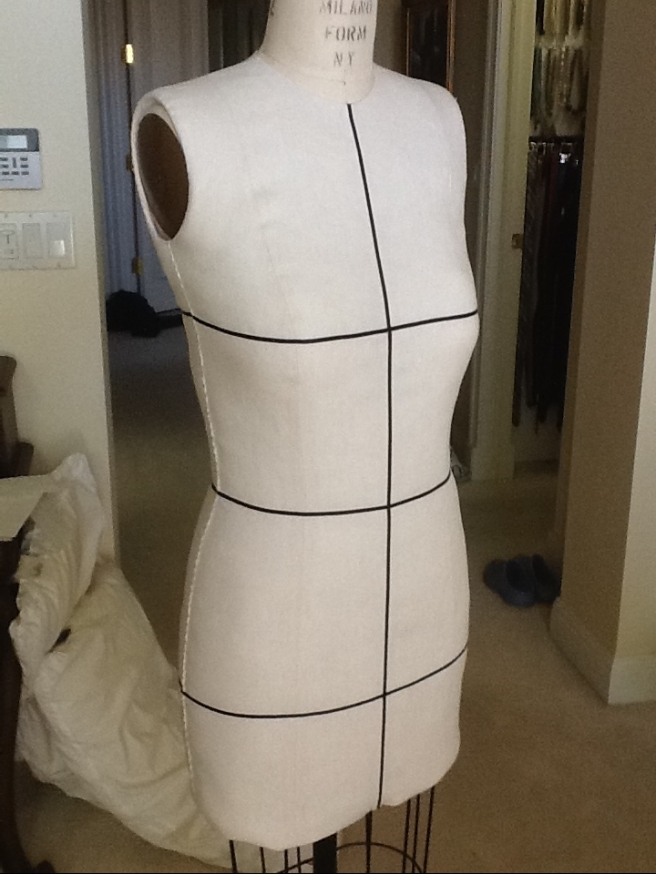
One of the many projects I plan to make is a dress form cover. I love Catherine, but we’re not the same size.

This is something I’ve looked into a bit, but haven’t found that perfect solution yet. I think a lot of the dress form tutorials and classes are all great for sewing, but not perfect for bra-making. From what I’ve seen, most dress form covers result in more of a uni-boob look, which would not work at all for bras.

Here is the first one I found, which I still think is so beautiful! Mary uses the sloper she made from Suzy Furrer’s Bodice Sloper class.

completed me

This image is from Cloning Couture‘s blog post. Isn’t this professional looking? I do love this! If I decide to simply to cover my dress form for sewing clothes, I’ll do this too.

I had similar thoughts about the Craftsy class Customize Your Dress Form. This class takes you through exactly what to do, step by step. I watched this class when Craftsy had their October pass in 2015. I thought it was really great, but again, it wasn’t addressing my desire to have the bust defined. That definition is an important part of bra-fitting.

14154439

So, I kept thinking about how I could adjust my sloper so I could have that bust definition I wanted.

Let me take a side road here and show you why I haven’t been 100% happy with any solution I’ve seen yet. This is the bra dress form Beverly uses in her Craftsy classes; Naomi, of Barely Beige also has one. This dress form is called Ashley. There’s no uni-boob happening here.

sewing-bras-designer-techniques-craftsy-taught-by-beverly-johnson-beverly-feature-image

How am I supposed to be satisfied with anything less than bust definition on my dress form after seeing this?

I recently came across a blog post by Sew Chic Pattern Company. They have a three-part post called Copy your Figure: A Dress Form Tutorial.

 Laura does do a dart to give bust definition, but I’m still thinking it won’t give me as much definition as I’m wanting.

bust-dart

Here’s a photo from her blog. This is getting closer.

I know from making my own sloper that mine doesn’t give enough bust definition the way it is now.

moulage done

Here’s the one I made. There’s a small dart there on the sloper, but…

So what I’m thinking is do some draping with fabric to see what size of darts I’d need, where I’d need them, how many darts I’d need. I might need to play with it a bit, but I think it can be done.

Has anyone made a dress form cover with more bust definition? What did you do? How did it turn out?

Happy Thanksgiving & happy creating!

A Craftsy Review: Design & Sew an A-Line Skirt

I have a lot of Craftsy classes, and I know I’m not alone in that. In fact, I know two other bloggers who also have a lot of classes, and we’re teaming up to post monthly (we hope) reviews of the classes we’ve taken.

Reviewing along with me are Marsha of Flying by the Seam of my Pants and Naomi of Barely Beige. Marsha and I have done a few blog tours together now, so I think you’ll all recognize her. Naomi is just getting started. I hope you pop over and read both of their reviews, and please make Naomi feel welcome .

craftsy-script-with-magnifying-glass-2

Now, let me share with you our real motive behind our plan to do these monthly class reviews – it’s to really watch all of these wonderful classes we’ve bought, and really get the most from them; you know – do the projects, make the wonderful makes, and not just have a lovely Craftsy class collection (as wonderful as that would be on its own). Is there anyone else out there who has classes they haven’t watched yet? I’m so guilty, but don’t tell my hubby!

So, for our first review we’re covering Design & Sew an A-Line Skirt, which was one of my first Craftsy classes.

design-sew

Of all the classes I’ve taken on Craftsy, this will probably be the hardest one for me to review. The reason for that is I’d like to just say great things about this class, or any class. It’s a little harder for this class to do that. Here are my first thoughts on the class from a couple of years ago. And here are a few more thoughts from that time.

However, I like to focus on positives, so I’ll share some really good things about the class now. Let’s cover those first.

One thing I like about this class.

One of the things I really like about this class is it taught me to put in an invisible zipper for the first time. I’d avoided them until this point. A regular zipper was fine, but I had been too intimidated to even try an invisible one. Just the name itself had scared me off.

Deborah’s instructions were very clear on how to install the zipper and I had no trouble. Her instructions were great really.

Here’s an old photo showing the zipper. (Sorry for these terrible photos – I was having camera trouble back then.)

invisible zipper

That zipper is about as perfect as a zipper can get. That’s a great aspect to the class.

I made a skirt that fit.

I did finish my skirt. That’s another positive for the class. Not only did I finish the skirt, but it fit as well. Here’s another (terrible) old photo.skirt

A personal dislike.

The skirt we make in this class sits a couple of inches below the natural waist, and I don’t love that. That’s simply a style preference.

Positive reviews with cautions.

This class is rated for beginners. It has reviews from 87 people and they have given it a 4.5 out of 5 stars. That’s pretty positive. However, there are comments in those reviews questioning whether this is really a class for beginners.

Maybe not for beginners.

The reason reviewers are saying this class isn’t for beginners is this instructor wasn’t answering questions. The fact that so many don’t receive answers makes me think this class might be better suited to someone with more sewing experience.

I had the experience of not having my questions answered when I ran into a bit of trouble. With this class, I made my first sloper. I’d had no previous experience with slopers.

square-up

Here’s a screen shot from the Craftsy class showing Deborah squaring up the pattern she’s making. This was the first area where I had trouble – ‘squaring up’.

My sloper was so curvy (like me) that squaring it was rather hard. I asked my question and didn’t receive an answer. I decided to simply move ahead even though my sloper wasn’t perfectly squared up. I did run into more trouble, and again didn’t have an answer to my question.

I contacted Craftsy about not getting answers.

Craftsy customer service.

ccs

Have any of you had any experience in dealing with Craftsy when a problem comes up? Craftsy is great! They have phenomenal customer service, and they came through for me with my unanswered questions.

When I emailed Craftsy with my frustrations over not having my questions answered, Craftsy checked and confirmed I did in fact have unanswered questions. Then made things right for me. That made me a happier customer. I still didn’t have answers to my questions though, which left a bit of a negative feeling about the class. That’s why this class review is a bit of a struggle. I have some negative feelings about this class.

However, to be fair, there are a few really great aspects to this class. So again, let’s focus on these:

  • I drafted and made a skirt that fit me.
  • I installed my first invisible zipper (and it looks great)!
  • There are a lot of positive reviews for the class.
  • With this class you make a modern A-Line skirt.

I think if you’re a competent sewer, there would be a lot you could learn from this class. So despite a bit of a negative experience, I, along with many of the other class reviewers, will recommend this class with a caution – it’s not for beginners.

I will let you know, we decided to start with our reviews but are taking December off. We’ll pick this up again in January. So no review in December.

Happy creating!

Happy Thanksgiving/National Handbag Day

Craftsy is saying it’s National Handbag day and has a great blog post with some free bag patterns. It’s Thanksgiving Day in Canada. I’m good with celebrating both!

Here’s a wonderful free bag with a tutorial.

THE MANHATTAN ZIPPERED CASE

themanhattanzippercase_aiid1975673

This pattern comes from the instructor of Craftsy class Mix & Match Clutch Bag Techniques, so you can bet it’ll be a great tutorial! The small handbag is perfect for quick trips when you need just a few things.

Get the FREE pattern »

Happy creating!