Agnes Swing Top & Dress

This week I’m trying a new pattern. It’s the hallå patterns’ agnes swing top & dress. I’m making the dress.

This is so pretty! I’ve heard so many great things about this pattern. I was really looking forward to trying it.

Something I Like

Right off, I can tell you something I really like about this pattern. It’s a layered PDF pattern so I can print the size I want, or if not sure, just two sizes. I love that! I’ve also heard the instructions for these patterns are really good. I’ll let you know.

Plans

My plans are to use this adorable pattern to make a nightdress or two. I really don’t like the over-sized, one-size-fits-all sleep tees that are so commonly available. I also love my cotton, which narrows things down too.

Another idea I have for a nightgown is the Butterick 6031. I’ve made the camisole, but if I lengthen the slip it would be a lovely nightgown.

Last year, I purchased some lovely cotton Lycra my fabric store brought in. This year, it’s all on sale 70% off. I’ve bought a few more solid colors and prints just for my summer nightgown project. One of the solid colors is the same as my summer house coat, so I’m thrilled about that. That’s where I’m starting.

Small Bumps in the Road

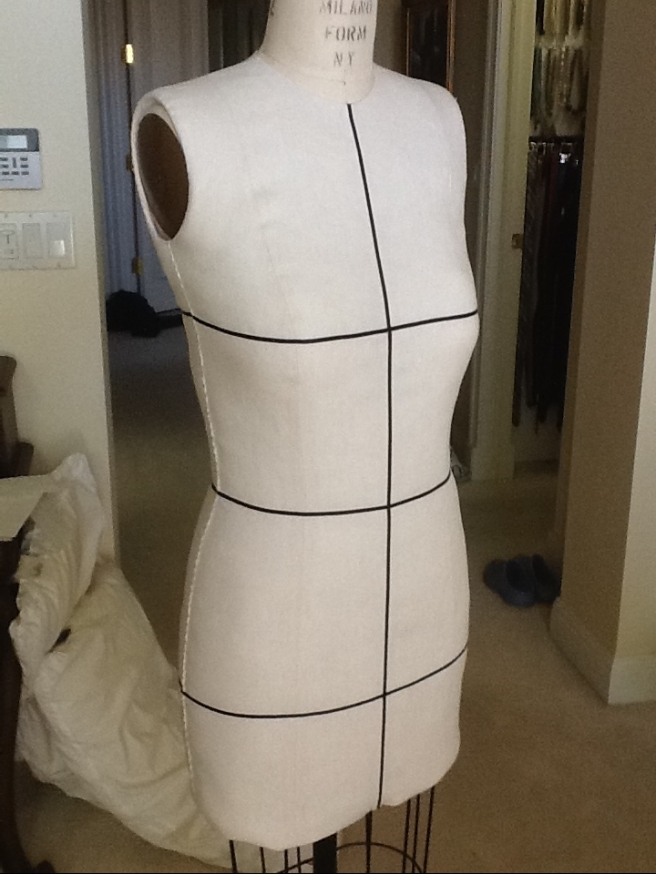
This bump isn’t a new bump. When I look at my measurements, the pattern would put me in a size 20. I know that will be way too big. Out comes my sloper just to prove to me this is going to be too big..

My sloper has a little bit of ease added to it, and I would want more ease for a nightgown. However, this would still be way too big.

I’ve been down this road so many times though, so I knew to look at my high bust measurement rather than my full bust. And even though I’ve been sewing for 25+ years, I learned about the high bust on this blog! Thank you!

My high bust wasn’t going to work this time though. It was going to put me in a size 2/4, and I knew that would be way too small for me.

Since I could print different layers, I printed off 6/8, 10/12, and 14/16.

You can see below, my shoulder hits between the 6/8 and 10/12.

Solution

If I wanted something a little more fitted, I’d probably adjust the shoulder to a 6/8. I’d make a size 10/12 except for the bust, which I’d make a 14/16. Seeing as I want this loose for sleeping, I’m making the 14/16.

My Agnes Make

This does come together really quickly. It’s quick to cut out, and quick to sew up. A serger is what is used in the instructions, so I’m used my serger.

I finished it with a rolled hem.
My hubby is so cute. He tells me this looks like a summer dress. I told him it is a summer dress!

It’s super comfy and as I’d heard, a pretty easy and clear sew.

I will definitely make another agnes, probably a top because it is a very flattering style. I’ll also make one change.

For my next one I’ll use the instructions from the Perfect T-Shirt to do my bindings for the neckline and arms. I prefer her way. It will take a bit longer, but I think the results are a bit better too. I’m not used to this way either, and feels a bit more in control sewing on the bindings in two steps. This one was just one step with the serger.

Here I am in my new agnes.

Material Disappointment

My one disappointment here is not in the pattern, or the instructions. When I was cutting out the dress, I noticed some imperfections in the material.

I’m calling these ‘slubs’ because this reminds of what you get in slub cotton. However, this isn’t supposed to be slub cotton. I’m glad it’s just a nightgown. I turn the lights out and don’t notice them at all.

Happy creating!

A Dress Form Cover

One of the many projects I plan to make is a dress form cover. I love Catherine, but we’re not the same size.

This is something I’ve looked into a bit, but haven’t found that perfect solution yet. I think a lot of the dress form tutorials and classes are all great for sewing, but not perfect for bra-making. From what I’ve seen, most dress form covers result in more of a uni-boob look, which would not work at all for bras.

Here is the first one I found, which I still think is so beautiful! Mary uses the sloper she made from Suzy Furrer’s Bodice Sloper class.

completed me

This image is from Cloning Couture‘s blog post. Isn’t this professional looking? I do love this! If I decide to simply to cover my dress form for sewing clothes, I’ll do this too.

I had similar thoughts about the Craftsy class Customize Your Dress Form. This class takes you through exactly what to do, step by step. I watched this class when Craftsy had their October pass in 2015. I thought it was really great, but again, it wasn’t addressing my desire to have the bust defined. That definition is an important part of bra-fitting.

14154439

So, I kept thinking about how I could adjust my sloper so I could have that bust definition I wanted.

Let me take a side road here and show you why I haven’t been 100% happy with any solution I’ve seen yet. This is the bra dress form Beverly uses in her Craftsy classes; Naomi, of Barely Beige also has one. This dress form is called Ashley. There’s no uni-boob happening here.

sewing-bras-designer-techniques-craftsy-taught-by-beverly-johnson-beverly-feature-image

How am I supposed to be satisfied with anything less than bust definition on my dress form after seeing this?

I recently came across a blog post by Sew Chic Pattern Company. They have a three-part post called Copy your Figure: A Dress Form Tutorial.

 Laura does do a dart to give bust definition, but I’m still thinking it won’t give me as much definition as I’m wanting.

bust-dart

Here’s a photo from her blog. This is getting closer.

I know from making my own sloper that mine doesn’t give enough bust definition the way it is now.

moulage done

Here’s the one I made. There’s a small dart there on the sloper, but…

So what I’m thinking is do some draping with fabric to see what size of darts I’d need, where I’d need them, how many darts I’d need. I might need to play with it a bit, but I think it can be done.

Has anyone made a dress form cover with more bust definition? What did you do? How did it turn out?

Happy Thanksgiving & happy creating!

A Craftsy Review: Design & Sew an A-Line Skirt

I have a lot of Craftsy classes, and I know I’m not alone in that. In fact, I know two other bloggers who also have a lot of classes, and we’re teaming up to post monthly (we hope) reviews of the classes we’ve taken.

Reviewing along with me are Marsha of Flying by the Seam of my Pants and Naomi of Barely Beige. Marsha and I have done a few blog tours together now, so I think you’ll all recognize her. Naomi is just getting started. I hope you pop over and read both of their reviews, and please make Naomi feel welcome .

craftsy-script-with-magnifying-glass-2

Now, let me share with you our real motive behind our plan to do these monthly class reviews – it’s to really watch all of these wonderful classes we’ve bought, and really get the most from them; you know – do the projects, make the wonderful makes, and not just have a lovely Craftsy class collection (as wonderful as that would be on its own). Is there anyone else out there who has classes they haven’t watched yet? I’m so guilty, but don’t tell my hubby!

So, for our first review we’re covering Design & Sew an A-Line Skirt, which was one of my first Craftsy classes.

design-sew

Of all the classes I’ve taken on Craftsy, this will probably be the hardest one for me to review. The reason for that is I’d like to just say great things about this class, or any class. It’s a little harder for this class to do that. Here are my first thoughts on the class from a couple of years ago. And here are a few more thoughts from that time.

However, I like to focus on positives, so I’ll share some really good things about the class now. Let’s cover those first.

One thing I like about this class.

One of the things I really like about this class is it taught me to put in an invisible zipper for the first time. I’d avoided them until this point. A regular zipper was fine, but I had been too intimidated to even try an invisible one. Just the name itself had scared me off.

Deborah’s instructions were very clear on how to install the zipper and I had no trouble. Her instructions were great really.

Here’s an old photo showing the zipper. (Sorry for these terrible photos – I was having camera trouble back then.)

invisible zipper

That zipper is about as perfect as a zipper can get. That’s a great aspect to the class.

I made a skirt that fit.

I did finish my skirt. That’s another positive for the class. Not only did I finish the skirt, but it fit as well. Here’s another (terrible) old photo.skirt

A personal dislike.

The skirt we make in this class sits a couple of inches below the natural waist, and I don’t love that. That’s simply a style preference.

Positive reviews with cautions.

This class is rated for beginners. It has reviews from 87 people and they have given it a 4.5 out of 5 stars. That’s pretty positive. However, there are comments in those reviews questioning whether this is really a class for beginners.

Maybe not for beginners.

The reason reviewers are saying this class isn’t for beginners is this instructor wasn’t answering questions. The fact that so many don’t receive answers makes me think this class might be better suited to someone with more sewing experience.

I had the experience of not having my questions answered when I ran into a bit of trouble. With this class, I made my first sloper. I’d had no previous experience with slopers.

square-up

Here’s a screen shot from the Craftsy class showing Deborah squaring up the pattern she’s making. This was the first area where I had trouble – ‘squaring up’.

My sloper was so curvy (like me) that squaring it was rather hard. I asked my question and didn’t receive an answer. I decided to simply move ahead even though my sloper wasn’t perfectly squared up. I did run into more trouble, and again didn’t have an answer to my question.

I contacted Craftsy about not getting answers.

Craftsy customer service.

ccs

Have any of you had any experience in dealing with Craftsy when a problem comes up? Craftsy is great! They have phenomenal customer service, and they came through for me with my unanswered questions.

When I emailed Craftsy with my frustrations over not having my questions answered, Craftsy checked and confirmed I did in fact have unanswered questions. Then made things right for me. That made me a happier customer. I still didn’t have answers to my questions though, which left a bit of a negative feeling about the class. That’s why this class review is a bit of a struggle. I have some negative feelings about this class.

However, to be fair, there are a few really great aspects to this class. So again, let’s focus on these:

  • I drafted and made a skirt that fit me.
  • I installed my first invisible zipper (and it looks great)!
  • There are a lot of positive reviews for the class.
  • With this class you make a modern A-Line skirt.

I think if you’re a competent sewer, there would be a lot you could learn from this class. So despite a bit of a negative experience, I, along with many of the other class reviewers, will recommend this class with a caution – it’s not for beginners.

I will let you know, we decided to start with our reviews but are taking December off. We’ll pick this up again in January. So no review in December.

Happy creating!

Great Timing!

No tricks today, but hopefully a treat.

I have both of the Bra-Makers Manuals. I have Demystifying Bra Fitting and Construction. I have Bare Essentials: Bras – Second Edition: Construction and Pattern Drafting in Lingerie Design. I’ve taken a few books out of the library as well – like Patternmaking for Underwear Design: 2nd Edition.

bra-drafting

I’ve been reading about drafting my own pattern for a while and decided it was time to take the jump. I started with the instructions in the Bra-Makers Manual Vol 2. I’ve used part of this already to draft my own cradle and band to help fit my Omega shape and had no trouble with it. So, I thought it was time I tried drafting my own pattern.

I did run into a bump drafting and sent off an email to Bra-Makers Supply. It turns out, the information from the manual had been updated, and that new information would take care of my question.

Now, with updated information in hand, I was ready to start again.

Just as I was about to start, there was another very timely post on Facebook. I love the sewing/bra-making forums on Facebook. They are a wealth of information!

untitled

Perfect! Rather than muddling through this mostly on my own, I’d much rather walk through with someone else for a first go.

We’ve just done some measuring so far, so the actual drafting hasn’t started. If you’ve ever wanted to try this out, here’s a great opportunity.

Here’s the blog post if you want to follow along.

Happy creating!

Canada Cups Posts for Sunday, September 18th, 2016

picmonkey-image-banner-2016

Here is our wrap-up post for the tour. What an incredible week it’s been! Don’t forget to enter the give-away and come back for some wonderful prizes.

Sunday, September 18

  • Linda, the instructor from the newest Corset-making class and owner of her own Corset business, is doing our wrap-up on Farthingales.

14339952_10210984887124239_819227118_o

All of the talented bloggers on this tour have done a fabulous job!

bloggers

If you’re looking for any of the past posts, here they all are.

Follow the magical tour to see what we all have under our clothes

Canada Cups Logo Draft

Sunday, September 11

Monday, September 12

Tuesday, September 13

Wednesday, September 14

Thursday, September 15

Friday, September 16

Saturday, September 17

Sunday, September 18

  • Linda, the instructor from the newest Corset-making class and owner of her own Corset business, is doing our wrap-up on Farthingales

Whoohoo! It’s giveaway day today!

Monday, September 19

Have you entered the giveaways yet? Today’s your last chance.

Tuesday, September 20

Giveaway winners announced on all the blogs:

Life of a Fairy Bra Mother, Little Heart Threads, Glitter in my Coffee, Michelle’s Creations, Mrs. Weaver’s Finest Unmentionables, Braphoria, Gracious Threads, Élégantine!, Shelaine’s Designs, That’s so Venice, Sprouting Jubejube, Flying by the Seam of my Pants, The Wild Stitch, Farthingales Corset Blog

After September 20

  • Come back to visit all the blogs for followup posts. It’s always fun!
  • Craftsy class discounts expire at midnight Sept. 30

Happy creating.

A Review of Sewing Panties Construction & Fit

Welcome to Michelle’s Creations for the Canada Cups – Cross Your Heart Relay blog tour, 2016.

banner-improvedI hope you’re enjoying all of our makes and reviews so far. This time around, I’m reviewing Beverly Johnson’s new Panty class and so is Deb, my booty buddy, from Sprouting JubeJube. Make sure after you read my post, you hop on over to read Deb’s thoughts on the class. If you started with Deb’s review, welcome here!  I do know Deb has been really busy with all her makes and has them all here in a separate write-up than her class review.

header_11223

Don’t you love Craftsy? It really is the best. They offer online classes that never expire, and in so many different categories (sewing, cooking, gardening, painting…); the instructors they get are the best and they answer your questions; Craftsy offers kits and supplies as well. They really are great!

You’ll see in my sidebar menu, I’m an affiliate with Craftsy. I decided to do this because I can do this without any compromise. I really do think they’re great. You won’t see me stand behind everything. But Craftsy, I do.

Back to Sewing Panties Construction & Fit. I started watching. I watched the class half way through the first night. Then got up the next morning and watched the rest of it. I felt ready and confident to draft my own panties which was something I’d wondered if I could really do before the class.

Beverly assures us that drafting our own panties isn’t hard. It’s just a few simple measurements. Then she proceeds to show us just how to do it. This photo is from Craftsy showing Beverly making her master panty pattern.

She was absolutely right! It’s not hard.

full_2846_373118_DraftingaMasterPattern_1

The drafting of the panty is very reminiscent of Suzy Furrer’s Sloper classes. Once we’ve drafted our pattern, Beverly moves on to show us the three basic styles of panties – Brief, Hipster, and Bikini – and how to make each one from our own master pattern.

From those three styles, Beverly shows some more variations like making your own French cut panties. There is also a style with the seams in the front. I had just been looking at the Make Bra DL21 pattern. I’d read great reviews on them and how the seams didn’t show at all. I’m going to try my hand at drafting my own!

My big question is how will my class-drafted pattern compare to my favorite pattern?

Before I made a pair up, I wanted to compare my class-drafted pattern to my favorites: Kwik Sew 2286.

Here are both back pattern pieces – the black outline is the class-drafted pattern; the white pattern piece is my 2286 pattern:

back 2

The pencil wasn’t showing up very well in the photo, so I redrew the lines in black on my computer. The class-drafted Hipster hits the center back exactly the same as my 2286s. The hip sits a bit higher on the class-drafted pair. As well, the class-drafted back is a bit wider in the hip and gives a little more cheek coverage. I had no idea my 2286s were cheeky!

I was thinking about the size difference, and remembered Beverly does suggest in the class to start with a 20% reduction when drafting the pattern. Clearly, my 2286s have more than 20% reduction, which shows even more on the front piece.

Front

Again, the front is bigger on my class-drafted pair. And the Hipster line sits a little lower. The leg opening on the front of my class-drafted pair (again, outlined in black) is definitely lower, and that would be something I’d want to change.

Gusset

The class-drafted gusset is shorter and although you can’t tell in the photo, it’s a touch narrower as well. I’d even narrowed the gusset pattern piece on my 2286s.

For my panties, I’m going to use my favorite 2286s like I often use my sloper – to help me get the fit I want. I will change the leg opening on the front, lengthen the gusset a tiny bit, and since I haven’t found my 2286s to be too small at all, I will narrow the class-drafted pattern.

It’s time for new panties! New, drafted-to-my-measurements, incorporating-all-the-aspects-of-my-favorite-pattern, and matching-my-new-bra new panties. These are not just any panties!

panties on table

Oh, I like these. I incorporated the lace application on the legs the same as my 2286s, and did a lace front panel to match my bra.

I wanted to show you a few more details. One of the things I’ve learned making my own panties is the side seam is a weak spot when you’re using lace on the front like this. So, for these panties, I used a 1/2″ strip of knit interfacing to reinforce the seam.

reinforement

As well, having a lace front isn’t quite the same without some elastic. It will often be too loose. So a little bit of lingerie elastic behind the lace is hardly visible, but makes a big difference when you’re wearing them.

Elastic behind the lace

I like everything to look as nice inside as out. I pin my lace out of the way and use my Pinking blade to trim away the excess fabric.

Pinking the edges

There’s only one more thing to add. This is one of the bows I made for my bra.

One more thing to add

Here’s my matching set.

Full set on table 2

 I love them both!

Set on Catherine 3

I loved making self-drafted panties, but that wasn’t all I made. As well as making these panties, I reviewed a pattern.


 Here are the panties I made:

il_570xN.1022408585_jahx

Yes, it’s the Pin-Up Girls Boy Short Collection.

Along with covering Beverly’s newest class, Deb from Sprouting JubeJube and I are both reviewing panty patterns, but not the same pattern. I’m reviewing the Pin-Up Girls Boy Short Collection. Although I know what pattern Deb is making, I’m not going to tell. You’ll have to go to Deb’s blog to see her pattern review and all her makes. She really did make some lovely panties, and we found out we love the same materials. Really. We have the same Cotton Lycra stash. That’s all I’m saying.

Let me show you the Boy Shorts I made.

Front of panty

 They look just like Boy Shorts, but they also looked bigger than what I usually wear.

comparison

And they are bigger. To be totally honest here, they looked HUGE to me!  It’s mostly the different shape. Boy shorts have material over the leg and what I usually wear doesn’t. Oh my! Here they are being compared to my favorite Kwik Sew 2286s. I know what size not to use so my next pair will fit.

The best part of these panties is the back. I made view 4. They really have a super cute back and I will use this feature in the future.

Back lace detail

Isn’t that a lovely detail?

I want to thank Bra-Makers Supply for providing me with the Pin-Up Girls Boy Short Collection, and Craftsy for providing me with the class Sewing Panties Construction & Fit.

14339952_10210984887124239_819227118_o

Tour Schedule Itinerary

Follow the magical tour to see what we all have under our clothes

Canada Cups Logo Draft

Saturday, September 17

bloggers

A big thank you to our wonderful bloggers. They’ve all done such a great job!

Happy creating!

Announcing The Canada Cups – Cross Your Heart Relay Blog Tour

Over the last week, I’ve posted a couple of teasers for our upcoming tour.

picmonkey-image-banner-2016Well, the wait is over. The tour starts today!

Welcome to the Canada Cups – Cross Your Heart Relay blog tour, 2016!

The tour begins with the incredible Fairy Bra Mother herself – Beverly Johnson. Pop over to the Fairy Bra Mother’s blog for a great kick-off post!

Fairy Bra Mother’s blog

Happy creating!

The Perfect T-Shirt Take Two

I love my Perfect T-shirt.

on bench

The concept behind The Perfect T-Shirt is to make a working muslin and make any adjustments you need to that tee and the pattern at the same time. That’s a really great idea.

I did do that, but there were still a couple of changes I wanted to make before I had my absolutely perfect tee.

The neckline on my first tee fits me the same as any other RTW tee – it gapes a bit. Sizing down would be too small, so it was time to figure out what adjustment needed to be made.

I pulled out a favorite resource.

071349_1_1

The recommendation in this book for a gaping neckline is to adjust the shoulders. Perfect. You can download a sample from the book here.

It was time for my wonderful knit sloper to come out again and compare it to the pattern.* (see the note at the bottom of the post)

shoulder

Do you see how the shoulders aren’t the same? My sloper (on top of the pattern) really shows my shoulders are shorter at the neckline edge than the pattern’s. That difference on the front and back on each side adds up to 1″ more than I need around the neckline.

I also adjusted the hip area on the pattern. I had graded up to a Medium in the hips on my first tee and it gave it a bit of a peplum look. As well, the hips were a bit loose, but a Small wouldn’t give me enough room in the Hips. I was right in-between the two sizes, so I re-drew my cutting line right in-between those two size lines.

Sewing up my Perfect T-shirt was fine. I did do one thing differently than what is recommended in the pattern instructions. One thing they do recommend is to sew the sleeves in before sewing the sides up. I really like that flat constructions style of sewing garments. It makes it easier. Along that same way of thinking, I used knit interfacing on the shirt hem and the sleeve hem and added those to the garment while the pieces were flat too. The instructions say to do that after the garment is all sewn. I did that the first time and let me tell you, this is a lot easier. It might be different if I were using the same products Pamela recommends though.

interfaced hem

The only other little bump on the road to sewing this was I adjusted both shoulders to make the neckline fit better and forgot to adjust the neckline binding. So I had it all cut out and was pinning it, and couldn’t figure out why there was more. I went and checked the pattern again.Still didn’t clue in. Remember that inch I mentioned before? That was exactly how much extra I had. I rolled my eyes when I realized what I had done. It was a small bump. I adjusted the binding and wrote it in my pattern for next time.

note

I wasn’t the only one to write a note on my instructions. I went away for a weekend a while ago and I guess DS1 was bored. I have these little ‘hi’ notes all over. I smile when I find a new one. I just found this one this week.

Here’s my new Perfect T-shirt.

front

I also lengthened the sleeves a bit too. On my next one I plan to play with the sleeves some more.

Side

tee back

I’m loving these cotton/Lycra knits my local fabric store is carrying.

collor

Here’s a close up of the only part of my Perfect tee that really needed changing.

We’ll all have to wait until I have a photographer to see it on me.

Happy creating!