Canada Cups – It’s a Wrap

Welcome back for the final stop on our Canada Cups Coming Unwired tour.

I’d Like to Thank the Academy…

Before I say anything else, I really want to say a big thank you! We put out the call to some incredibly talented Canadian designers, suppliers, and bloggers, and got an amazing response! Well, you’ve seen the prize list, seen the makes, and read the blogs. It’s been great!

Personally, on behalf of the bloggers, here’s a shout out to Bra-Makers SupplyChelsea C. DesignsClub TissusFavorite ThingsJalie Sewing PatternsLingerie Secrets, and Ohhh Lulu for donating patterns and/or supplies to our bloggers!

We had two guest bloggers on the tour as well! Some wonderful professional bra-makers took time out of their very busy schedules and wrote up posts. Thank you, Linda (Uplift Custom Bras), Maria and Karin (Mrs. Weaver’s Finest Unmentionables). We are so grateful to you.

Our tour really wouldn’t have happened if it weren’t for our bloggers willing to take their time too. Thank you Deb, Jessica, Lisa, Marsha, Mel, Michelle S., Rachelle, and Valérie! I loved seeing your gorgeous makes!

Lastly, there are all the wonderful prizes donated for the tour. Thank you Atelier Fiber Arts & Abrakdabra, Bra-Makers SupplyBraphoria, Central Sewing Machines, Chelsea C Designs, Closet Case Patterns, Crookshanks Custom Textiles (I’m totally envious of whoever wins this one), Fabric Please, Favorite Things, Funky Monkey Fabrics, Libelle Sewing, and Midnight Mountain Fabrics. (Oh, I’d like any or all of these prizes!)

Behind the Scenes Highlights!

 Now for some behind the scenes fun! Let’s talk about a few things that went on while getting ready for the tour!

Don’t Get Your Knickers in a Knot!

Lisa made some hipster panties. She was questioning her fabric placement ability after putting that gold LOVE smack dab… well, you can see for yourself.

Lisa also had to draw on her own sewing experiences when she put off sewing until close to the end of the tour and found she was missing a page of instructions! There wasn’t enough time to get a new pattern and get the panties done in time. I wonder if that could have been the pattern placement page.

You Don’t Say

Rachelle and I both made the Sweet Sixteen bralette pattern. In fact, we not only both made the same pattern, we found the same material! Yup. It’s gorgeous, and we both loved it. We both almost made the same bralette out of the same material.

That Didn’t Work!  

I had a whoops moment I shared with the other bloggers. I called it when bad things happen to good cups. That gorgeous material I couldn’t resist? I had some technical difficulties with my machine… and then my seam ripper.Yes, that’s a hole in the middle of the cup, probably right about where the apex sits in the cup. There were jokes about leaking cups!

I wasn’t the only blogger who had trouble with my materials. Marsha shared with us how her crepe crept off the table and she cut one side of it 1-inch too deep!

 Kids Say the Cutest Things!

Jessica had a laugh when her toddler asked what she was sewing. She said ‘a bra’, and he replied…” a broccoli?'” Nope. Can’t sew a broccoli! It doesn’t fit with our soft-cupped theme either.

Deb told us her girls loved the nightdresses she made for them. They found them a little cold to sleep in now the weather is turning, but had a perfect solution: They suggested going on vacation. I like they way they think!

Name that Movie!

Michelle made the Romy bra, and Marsha reminded us all of the movie Romy and Michele’s High School Reunion.

Do you think we could get that out of our heads once it got in? Hmm, I wonder if those are soft-cupped bras they’re wearing?

Fitting

A number of us dealt with fitting issues. Cups too big, bands too big. I don’t know if anything fit perfectly the first time around.

There was one comment made to us about the patterns all being for skinny bodies. Nope. That’s not the case. More than one of us does not fit into that category anymore. We really enjoyed calling each other skinny after that though.

We really do have a lot of fun on these tours, and hope you enjoy them too! So, we’ve wrapped everything up, thanked everyone. All that’s left is for you, our readers to win a prize! I want to hear if one of my readers wins a prize!

Giveaway

a Rafflecopter giveaway (This giveaway has ended.)


Prizes

Tour Discounts (These tour discounts have ended.)

  • Funky Monkey Fabrics is offering a 10% discount for the duration of the tour. Use code: CC10 for 10% off store wide until October 22nd. Not valid on already discounted full bolts.
  • 20% discount storewide at Fabric Please. Use code CANADACUPS.
  • 10% discount from Central Sewing Machines. Orders must be mailed to Muriel @ centralsewing.com to have the discount applied manually.
  • 10% discount from Midnight Mountain Fabrics. Use the code CANADACUPS10
  • Free shipping from Club Tissus on all orders over $100. Use code: livraison100
  • 10% off a retail purchase from Libelle Sewing with $15 purchase. Use code: CANADACUPS

   If you missed any of the tour, here’s the schedule again.

Sunday, October 15


Monday, October 16


Tuesday, October 17


Wednesday, October 18


Thursday, October 19


Friday, October 20


Saturday, October 21

♥♥
Monday, October 23

  • Giveaway winners announced on all the blogs:

Little Heart ThreadsGlitter in my CoffeeMichelle’s CreationsMrs. Weaver’s Finest UnmentionablesGracious ThreadsÉlégantine!That’s Sew VeniceSprouting JubejubeFlying by the Seam of my PantsFilles à Maman

Useful Handbag Hacks

Do you ever want to make a handbag and the pattern looks great, but it just doesn’t have all the features you want? That’s how I’ve been feeling.

Here’s my first Raspberry Ripple handbag. I love the outside of this, but I didn’t love the inside. A zipper on one side and a couple of side pockets. It’s adequate, but not exactly what I want.

Common Patterns

I’ve been looking at a lot of patterns, and too many of them are totes. I don’t love totes. They’re fine as a tote, to throw a few books in when heading to the library, but they’re not a handbag.

Most of the patterns I have, or have seen are all missing one thing I really want in a handbag – a divider inside. I love a divided handbag. I like to put things like my sunglasses on one side, my wallet in the zippered divider pocket, and any cosmetic things like hand cream or lip balm on the other side. Nice and neat – not all thrown in on the bottom. I also like a top zipper closure to secure it all.

So, I haven’t found my perfect patterns out there. After a little searching around, it seems I’m not alone. A few bloggers have posted some hacks that look really good and I wanted to share them with you.

Purse Dividers

This first one was referred to me by Marsha (Seam of my Pants). Thanks, Marsha! Sherri at Thread Riding Hood has a free pattern (for a tote) and tutorial on how to install a divider.  I’m using a photo from Sherri’s blog post to show you just how nice it looks.

That is so lovely and such a neat-looking finish. I love her fabric choice too.

This next one came from a search and it looks really good too. On the photo it says it’s from Diedel Bug. It’s on the Swoon website. It’s adding an interior divider pocket to the Eleanor handbag. This is a great-looking tutorial, and exactly what I’m wanting. Again, I’m using the photo from the website.

This is great! It even has the zipper in the divider just like I’m wanting.

Here is one more divider tutorial for you.

This photo is from Abby at Things For Boys*, and it’s a divider for a tote bag.

These are all great tutorials, and I’ll go through them all before I draft a divider for my next Raspberry Ripple handbag.

Zipper Closures

There’s one more thing that will make my Raspberry Ripple, and so many of the other bag patterns I have, my perfect handbag – a zipper closure at the top.

Here’s one more great tutorial on how to add a zipper closure.

This one is from Lisa at Andrie Designs. And it’s for a tote!

With all these tutorials, I feel ready to make all the changes I want to make to my Raspberry Ripple pattern.

Happy creating!

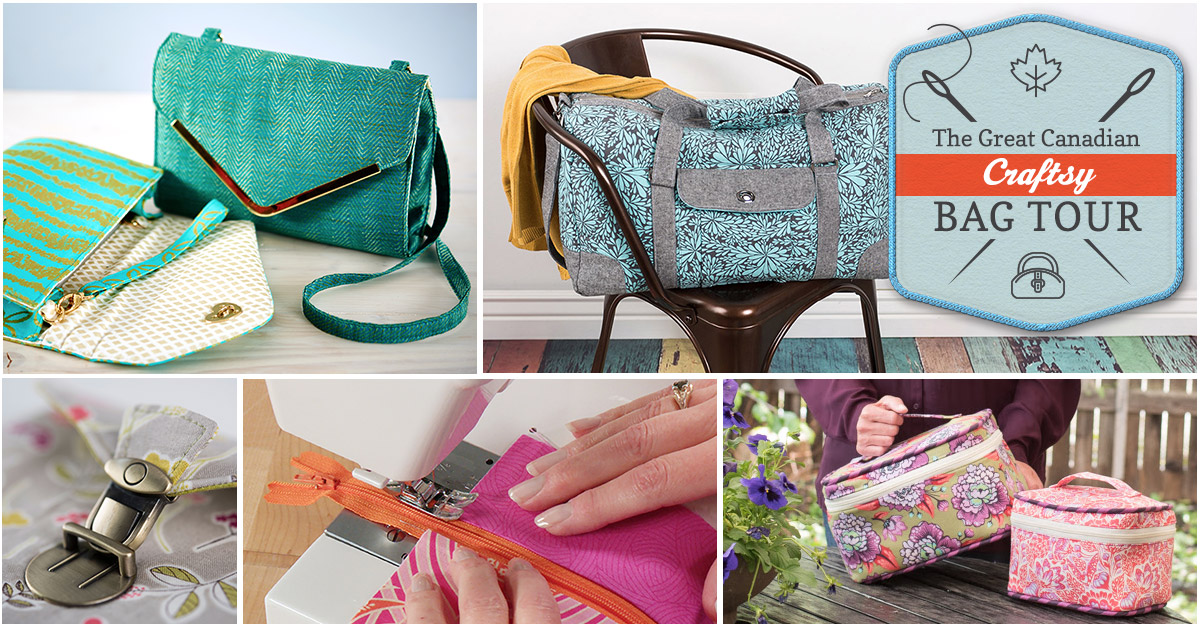
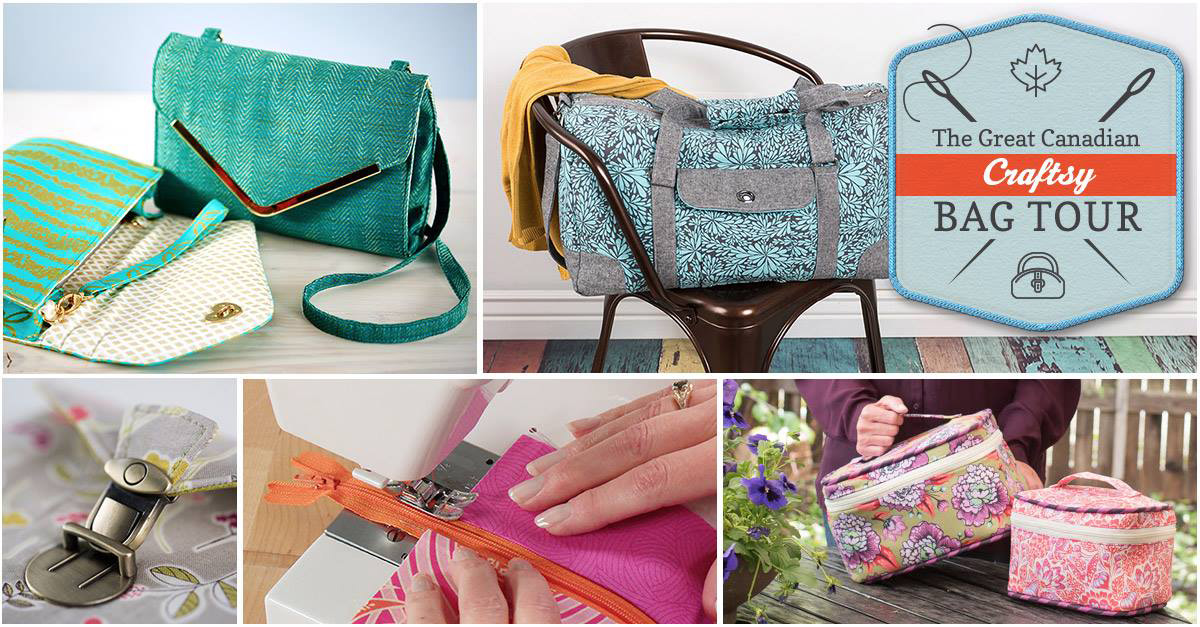
The Great Canadian Craftsy Bag Tour

Craftsy 1200x627_social

Welcome to my stop on The Great Canadian Craftsy Bag Tour! Our tour is made up of Canadian Bloggers, hence the name The Great Canadian… Only in Canada you say? Pity! Well, no, not really. We’re all in Canada, but you can join the tour from anywhere in the world! Sit back and enjoy – no tariffs, no shipping costs, no exchange rates. (Oh, Canadians know about exchange rates!)

Making handbags is something I’d wanted to do for a long time. After hearing of Craftsy, and signing up for my first class with them, I was hooked. I think my first class was Fab Felt Holiday Crafts with Betz White (you’ll see more of Betz on this tour), followed quickly by Design Your Own Handbag with Brett Bara. Brett’s class was the first of many handbag classes I’ve taken on Craftsy. With Craftsy, I’ve found a great learning platform, and I keep going back for more. I love that the classes I purchase are there for me anytime I want to access them, and never expire.

This year I became an Affiliate with Craftsy. On the right side of my blog, you’ll see some links to a few of my favorite classes, including the class I’m reviewing here (which Craftsy very graciously gave me to review for this tour). This list is by no means an exhaustive list, but just a few favorites. I can recommend these classes with confidence as I’ve taken them.

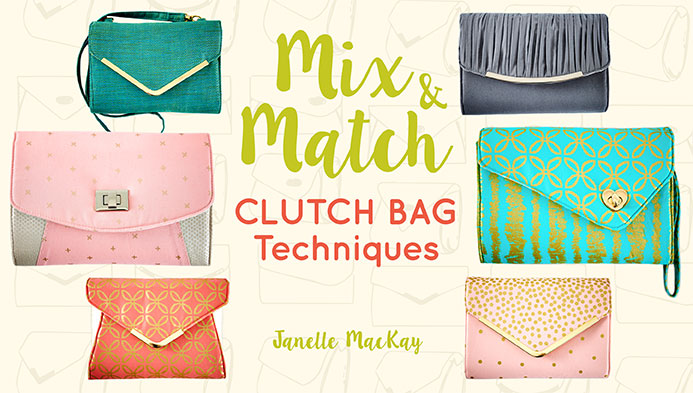
For my part in The Great Canadian Blog Tour, I’m reviewing Janelle MacKay’s class Mix & Match Clutch Bag Techniques.

titleCard

Janelle is a wonderful instructor. She’s very thorough, but without that rushed feeling we can get from having too much information thrown at us. She calmly takes us through each step, all the while giving us so many details of what we need to do, and options to change things up.

Janelle is composed in front of the camera. She definitely knows her material. Her knowledge and warmth come through on the question board too. She’s interacting with participants, telling them she loves the material they’ve chosen, encouraging when someone posts a question and figures out the answer on their own.

The class was a good pace for me. I’m not an overly experienced bag-maker, and I felt very comfortable with the pace of Janelle’s class.

Craftsy rates this class for an Intermediate skill level, and I would agree with that. There are some techniques that aren’t hard, but have a lot of steps that might be a challenge to a beginner sewist. I have read lots of comments on forums where people said how much they learned taking this class, and all the new tips they didn’t know before. There are tips in the class that can be used in any sewing. I loved how Janelle showed us how to deal with thread ends, and how she attached zippers. Both of these, and many more of the tips she shares can be transferred to non-bag-making sewing projects too.

The only difficulty I had with the class was having to draw out some of the pattern pieces. I need all the pattern pieces – even the ones that are simply a rectangle with the measurements given. I have some trouble with numbers. So for me, to have to draw out a rectangle piece… well, it’s a challenge. I have to look at the numbers, check them again, and then again to make sure I have them right in my head. Then a few more times because they can easily get mixed up in my head. It took me three tries to get those simple rectangles. I’m not talking just getting the numbers right, I’m talking drawing out those pieces. (Sigh) Now to be fair, I’ve read many comments on some of those same forums where others have said they hate to see something so simple included in patterns. For me, this is not so simple. I did get it done, and now going forward, I have all my pattern pieces cut out and labeled so I won’t have the same trouble.

Reece, of Happy Okapi, just reviewed the class Sew Sturdy Travel Organizers. One of the comments from Reece was there were no pattern pieces included with that class. Right away, I know it won’t be a class I want to take. Drawing out all the pieces would put me off before I started.

Back to things I love about this class. Here’s my clutch bag:

purse on cutting board

Oh, pretty, pretty. The inside of the bag is as beautiful as the outside. There’s a card slot that holds three cards, and a deeper pocket behind it. There’s a lipstick holder. There’s also a beautifully finished zippered pocket.

inside empty

Here’s the inside with a few basics in it. Sunglasses, keys, a few credit cards, lipstick. The red card is in sideways to show the deeper pocket behind the card slots. I didn’t even need to put anything in the zippered pocket. There’s lots of room in this little clutch! Look how pretty the zippered pocket is too. Janelle takes us through all the steps to make a beautiful, professional-looking finish on everything – inside and out. Here’s a confession: I thought the inside of the bag was so pretty, I took photos to send to a few friends before the bag was done. It looked so nice.

inside purse

pocket

Here’s the clutch on my dress form (Catherine) so you can see the size.

purse on Catherine

It’s a beautiful size and shape. For my first clutch, I chose a fairly basic design. If you look at the Craftsy image for Janelle’s class (above), you can see there are a few different options for the front of the bag, and for the flap. The variety offered is very nice.

One more comment on this clutch bag – I followed the Craftsy course alone to make this. I did use the pattern pieces that came with the instructions, but the class is so very thorough, a bag can be made following along with class instruction alone. It’s a really great class. I definitely recommend Mix & Match: Clutch Bag Techniques by Janelle MacKay, and I can’t wait to make another clutch bag.

Thanks for joining me on this stop of The Great Canadian Craftsy Bag Tour. The next stop is: 20 Essential Techniques for Better Bags with Fiona of Tangled Blossoms Design. If you’ve missed any of the reviews or stops along the tour, here’s the full listing of them:

Tour Dates

Monday, April 4

Seam of my PantsBag-Making Basics: Reversible Tote & Zipper Pouch with Kristin Link and Learn to Sew: Simple Bags with Nicole Vasbinder

Tuesday, April 5

Sprouting JubeJubeSew Sturdy: Home Organizers with Annie Unrein

Lulu & CelesteSewing With Oilcloth: Bags & Baskets with Kathy McGee

Wednesday, April 6

Happy OkapiSew Sturdy Travel Organizers with Annie Unrein

Thursday, April 7

Michelle’s CreationsMix & Match: Clutch Bag Techniques with Janelle MacKay

Friday, April 8

Shelaine’s DesignsSew Better Bags: The Weekend Duffel with Betz White

Tangled Blossom Designs20 Essential Techniques for Better Bags with Lisa Lam

Saturday, April 9

Emmaline Bags — Recap/Roundup

Sunday, April 10

Sur “prizes

Our tour has some amazing sponsors! Craftsy. Emmaline Bags. (Emmaline Bags donated the hardware for my gorgeous clutch) Tangled Blossoms Design. Blue Calla. Sprouting Jube Jube. Lulu & Celeste. Happy Okapi. Seam of my Pants. Thanks to all of our sponsors for generously providing prizes for the tour. You’ll have to wait until Sunday, April 10th to find out more about those. So make sure you come back on Sunday to find out what they are and how you can enter for your chance to win!

Prize Sponsors

Happy creating!

Please note, all contest links have been disabled as the contest is now over.


Announcing The Great Canadian Craftsy Bag Tour

Craftsy bag tour image b

The Great Canadian Craftsy Bag Tour starts today! Just what is the GCCBT? To sum it up, we’re all Canadian bloggers, we all sew, we all love Craftsy, we all reviewed some of the bag-making classes on Craftsy, and we put it all together for you to read over the next week.

The whole time the tour was being put together, I keep remembering an old television ad for Red Rose Tea: “Only in Canada you say? Pity.” Well, the bloggers all may be in Canada, but you can read along from anywhere in the world with no duties, tariffs, or shipping costs.

Head over to Emmaline Bags to start the tour today. And join us every day for the next week on our tour. It’s going to be fun, informative, there are prizes, and discounts too!

Happy creating!