I’ve been playing a little with my go-to patterns. I decided I wanted a tad more coverage, so I lengthened the bridge 1/3-inch. Being a rather pronounced Omega, I’m always taking away from the cups to get them to fit in, so adding a little back to the length where it fits into the cradle actually helps.
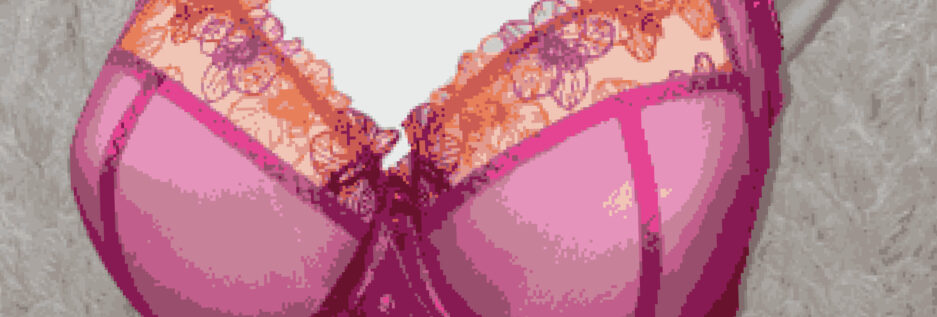
So here’s my latest Freja in a gorgeous peach lace you can find at Bwear.
 I used some beige duoplex and power net I had in my stash to compliment this lace. I think it’s very pretty together.
Here’s the lace on it’s own so you can see just how pretty it is. 
Those hearts…  I wanted a little more lace on the bra, so I added some to the side of the bra’s frame. Just a little added color there, and a pop of prettiness.
You all know me by now. Lace = love.
And the back of the bra.  I’m still pinning the back to get everything to lay nice and flat.
So how is that little added length along the cradle working? Well, it’s not perfect. It’s a little longer than the wire now, but I’m making it work. I’m just sharing that extra 1/3-inch between the top of the bridge and the underarm.
Until next week, Happy Creating!
 It definitely produced a neater look and fit. However, I really need the fullness throughout the bra cup.
 So as pretty as this is for a basic white bra with lace, it was ultimately a failed experiment.
 It’ll be back to basics after this – what I know works.
 They look a lot like a hipster from the front.
 You can see here they are not hipsters from the side.
  Aren’t they cute little cheeky panties?
  That lace!
 So, some of the changes I’ve made… I raised the bridge. Even though my wires don’t come all the way up to the top, this allows me to raise the upper cup up a bit and give me a little more coverage. Coverage that I need.
 This bra kit was so lovely. I think the lace and lingerie satin go together perfectly.
  Doesn’t that go so well? It’s so pretty.
  And lastly, I didn’t like the looseness and bagginess on the display form. So I’ve pinned it here. You can still see the back well enough – but if you think this looks terrible, please let me know.
 I used this cotton voile fabric. Oh! I love the bright colors.
 I made a full-length robe. To me, nothing feels more luxurious than a full-length robe. Even though this is very light-weight, it will still feel wonderful.
 The back has a lovely design to it. It’s not a rectangle pattern. There is style and design to this pattern, and honestly I love it!
 Here is a closer view of the back.
 This is really a lovely robe pattern. I actually think it’s the nicest robe pattern I’ve ever made.
 I know I say this all the time, but I think it’s also safe to say we all have lace addictions in the bra-making world. So… isn’t this pretty? I love the lace and the color.
  I loved the lace so much I had to use some on the power bar as well. Just a little more lace to love.
  And the back band. Just look at that power net. And matching hooks and eyes.
  This kit came with silver rings & sliders, but B,wear has rings & sliders in pistachio as well. I think it’s my new favorite color.
 Isn’t this just the loveliest lace? Although it was a winter kit, I think it’s pretty all year long.
  I’ll be happily sewing again for a bit now. And for me! There might be some more testing coming. But I need some pretty new bras. Or I want some new ones. The new ones always feel nicer to wear.
  One pretty surprise I had when I opened this kit was this lovely strap elastic. I thought this design added such a nice touch.
  You can see that pretty design all along the the back too.
 The one pair were Singer scissors. They were embroidery scissors too.
 I found another smaller pair of embroidery scissors. Not a brand name this time, but the blades are nice and narrow. However, they’re only about 3″ long. The scissors I had were 5″, and again, they just don’t feel the same in my hand.
 The handles didn’t look quite the same on this pair.
  At this point I was so thankful I’d taken a photo. So I kept looking. And I found them.

 I’m thrilled with how it turned out, but the pattern needs some tweaking.
 I’ll be making adjustments to my pattern right away so I can make another Angie’s Twin. Honestly, this bra gives some great lift and shaping.
  My next project I won’t be sharing any time soon. I’m testing a pattern that will be released later this year, but I do hope to be back to my blog before the end of January with some things to share.