Baking and Bracelets

I spent the afternoon baking up a storm. I had gluten-free baking to do as well as diabetic baking. Tarts, pies, muffins and mini muffins. My counter is full of delicious goodies.

After the baking was done, I had some custom jewelry to make.

Here are the two most recent Medical ID bracelets I’ve made. I think they’re  pretty. And they were very fun to make. I made two earlier in the week as well, but they’ve been delivered to the customers already, and I didn’t have my photo tent out to take some pictures before I sent them to their new homes.

The first one here is pink & green Swarovski crystals with Sterling beads and clasps.

100_1562

The second bracelet is a two-tone Swarovski crystal bracelet in purples, with Sterling beads & clasps.

100_1555

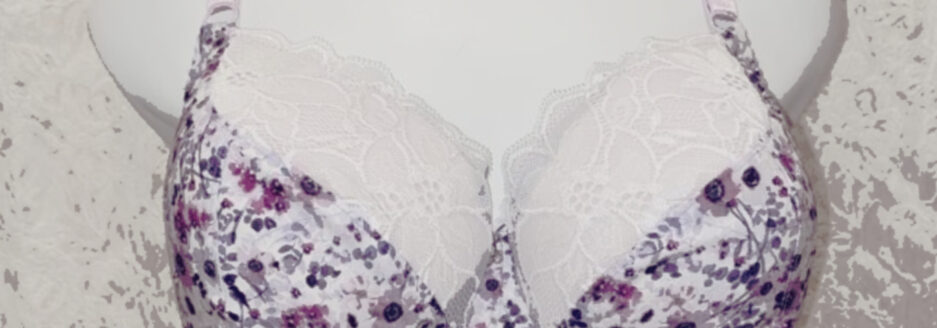
I did do some sewing this week. I ‘tweaked’ my pattern and it was perfect – except I didn’t add a seam allowance!!!! I could hardly believe I did that, but I did. I was so focused on making the pattern and then alterations to the pattern, that I overlooked a very basic part. It’s an easy fix, but I don’t think I’ll be doing any sewing now until after Christmas.

Merry Christmas! and have a very Happy New Year!

An Image is Worth a Thousand Words

If you’re reading along, don’t worry. This isn’t going to be a long post. I’m simply going to post a few pictures of the bras I’ve made with the alterations – smaller at underarm and now, smaller wire.

Beige Full Band F Cup D wire front view

I’m using the Classic Pin-Up Girls pattern here. You can see a bit of the ‘easing’ at the bottom of the cup, but nothing that can be seen under clothing.

Beige Full Band F Cup D wire side view

This shows the ‘ease’ much better. As well, a little elastic detail I added to the side band.

As I said in a previous post, I don’t LOVE this. It works, but I don’t like the look of those little gatherings around the cup.  The alteration I prefer is the small darts at seam lines. However, this means I need more seam lines to make those little darts.

I changed my basic Pin-Up Girls pattern to one shown on the Bra-Makers Supply’s web site: the Shelley bra. They had a DVD that shows how to make the alterations for this pattern.

So, here was my first attempt at the Shelley bra:

Shelly Full Band Front view

I LOVE the lace!

Shelly Full Band side view

Again, just to mention it, my dress form and I are not the same size, so any wrinkles on her are not on me. But something I really like are the lack of little gathers all around the cup. I really prefer this look. I think this will be the pattern I use most often now.

And that last little alteration. Well, it’s next. I should have my perfect bra then.

And one last comment: All of the jewelry shown on the dress form is not designed by Noble Jewelry Designs. It is simply being used to dress up the dress form.

Happy creating!

The Dawn of the Alteration Age

After a few bras, I made a call to Bra-Makers Supply with a question. You see, every bra I wore, whether RTW or one I’d made, all left a line or imprint about an inch or so under the bust line. I was simply wondering what caused this.

Beverly, the owner of Bra-Makers Supply, and author of two manuals on bra-making gave me my answer: the underwires I was using were either too big or too small. She said the best way to check the size of the underwires was by lifting my arm over my head.

I was off to the bedroom to stand in front of the mirror to test this new bit of information. And to my surprise and dismay, my underwires did NOT fit me. They were quite a bit too big. I had been wearing a size 44 wire. It was the same size as had been in the RTW bras I’d bought – I know, I took them apart.

So now I had to find out what size of wire I needed. I ordered a few wires to see what would fit. It turns out there are 4 sizes difference between what fits me and what I was wearing! But the cups were fitting correctly, so what did this mean?

wire difference

This image shows the difference in the wire sizes between what I had been using and what I am using now.

Well, I went back to my very-well-used manuals: The Bra-Makers Manual Vol 1 & 2. Both manuals explain about one particular fitting problem described as an Omega shape. This shape is smaller at the base (hence why a smaller wire is needed). The manual also gives some information on fitting for this. I had to alter things again – but this time it wasn’t the pattern.

I really can’t recommend these manuals enough. After my first attempt at bra-making, I had a fitting issue. I went to the manuals and saw what I needed to change AND how to do just that.

My first alterations were to shorten the underarm area both in the upper and lower cup. That gave me a very good fit.

Upper Cup Alteration

This photo shows how I shortened the underarm area. My cup pattern is on top, the original pattern is on the bottom. I did this both to the upper and lower cups at the under arm.

Now I was going to attempt changing the wire size. This now meant I had to put a larger cup into a smaller wire frame. For this, I’m having to build some ‘ease’ into the cup. To do this, I either run some gathering stitches around the lower outside edge of the cup or put small darts at seam lines – which I like better.

This has given me the best fit yet. But I still have one little area I want to correct. Now that the fit is almost perfect for me, I’m noticing I need to bring in the apex a little bit.

I think that will be the next project.

Happy creating!

There Must Be More Than Foam

That was what I was beginning to think. Everywhere I went, if I saw bras, I was over there looking, getting ideas, at times my camera came out to record that idea that was just ‘so cute’. Most of the time it seemed to involve lace. That was something completely new to me.

But to go back a bit, and just to clarify. I did cut up my favorite bra, and I did use it to make a pattern. BUT I still had no idea what to do with those pieces. For that I did buy a pattern and used that to follow along and make up my cloned bra.

Bra-Makers Supply has become a favorite on-line shop of mine. And that’s where I purchased a foam cup pattern. They actually have a few different ones, but I started with a basic one.

PB-1014%20Amanda

The Amanda Foam Cup bra pattern. It was great and it got me from those cut up pieces to an actual bra, well three actual bras.

But, I was really wanting to start working with lace, and most of what I was looking at wasn’t foam. It was time to look at another pattern and jump into what seemed like a whole new adventure.

Enter the ‘Linda’ Partial Band pattern. Again, from Bra-Makers Supply.

linda

So, my next few attempts would be with ‘Linda’.

I used the same size I’d been wearing from a specialty store, and all seemed great! Here’s one example of Linda in black.

Linda Partial Band Front view

The model and I are not the same size. I did put foam cups into the bra cups to fill them out (never thought I’d have to stuff one of my bras!), but there are still wrinkles on the bra on her. (She’s got a great waist though!)

Linda Partial Band side view

Here’s a bit of the side view. I really like the ‘Linda’ pattern. It’s really a great basic pattern, and from that there are so many places I can go.

I have a few more posts that will be what I’ve done already, but after that I plan to have my camera near by to take pictures of what I’m doing. I know there are others who are doing this already, but I’ve learned from each one, and think I have something to share as well.

Still to come, a classic Full-band bra, the Sewy Rebecca bra, and the Shelley bra.

Happy creating!