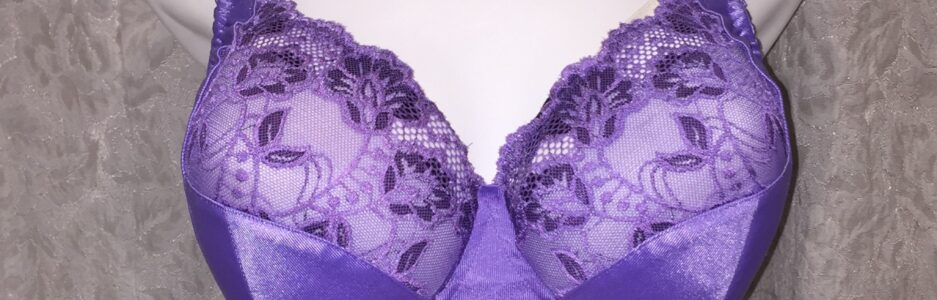
Yes, as my title says, I’m still not sewing. I’m slowly getting better. I can do a little more with my hand, but I’m still not quite fine. Boy, this little break is taking much longer than I thought.
But I had a question from Becky about my poplin bra that I made last year. I said the seams were all enclosed. That’s not exactly true. A better way to phrase that would be to say all the seams are secured with additional sewing.
Let me go over how each seam is secured, and also give an option for securing seams between layers of fabric – actual enclosing.
For the neckline, I usually use lace for my upper cup. However behind my lace I use narrow elastic to help the lace curve to my shape.  You can see the elastic here in this photo. It’s a narrow elastic just below the lowest parts of the scallops.
The cup seams are all secure as well, which you can also see in this photo. Most patterns will call for a straight stitch to secure the seams of the cup – top stitching. However, I like to add my own take on things and I use a three-step zigzag stitch. It reminds me of elegant slips I remember from growing up. They seemed so pretty and I remember that stitch on them.
Once the cups are sewn into the frame or cradle, that seam has the channeling added to it. Then after the elastic is added to the band, the channeling is folded down and sewn into place. This secures that cup in the cradle, and that edge isn’t going to go anywhere. Those edges aren’t going to fray at all.  You can see here, or actually you can’t see here any of the edges from the cup once it’s all sewn. In a way it is enclosed because it’s between the frame and the channeling. But I don’t think most of us are thinking of enclosed that way.
The above photo also shows you how at the underarm the cup and elastic have been turned over to the inside of the bra and secured here. None of that lace & sheer cup lining are going to move anywhere, or fray.  This photo shows the underarm from the outside of the bar. You can see there is no raw edge there.
Now for actual enclosed cups, you have to sew things together a bit differently, and I did just that with this bra. I really, actually, enclosed my seams.
To do this you have to make what I was told was a sandwich: Place the two cup pieces right sides together, and then place both sheer cup lining pieces under one of those pieces so everything is lined up. It will look a little funny, but it will work out.
Sew your seams as usual, then trim the lace.
Now comes the enclosing part: Open the cup pieces up, but fold one piece of sheer cup lining over the seam so there is sheer cup lining behind both cup pieces and the seams are now ‘sandwiched’ between the sheer cup lining.
Your seam will end up completely enclosed. At this point both seam allowances of the sheer cup lining will be going to one side and you can secure them with top stitching, or a three-step zigzag. 🙂
Repeat these steps for each bra cup seam, and they will all end up enclosed.
There is one other way to cover those seams, which I haven’t tried. Actually covering them with seam tape. There’s a great resource on Cloth Habit’s blog.
I hope this helps and cleared up what I had said earlier.
Happy creating!
 I adore these colors. This gorgeous kit came in turquoise findings and fabrics, and also this lovely golden colored fabric and findings.
  I’m a big turquoise fan, but I’m really loving this golden color too.
  So, was it worth it to sew? I’ll be honest, it hurt. But a little more medication rubbed into my wrist and I was feeling fine again the next morning. I think I’m coming back to sewing!