I have been using my Oh Canada Miss Maggie handbag since I made it last year. Here it is when it was new. It’s had a lot of use, and it’s still looking good! Below is how it looks after daily use for a year.
  The only real wear I’m seeing on it is on the handle where I used maple leaf fabric. It’s looking less bright now. The photo on the left is when the bag was new. A year later on the right.
 It doesn’t even look that bad.
I love the shape of the Miss Maggie handbag. So after debating other patterns I have, I’ve chosen to make this pattern again.
Materials
I’ve wanted to try working with leather. I love the durability of leather, but I do have to say, my cotton handbag has endured very well. It’s also the lightest handbag I can remember using. I was surprised when I started using it just how light it was. I may miss that using leather this time.
However, as I said, I wanted to try working with leather. I had purchased some last year, so decided to pull it out and cut into it. I got this at Peggy Sue Also, on Etsy. It’s lovely. So far, working with leather is really nice. It’s so soft and pliable. We’ll see if I still think working with it is nice once I’m sewing multiple layers of it.
I didn’t have any fabric with the exact same fuchsia color in my stash for the lining, so I decided to use a fun fabric I had. I think this lining fabric will be adorable. I found this on Etsy as well.
A Leather Miss Maggie
I had my Miss Maggie all cut out, and then the corset challenge for May happened. But it waited patiently for me. This turned out quite nicely. The only real problem I had was doing the top stitching at the end. My machine kept skipping stitches, and I had to keep going back over it to fix it.My machine was fine with two layers, and even three, but it decided four layers of leather was just too much.
Inside the bag I’ve added a zipper pocket. And a slip pocket.
 Aren’t all those bras adorable?
I also added a tassel and used Long John Strap anchors. After taking these photos, I did go over t hose skipped stitches again. It’s not the best, but it all works. I’ll find a better solution for the next leather bag I make. As well as the tassel, I used swivel hooks to attach my straps to the anchors. Adding just that little bit extra length to the straps makes this a shoulder bag for me.
I also added a lovely Handmade logo to the front of my bag.All the hardware for this bag is from Emmaline Bags. I love this bag, and my first attempt to make a leather bag turned out great! I will definitely be making another one – but I’ll tune up my Singer Featherweight to do the top stitching on that next one.
Happy creating!
 I started off thinking I’d make shapewear. I was interested in making the Slimming Shorts that are covered in the class. But as I was watching the class, I decided it was too close to the pants I’d just made for the April Challenge. I didn’t want to make another pair of pants right away.

 I’ll be the only one who will ever see if, but it is adorable. I had pulled this material out recently to use to line a handbag. I’ll share more on that a little later.

 The back shows how lose it is in I’ve had to pull these laces completely closed – and it’s still loose on me. There is supposed to be a two-inch gap at the back. I don’t have a gap at all.

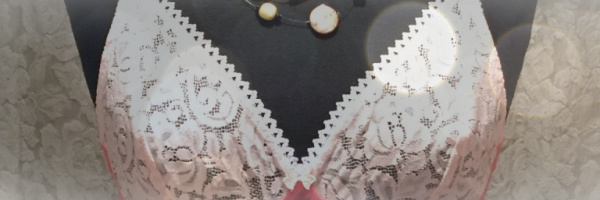
 You might have noticed, I haven’t added any bows. It’s not because it’s not bow-worthy this time. I’m not sure I want bows. I made some. I pinned them on to see what I thought, but I wasn’t over the top in love with the bows on it. I may look for a little golden leaf charm. I think that would look great on this bra and mirror the gold leaves in the lace.

 It’s out by a smidge, but that’s pretty darn good.

 I was encouraged by these and how well they fit. I will finish these up with a proper waistband, and hem the legs. They’ll make great slim pants for under my Agnes dresses for the summer.
 Here’s the side:
 How about them tomatoes? I won’t be making pants again any time soon, so it’s time to dismantle my ‘legs’.
 To make the legs, I had the cans on top of a stool to add some height. I had the stool sitting on my Lazy Susan. This made it so once I had my mannequin balanced, I could gently turn her for photos. Whew. It all worked, but I’m also glad that’s done.
 No, this definitely is not great.
 Next, I spotted a box of canning jars. Hmm. Just maybe if I taped them all together.
 This idea wasn’t completely bad. They had more stability than the paper rolls. They didn’t have the weight to support the mannequin though.
 The cans work!
 This made me realize why she couldn’t balance on anything.
 This is much better. A little more playing with the display set up for photos, and hemming of course, and these will be all ready for me to submit for my challenge.
 For most of what I sew, using this display standing, as it is shown above, will be just fine.
 These were the Barb pants I made a few years ago – pinned to Catherine. I guess it would work somewhat, but I’m not thrilled with this option.
 You can see, they’re basic black cotton Lycra, with a yoga waistband.
 Here’s my drafted cradle and the tester frame. This was pretty good.
 This one is good too. And it will be much easier to use with the added material in the cradle.
 That’s quite a difference the wire makes.
 Everything is exactly where it is supposed to be. The bridge is right up where it needs to be, not pushed down, not coming away from the chest wall. The wires are just right too.
 How is it fitting? In all honesty, this probably would have been fine if I’d made it into a bra. It fit better than any RTW bra I’ve had. But I figured why not go for the brass ring. Seeing as this was still only a tester, I still made a couple of changes to my pattern.
 Another adjustment was deciding if I wanted to lower the upper cups to meet the bridge, or raise the bridge a bit. I pulled out the custom bridge I’d drafted a few years ago, and decided to incorporate that into the frame. That means the cups won’t need to be lowered any more than they are now. The bridge will come up 1/4-inch to meet them. I’ll have to overlap my wires, but I’ve done that before.
 Once again, I’m going for that perfectly matched cradle and cup at the side seam, and once the upper band elastic is added to the underarm of the cup, I’m going to have it!
  Yes, I’m happy with how this is all coming together.
 Oh, a pattern drafted for me? Yes! I was interested. I signed up right away.
 Although this first bra didn’t fit perfectly, I was so happy with it. Let me show you why.
 Do you see how the cup meets the cradle and they’re both the same length? I haven’t had that happen in a bra since my second or third bra when I found out I had an Omega shape. I am so excited about that.
 Overall, even though I could already sew a bra, I’m so glad I took the beginner class.
 On this bra, we’ve lowered the bridge, adjusted the cups for the lowered bridge, and adjusted for my Omega shape. I also added a Gothic arch, but that wasn’t part of the class. However, as a class, we thinned the band.
 Another lovely feature that shows in the side view is the power bar. It’s an S-shape. That was a first for me. It’s so pretty.
 Again, on this bra I’ve used sliders only rather than rings and sliders. It does give a neater line on the back, but I have a lot of rings and sliders in my stash, so I will be using those still.