TNT Wins Again and So Sew Easy

I was really thinking I’d try another pattern for some panties, but when push came to shove, I just didn’t love all aspects of Butterick 6031.

butterick-6031

What I like about them is they sit at the hip. I prefer a Hipster over a Brief. What I don’t love about them is they also look rather like Boy Shorts. As cute as they are, I decided I’d go back to my TNT favorite panty – Kwik Sew 2286.

tnt

I played with my pattern using the same technique I’d mentioned a few weeks ago – redrawing the front and making a new pattern. Here are my panties to go with my camisole. I used the same leopard mesh as in the camisole (thank you again, Ginny), and the same lace (Frog Feathers), but this time I’ve matched them both up with some Cotton Spandex from Bra-Makers Supply.

To bring even more continuity to the two, I used the lace in-between the mesh and cotton pieces on the front, and cut away the material behind it to give it the same peeking-through lace look. I think it pulls them together very nicely.

Cami-panty-set

For a second pair of panties I used the mesh again, but decided to venture out and try a new pattern. It was with a little hesitation though. I should have listened to that little voice. I made the Sophia panties from Ohhh Lulu.

Here’s the photo from their Etsy store:

il_570xN.686001453_rp58

Aren’t they cute? That’s not what mine look like, she says in a flat voice.

sophia-set

So what is wrong with mine? Well, they’re just too big. And I’ve already taken them in a 1/2″ on each side side, and in taking them in I lost most of the ruching on the sides. On their web site, when they released the pattern, they said to test it first before cutting into your good material. Yes, that’s good advice. Back to them being too big… You can see when I put my TNT pair over top of the Sophia panties. They’re not too bad at the waist, but the leg opening. Well, that won’t work for me.

sophia-and-tnt

Looking at them, I really didn’t think taking them in more would help how much too big they would be at the leg opening. Normally, the Sophia panty is finished by turning those side panels inside out and sewing them with a straight stitch. I decided not to do that, but to add some elastic there and see if that helped.

leg-fix

It did help a bit, but they’re still to big. I’m really not one to give up. I knew. A bow. A bow makes everything better.

bow

They look a lot prettier now. One thing I didn’t do that I often do when buying patterns is look for the ones lots of people have made and loved. I didn’t do that with this pattern. It was just too darn cute. Sigh. I’ve seen oodles of Grace panties, so maybe those were the ones to try.

Next week I will be adding one more piece I want to make to complete my Camisole set.

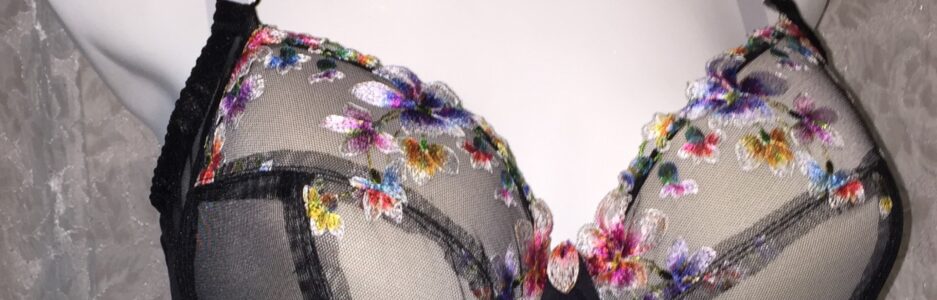
Normally, at this point in my blog I’d be saying, ‘And now onto the Bra-A-Week Challenge. This week we’re on week 30!’

Well, we are on week 30, but I think with all the amazing sewing last week, everyone went camping this week. Let’s hope we have lots of submissions again next week!

To end this week, I have some good news – I was asked to write about bra and lingerie making on So Sew Easy. My first post was published this week to coincide with National Underwear Day . You can read it here. As well, I’d love to hear your thoughts on it, and what you’d like to read about in the future.

Happy creating!

Butterick 6031 and The Bra-A-Week Challenge

Have you seen any of the Patterns by Gertie? She has some lovely patterns, and her Butterick 6031 is one of my favorites in my lingerie pattern stash… and it was time to pull it out.

butterick-6031-w

It is so pretty! I love that slip – black and white – such a classic!

Another admission I must make is I love watching The Shopping Channel. There are many Today’s Showstopper items in my house. This camisole was something I found on their website and was an inspiration for me. This, as well as some gorgeous material a friend sent me. The photo is the Rhonda Shear Leopard Lace Cami.

comparison-w

I saw this and loved it, but I wanted something a little looser. I have a favorite camisole, and it’s not a snug fit, so I wanted one more like the one I have. That leopard lace? Love! Yes, it was time to pull out the leopard mesh I have in my stash and make something with it. Adding lace just makes it perfect.

Here’s my B6031 camisole.

Cami

Love, love, love. However, I did have a bump along the way. I’m still trying to figure out what happened. Somehow, after cutting the mesh material for the cups, I ended up with two right cups. Excuse me? I’m completely baffled by this. I really have no idea how I cut out two the same, but I did.

right-cups

That was upsetting. I didn’t want to waste any of the material. I will be able to use the material to make a Shelley though, so I’ll save it for future right and left cup pieces. I wasn’t alone this week though, I was reading on another blog how the blogger cut out two left sides of her top.

To make the camisole I also had to do a Full Bust Adjustment. I’ve done one before when I made my moulage from Suzy Furer‘s class on Craftsy: Patternmaking Basics: The Bodice Sloper.

However, this time I used the information on the sew-along from Gertie herself to adjust my pattern following her instructions. I’m glad I did. The instructions I have would have had me add 3/4″ more than I added. The 1″ Gertie suggested was perfect.

I decided I’d follow along on the sew-along, and the funny thing about following along is once I got started sewing, I forgot about following. I was 3/4s done and remembered. I went back and read through it just to see what it said. The sew-along is for a slip, but all but the hem treatment is exactly the same as for the camisole. I’m thinking of trying the panties from this pattern too. They look really cute and are similar to my favorite TNT Kwik Sew 2286.

I also had some fun making my own bows again. I often like to find some way to do something different or unique. I did that with my bows. The first bow shown here has some mesh with the ribbon, and they’re both tied into the bow, the second bow is ribbon tied with the mess, and the mesh tails hanging down. Both were so fun to make.

Front-bow

Strap-Bow

The materials I used came from BMS (power net), Frog Feathers (lace), and a dear friend, who just happens to be in our Challenge this week, (leopard mesh). Thank you, Ginny! I love how beautiful my camisole is, and will treasure it even more because the material was a gift.

Now onto the Bra-A-Week Challenge. This week we’re on week 29 and we have a great week!

Our first submission comes from Karin of Mrs. Weaver’s Finest Unmentionables.

untitled

This is the Marrakech bikini. It’s based on the Rebecca bikini from the 3 Sisters pattern, a Pin-Up Girls pattern. Karin altered it to make the cups a little more flattering. The back detail is gorgeous and the fabric amazing!

untitled (2)

That is gorgeous! You can read more about this beautiful bikini on Mrs. Weaver’s blog.

Our next submission comes from Amber. Amber made this beautiful bra for her friend, Helena. She started a while ago, but got interrupted in her sewing by having a son. Congratulations on your son, Amber!

untitled-(3)

Amber started out planning to make a basic bra, but then saw this lace and wanted to try a couple of different techniques.

untitled-(5)

Look at that starburst. So very pretty! This is the Pin-Up Girls Amanda foam cup pattern. The pattern, fabric and notions – except for the lace are from Bra Makers Supply or BWear. It’s beautiful, Amber!

Next we have a beautiful bra from Maddy.

Maddy made her third Marlborough with matching Ohhh Lulu tap pants, in coral lace.

img_1670

img_1674

Maddy says, ‘I love this set so much! The fit is lovely and comfortable, and I’m so in love with the lace (and its remnant price tag!)’

I agree with Maddy on that – it’s lovely! And beautiful remnant always feels better than full price. It’s gorgeous! You can read more about Maddy’s Marlborough on her blog, Miss Maddy Sews.

Next we have a beautiful bra by Sofia.

Sofia made a very lacy bra. Is there anything more delicate looking than an all lace bra? She also made a few alterations to her pattern. You can read about that on her blog, Silver Lining.

Lacy-bra

Beautiful. That bow really looks awesome, Sofia! Sofia made her own bow for this bra. It really pops with that deep color.

Our next submission comes from Ginny. Ginny made the Boylston Bra, the newest pattern from Orange Lingerie, and she made it for her niece.

bcu

Oh, that is pretty. Ginny describes the Boylston as ‘a sleek balconette style with self fabric straps’.

Ginny also made some matching panties for her niece. Here is Ginny’s first set featuring Make Bra’s DL21 panties.

bs2

That is lovely. Ginny, your niece will love it! Here’s Ginny’s second set now featuring Ohhh Lulu’s ‘super comfy’ Grace panty.

bs3

I love that floral lace on the sides! You can read Ginny’s guest post on Sewcialists‘ blog.

Our final submission for the week is from David.

David front

David made this bra with pink cups with black lace. The upper part of bra cups are made with black embroidery on tulle.

David side

This bra has a double strapy back and a neck strap.

David back

David is a free-lance lingerie designer. This is really beautiful.

Happy creating!

Pretty in Pinks Panties and The Bra-A-Week Challenge

A pretty new bra deserves some matching panties. I went back to my TNT panty pattern, Kwik Sew 2286, and made a few modifications to the original pattern to make my panties.

horizontal lace on panties

Making these panties with the horizontal lace is really easy. Here’s what I do.

1. Re-draw the front pattern piece because you’re going to cut it up.

2. Lay your lace over the new front pattern piece. My pink lace was packed away, so I used the lace I had out for this photo. Your laces may be different heights, 5″ or 6″ or less even.

lace front

3. Because they can be different heights, do this step for each lace you use. Draw a line where the lace ends. Cut your lace the width of the front pattern.

4. Re-draw the lower front piece now – adding 1/4″ seam allowance.

new front pattern

Here it is. This is now your new front pattern.

I fold the lace to find the center front, and fold the bottom front material as well. Mark them both with a pin and match them up overlapping by that 1/4″. You can see at the top of my pattern in the photo above, I use a Zigzag stitch to attach them together. It’s not hard at all to hack your favorite panties and made new styles and still get your favorite fit.

I put these new pattern pieces in a new envelope just for themselves, so I can pull them out and re-use them when I want to make that style again, being careful to make sure the lace is the same height.

One last bit from me before we move onto the Bra-A-Week Challenge. Remember my bridge from last week, and how I felt it needed some bling?

Bling on Bridge

I added a few crystals with my Hotfix tool. They may not cover up that little pucker, but they do make the bridge look much prettier. I didn’t stop there though.

bow on strap

I added a crystal to each strap. Can there ever be too much bling or lace?

Now onto the challenge. We’re on week 28 of the Bra-A-Week Challenge.

Our first submission comes from Andie.

Andie made a beautiful bra she’s called her Sailor Mercury bra.

dsc_1275-e1437657666589

Isn’t that lovely? It’s made from teal duoplex, white findings kit, white power net, and white power mesh lining the lace from Bra-Maker’s Supply. The white lace is re-purposed from a nightgown Andie had used for a cosplay project last year.

I love re-purposing things. It’s so creative and it’s also so very pretty.

Andie also embroidered Sailor Mercury’s symbol on the right back strap to really make it her Sailor Mercury bra.

dsc_1280 (1)

I love that! I hadn’t thought of using embroidery stitches on my bra to make it even more unique. What a great idea, Andie!

You can read more about Andie Sailor Mercury bra on her blog: Sew Pretty In Pink.

Our next submission comes from Erin.

IMG_2716

This is a full band bra, full coverage with extra long wires. It has horizontal seaming, with a split lower cup. Erin made it using a lightweight stable knit,  power net for the back band and 15 denier to line the bridge for stability.
Erin, that looks like such a fabulous fit and it looks so soft and comfortable.
IMG_2713
 I love the bow. You can read more about Erin’s bra on her blog: The Sewing and Life Adventures of Emerald Erin.
Our next submission is from David. Here David made a foam cup bra.
Zdjęcie0488
 Wow. That is really beautiful. It definitely has the Va-Va-Voom factor.
Zdjęcie0486
It’s so beautiful. David is a freelance lingerie designer.
Zdjęcie0490
 What wonderful submissions this week! If you haven’t looked at the Pinterest board for the Bra-A-Week Challenge, you can see many of the past weeks’ submissions all at once and get lots of inspiration.

Happy creating!

Pretty In Pinks and The Bra-A-Week Challenge

This week, I’ve made another lovely Shelley bra – in pink.

Front

For this bra, I used my custom Shelley pattern, but I did make a couple of little changes.

I added some lace to the power bars, which is really only a change to the look.

power BAr

A few changes I made to the pattern itself is I made a Gothic Arch on the bridge. I didn’t get it perfect, but close. I also now know what to do for the next one. I think I missed a couple of stitches on the first pass of the elastic on the one side. When I turned it, because I missed those stitches, I got a tiny pucker. That bridge is looking so unadorned… I need to get my Hotfix crystals out and put some bling on it!

Gothic Arch

Oh, I have to show you how lovely and neat the inside is when sewing a Gothic Arch.

Inside

Do you see how the ends of the elastic are tucked nice and neatly under the channeling? Ooooh, I love that! I’m all for the inside of my bras or garments looking as nice as the outside. I lined the cups using the Sewy Rebecca method, so all my inside seams look as nice and neat as that Gothic Arch.

One other change I made was in how I put on the straps. I usually use some of the band elastic to attach the strap – making a loop at the top of the band where I put the slider.

gap

However, a few weeks ago, I showed you how that really hadn’t worked well on my beige Shelley. When I was looking at the elastics for this bra, they didn’t seem as firm as some others I’ve used, so I decided to use the strap elastic on the band. I don’t like it as much. It always seems to pucker where it meets the band when the bra is on me. It’s even puckering a little bit here on Catherine (my dress form).

One last comment on my own make. I tried the little tutorial I’d posted on making your own bows with a fork. Hmm. Well, I tried a number of times, and it did not work. I used the cardboard method again, and made little bows for my straps. I’m going to take that link out. I don’t want to recommend something that doesn’t work.

pink bow

It’s so fun to make my own bows,  I wanted to find a way to do the bows with all ribbon that actually worked and I found one. I even made a couple before I shared the site with you. You can find the tutorial here.

Now onto the Bra-A-Week Challenge! We’re on week 27!

Our first submission is from Sofia.

Sofia made a Partial-Band bra this week.

Dotted-bra

That is so pretty! Sofa made this bra from her full-band pattern and modified it. She also added an inside pocket for cookies. Sofia said this was the slipperiest Lycra she’d ever sewn. I understand about slippery Lycra. You did a beautiful job!

As well as modifying her bra pattern, Sofia made knickers from a pattern she drafted herself. They’re a high-waisted brief with princess seams.

Dotted-Bra-Knickers-set

What a beautiful set! You can read more about Sofia’s set and her alterations on her blog: Silver Lining.

Our next submission comes from David.

David made a stunning ‘open’ bra.

Zdjęcie0008

David explained with a triangle breast shape the pink lace will still cover – over the apex of the breast.

Zdjęcie0009

Zdjęcie0011

           Here we can see from the side.

Zdjęcie0010

And the back of the bra.

David is a freelance lingerie designer, his label is Bonnet Bleu.

Happy creating!

Matching Panties for A Modern Floral Shelley and The Bra-A-Week Challenge

This week I have a couple of pair of panties I made to co-ordinate with my Modern Floral Shelley.

I love cotton, and this Indigo cotton spandex is from Bra-Makers Supply. The lace is from the Merckwaerdigh kit I used for the bra, and the elastics are from Frog Feathers on Etsy.

2 panties

On the first pair I made I used a bit of the lace I used from the bra and then some Ivory lace elastics – Ivory also being a color also in the Lycra. I’d wondered if maybe there was too much lace, but then decided there can never be too much lace. I love them. They’re so comfortable.

Too much lace

The second pair, which is my favorite style to make, uses the same lace from the kit for the whole front panel. On this pair I used Navy lace elastics.

Fav style of panties

Both pairs of panties are from my TNT panty pattern – Kwik Sew 2286, which I have fun with by changing the lines or style, but using the pattern as a base or starting point.

I also picked up a couple of pair of panties in some coordinating colors, not so much because I wanted or needed the panties, but to clone them for patterns. I really like the top pair – how the back part of the panty wraps right around the front in a little V across the hip, and the lace elastic in the design. Very pretty. The bottom pair is simply a high cut style, but still fun.

RTW

Now our Bra-A-Week Challenge. We’re on week 26 of the Challenge! It is so very inspiring to see everyone’s submissions.

This week we have a beautiful bikini from Diana.

WK26Diana

That is so lovely. Diana wrote about this on her blog poetsie.blogspot.nl. If you don’t read Dutch, it helps to open it in Google Translate. You can read it that way in your own language. Check it out here for English.

This is so colorful and fun. It’s really lovely, Diana.

Our next submission comes from Maddy.

img_1570

Maddy made the Marlborough bra. This is her second time making the Marlborough; she made a few modification to the pattern and got an almost perfect fit. That perfect fit (or almost perfect) feels so good!

Maddy also mad a matching pair of Ohhh Lulu Grace panties.

img_1581-e1435650089567

This was Maddy’s first time making the Grace panties, and she really loves the style and fit! That is so good to know because the Grace panties are on my to-buy list. Thanks for recommending them, Maddy!

You can read all about Maddy’s Marlborough and Grace panties, with more pictures and details about the alterations on her blog:  https://missmaddysews.wordpress.com/2015/07/09/something-wicked-this-way-comes/
Our next submission comes from Monserratt. Monserratt is a Pin-Up Girl like me, and made her bra from the Classic pattern.

stardust front

I love these colors! So gorgeous! You really need to see take a look at Monserratt’s blog: https://monserrattlopez.wordpress.com/2015/07/11/we-are-stardust-bra/ – she has a lot of information on there as to what she’s done in the way of alterations, but also a lot of photos. You can see her lovely makes, and her great photos!
stardust back
Love that blue and gold! So very pretty.
Our next submission comes from David.
Zdj cie0475
 David’s bra features black lace across the front overlaid with the straps. This is something like a short corset, bandeau, sport bra and strappy.
Zdj cie0477
 But there are two different laces used here. You can see the second lace on the back.
Zdj cie0480
 Isn’t that stunning? Just gorgeous. David is a freelance lingerie designer, his label is: Bonnet Bleu
Our last submission is from Erin!
Erin made this is a bikini for her sister’s birthday.
IMG_2400
 Erin’s sister picked out this fabric and wanted a cute itsy-bitsy bikini, but with a little more structure (underwires & foam). It’s a vertical seam cup, low cut with short wires. (Erin thinks she’s the equivalent of a 34C although she drafted this pattern off her measurements).
IMG_2389
 The details are a cute tie in the front and on the sides of the bottoms and nice double stitching on the outer fabric for the cups, gold rings and G-hooks. Erin said it was lots of fun to make – and hopes it fits her sister perfectly!!
What a nice birthday gift! You can read more on Erin’s blog: http://emeralderin.blogspot.ca.
I’m loving summer hosting the challenge – it is so exciting and fun to see all the makes coming in!
Happy creating!

A Modern Floral Shelley and The Bra-A-Week Challenge

My most recent Shelley is a bit of an experiment for me. My experiment was in the materials I used. I usually use Duoplex for my bra cups. On this bra, I used the Lycra that came in the Merckwaerdigh kit and then lined it with Sheer Cup Lining. Seeing as there’s no stretch in the lining, I thought it would work.

il_570xN.672896523_cb2l

Isn’t that pretty? I loved it the moment I saw it. And I’ve learned, when I see something in Margreet’s Etsy store that I love, I buy it right away. I’ve found if I wait, it’s gone. My challenge with using kits from Merckwaerdigh is I need the support of Duoplex or something non-stretch. If I use Duoplex underneath the Lycra, it’s getting to be the cost of two bras. I wanted to try something different.

I had a little more trouble sewing Lycra than I do Duoplex. I’m not used to sewing stretch when sewing my cups. Here you can see where I made a little mistake in my sewing.

Mod Blue Shelley

Look at that wrinkle. I decided it was a small cosmetic error, I’m going to give it a cosmetic treatment – cover it up.

I love this material, but there was one big downside to it – all the shades of blue in it. I planned on using a Navy findings kit from Bra-Makers Supply, as well as Navy Power Net from them. So, I needed Navy thread. Fine. I got Navy thread. When I sewed the elastic on the back of the lace though, the Navy looked terrible. So, off to the store to match some thread to the lace. The thread that matches the lace, doesn’t look great on the Lycra. Sigh. I wasn’t going to buy a third spool of thread for the bra, so the Navy thread is now a design element on this bra.

front

Here’s the bra from the front. I love those three little bows at the front. And those little bows … they’re all me-made. The Merckwaerdigh kits don’t come with bows. The only bows I had really didn’t go with the colors of the bra, so I looked at my ribbon stash. This golden ribbon was the only one that went well. It’s really fun to make ribbons, and easy. I shared how in this post. I used the cardboard method, but the fork method looks like it produces a lovely bow as well.

three bows

Here are the bows all finished and sewn on with a blue bead in the center. It hides that little wrinkle pretty well.

back

Here’s the back of the bra. I did over-calculate how much I had to add to the band using the new, stronger elastics from Bra-Makers Supply. You can read about those elastics here. I had to cut a bit off both sides to make it perfect for me, and next I’ll adjust my band pattern.

So, how did my experiment go? The bra fits a touch looser than when I make it from Duoplex. The only place I noticed any wrinkles at all were under the arm where I already have to make an adjustment. Now, if I could only sew Lycra more neatly and without wrinkles!

Now onto the Bra-a Week Challenge submissions!

This is week 25 of the Bra-A-Week Challenge, and this week we have some very beautiful submissions along with my own.

The first bra is from Sofia. It is such a delicate work of art inspired by a one of her favorite lingerie brands.

Little-Black-Bra

Here’s Sofia’s Little Black Bra. Isn’t that gorgeous? Sofia used Eyelash lace backed with nude Power Net to achieve the look on the front of the bra.  As well, she took careful attention to match the lace on the cups. All that extra attention does show. She finished her bra with black Power Net for the band and a 3 Hook and Eye set. Stunning!

You can read more about Sofia’s inspiration and Black Lace Bra on her blog Silver Lining. So very lovely!

Our second bra this week is from France and it’s actually a set of bras, not just one.

IMG_2287

I can’t even imagine how wonderful it would be to have someone make custom-fitting bras for me. France is making them for her Mom. What a wonderful thing!

Look at all these beautiful bras! This is what you can do once you have that perfect pattern.

IMG_2288

This photo shows the back of the bra. Look at how perfectly the whole bra fits! And it looks really comfortable too with that full back. That’s just so great!

Our next submission is from David of Bonnet Bleu. It’s another lovely delicate looking bra. David made this bra using Black tulle and white lace for his triangle lace cup bra with nude bra cup foams.

Zdj cie0469

The black is more visible here from the side. The wings are black. So very lovely and delicate looking.

Zdj cie0472

David is a freelance lingerie designer, label: Bonnet Bleu.

Happy creating!

A Quick Repair and Another Skirt

Recently I was wearing one of my Shelley bras, and something just didn’t feel right about the back. I felt around and I was all done up, so really didn’t know what was going on there. So I had to wait until I got home and could look in a mirror to see what was going on.

What Happened Here

This is what I saw! Well, that’s just isn’t working, is it? I knew I would want to repair this bra right away, as it’s one of my favorites. It didn’t take me long to realize the elastic I used at the back just wasn’t strong enough to hold … well, it wasn’t strong enough hold anything.

I had this elastic in my stash, and hadn’t used it at all because it was so flimsy.

bad elastic

You can see here, I had a fair amount of it too. I hadn’t used it on any bras because it just stretched out; it didn’t recover. I decided this is not anything I wanted in my stash, and it wasn’t good enough to send to a friend. It has left my home and is where it belongs now.

repaired

There are times when a repair or fix needs to happen, and after carefully sewing things on so they won’t come off, I just don’t want to rip things apart. I felt that way after double stitching my  hooks and eyes on, and zigzagging the edges as well. So, what other options are there for a repair?

For my repair on this, I ripped the old elastic out up to the hooks and eyes. Then I trimmed it really close to them. I butted the new stronger elastic up to where I’d trimmed the old away and zigzagged that first. This allowed me to not need to remove the hooks and eyes, which weren’t the problem anyway.

Then I attached the rest of the new elastic to the band. I’ve worn this a couple of times now and no problems at all. Bad old elastic!

This week I finished another skirt. I live in skirts in the summer. In fact, I have my next skirt all cut out waiting to be sewn. Skirts are my summer staple.

If you haven’t tried the Flirt Skirt yet, I really recommend it. It’s a very comfortable skirt to wear, and I get so many compliments on it. It’s that back part. The part I call the ‘flirt’. That’s the part people are saying, ‘Turn around’. ‘Did you make your skirt?’ ‘What pattern is that?’ It’s definitely fun.

Untitled-1

This skirt has no stretch in the material, so I changed the pattern a bit – instead of using my knit sloper, I used the woven one to determine how big to make the pattern. The denim I’d used before only had a bit of stretch, so I didn’t need to adjust this one that much. This is a light-weight cotton with a denim look.

Untitled-2

And from the side with that flirty part showing.

No photos of me in my skirt just yet – my photographer is absent at the moment, and has been too busy to be my photographer this week.

Happy creating!

A Few Thoughts From Other Blogs

This week I want to share a few thoughts I’ve had from reading other blogs.

The first one is from Erin. Do you follow The Sewing and Life Adventures of Emerald Erin? On her June 11th post Erin made an announcement:

“A Special Summer for the Bra-A-Week Challenge!

Hi All! I said earlier this week that I would announce the summer host for the Bra-A-Week Challenge – and here is the announcement!
f8898-braaweekbutton

I am delighted to announce that the Bra-A-Week Challenge will be hosted by the lovely….

Michelle!
 
 
“Michelle is such a wonderful fellow bra-maker, and I’m sure you’ve all admired her work over the last 21 weeks like I have, and she most generously offered to host the challenge for the months of July and August for me!!”
Thanks, Erin! I’m pretty excited about hosting the challenge, and hoping some of my bra-making friends will join me and sew up a bra or two (or more) along with all the other wonderfully creative sewists who have contributed.  There’s more information on Erin’s blog if you’ve been participating in the challenge already and want to continue. You’ll still send your submissions to Erin. I’ll just be doing the write-up and posting it.
It’s great that the challenge will continue over the summer months!
This next blog comment I want to make really has nothing whatsoever to do with sewing – or does it? My good friend, Valerie over at Intricate Knits has been blogging about and telling me about her favorite author for years now. She just recently posted some scarves she designed that were inspired by Susanna Kearsley’s novel A Desperate Fortune. You can see Valerie’s designs here. After seeing the scarves, and having heard so much about Susanna, I decided I’d get A Desperate Fortune and read it myself.
This photo is from Valerie’s blog and shows a couple of the designs Susanna’s book has inspired. Valerie does such beautiful work. Check out her blog, and if you see something you love, she sells her beautiful creations on Etsy.
adesperatefortune-susanna-short-2
Aren’t these lovely?  This morning as I came into my sewing room, I didn’t even want to sew! I wanted to get back into A Desperate Fortune. So far, I have to say, I can recommend Valerie’s favorite author as well.
Happy creating!

Pattern Preferences

I’ve had a number of people ask me which I prefer, the Sewy Rebecca or the Pin-Up Girls Shelley. The Rebecca was published before the Shelley. I had also sewn the Rebecca pattern a couple of times before the Shelley pattern even came out, so was used to that pattern before I even tried the Shelley.

In fact, it was the Rebecca pattern I made for the Sew-Along hosted by Amy of Cloth Habit. It was during that time – when the Sew-Along was happening – that news of the Shelley pattern came out. I loved the Pin-Up Girls Classic pattern, and have both of Beverly’s Bra-Making Manuals, so was excited about a new pattern from her.

Over the years, I’ve had people email me and ask me which bra I prefer. And honestly, I had a hard time deciding which bra I did prefer.

The Sewy Rebecca pattern consists of a three-part cup: the upper cup, lower cup and power bar. This photo of the Rebecca pattern is taken from the Sewy website.

tzrebeccaotgr_z3

The Pin-Up Girls Shelley is a four-part cup consisting of the upper cup, split lower cup, and power bar. This photo of the Shelley pattern is from the Bra-Makers Supply website.

PB-3230%20Shelley

The two bras really are similar in design. One big difference is the Sewy Rebecca is fully lined inside the cup, and that really makes it look so professionally finished on the inside – something I love.

However, I’ve made a couple of Shelley bras now and lined them on the inside making them look as professionally finished as the Rebecca always does.

My most recent bra that I made was a Pink and Ivory Rebecca and while wearing it, I realized, for my shape I prefer… the Shelley.

So, what finally made me prefer one pattern over the other? Well,…

I have read many comments on blogs, bra-sewing forums, and personal emails to me where people have expressed their thoughts on another bra – the Marlborough by Orange Lingerie.

I know sewers who love this pattern. It’s their TNT pattern that they go to every time. I haven’t personally made up the Marlborough, so can’t say anything from personal experience. One of the reasons I haven’t made it up is I’ve heard it has a shallower fit. Another reason is I’m outside the bra’s  size range. I can play around with sister sizing and grading to get the right size for me, but hearing the bra fit more shallowly has been the one factor making me hesitate to try the bra. Although I must say, I’ve seen so many beautiful examples of the Marlborough sewn up and they all look lovely. I don’t think it’s the right pattern for me.

After wearing the Rebecca, I’ve realized there’s a shallowness to the fit of it as well. Although the two patterns, Rebecca and Shelley, are very similar, they don’t fit the same on me.

The Pin-Up Girls Shelley bra pattern gives me a nice shape and lift. The Rebecca pattern does not give me the same nice shape. Even though the patterns measure pretty much the same – the cross cup seam is the same length, and the bottom cup depth is the same, the upper cup is shallower on the Rebecca. I even added 1/4″ to it, but it still just didn’t give me the shaping I want.

Happy creating!

A Couple Pair of Matching Panties

This week I have a couple of pair of panties to match the Ivory and Pink Sewy Rebecca bra I made. I mentioned a few posts ago how I was going to use some Cotton Spandex Double-knit from Bra-Makers Supply. The color wasn’t an exact match though. It’s close, but not exact.

Here’s the bra and panties together.

Full Set on Catherine

Here you can you see the cotton looks quite a bit deeper in color than the Duoplex. However, I’m still very happy with this set.

The panties are from my TNT pattern – Kwik Sew 2286. I prefer the KS 2286 because it so closely resembles my very favorite RTW panties from La Vie En Rose. They had the lace at the legs and waistband as well, and I loved that.

I used KS 2286 without any alterations this time, and then used the two remaining scraps of lace I had left over from making my bra, and added those to the panties. There was so little lace left too. I’m always sad when a much-loved lace is gone.

On this pair, I sewed the pink and ivory lace to the stretch lace I used on the waistband and then sewed it to the panty as one piece. I cut away the cotton from behind the lace as well, to make a ‘window’ of the lace.

Full Set

Here are the two together. I do think the lace pulls them together pretty well.

For the second pair of panties I made, I had even less lace than this first pair. It was time to get creative with what I could do with it.

playing with lace

Here I was just laying the lace out in different patterns to see what would look nice and what I preferred.

And here is my second pair of panties to match my Pink and Ivory Rebecca.

panties 2

I like these as much as the first pair. Again, I cut away the cotton from behind the lace to make a window. You can see the window in the picture below.

window

There, two pretty and much-loved cotton panties to match my new bra.

Happy creating!