Do you know what a knob is? I use one in my bra-making all the time.
A Knob
 I’ve been using a knob for a few years now – almost since I started sewing bras. It’s a wooden ball, elevated, and on a base. It’s a great, very specialized, pressing tool for bra-making. I got this one from Bra-Makers Supply. You can find them here.
I love mine, but do have one little problem with it. It’s little. Well, it’s littler than me. I find when I’m using it, I’m only ironing about a two-inch part of the seam at a time, and my seams are all a fair amount longer than two-inches.
I’ve wanted a larger one for a long time. I knew they were available at one time. Here’s an old photo, from Bra-Makers Supply’s site. I had kept it for inspiration. This was from the old store location, and it showed one of the walls. Do you see down there on the left?
Here. Let me show you what I’m looking at. Knobs! And they came in different sizes! Larger sizes! Unfortunately, Beverly said she was no longer able to get the other sizes. So, I have been looking for a wooden finial to make a larger knob since I saw this photo.
Options
I’ve searched all the home building stores for something that would work. And I’ve searched online as well. I did find a few options, but they were just too expensive when the shipping was added.
Here. Let me share with you a few of the options I found. I found this on eBay. It’s a wooden ball with a flat bottom. I’m sure it would have been great, but the $65 shipping was way too much for me.
I kept looking.
Next I found this finial. I found this on Mr. Spindle. I called their 1-800 number thinking a knob the right size was finally going to be within a reasonable amount, and then I was told the shipping. The shipping wasn’t much less than what the eBay shop was charging. I started to think of giving up the search again.
I have to say, I shared my whole story with the receptionist at Mr. Spindle. What I was going to use it for, how I’d been searching for a few years now and not finding anything, or finding something and the shipping being too expensive. Then the receptionist said to just wait a minute. She came back on the line and had the shipping down to $20. She did warn me there might be customs on it when it arrived. I bought it.
More good news – there were no extra charges when my order arrived.
My New Knob
Lastly, let me show you the difference between the two knobs and just why I’m so excited about this. My first thought is, ‘That looks huge!’ However, when sewing the cup seams together, they’re still relatively flat. A larger pressing surface is going to be great!
To give a better perspective, here’s the smaller knob with the first too-small Angie cup over it. The cup dwarfs the knob.
And here’s that same Angie cup on the new knob.  The knob fills a lot more of the cup. What a difference this will make!
I’ve asked my hubby to help me make the base. We’ve found a post cap that worked. I’m not sure exactly how he attached it, but it works perfectly!
Here’s my completed knob. I have to tell you, it works wonderfully! I was using it on my most recent bra – Ruby II. I love this!
Happy creating!
 This Ruby fit everywhere, but was a little small in the cups.
 For this Ruby, I’ve used some gorgeous lace I bought from Merckwaerdigh, duoplex and power net from Bra-Makers Supply, and some amazing strap elastic I bought in a destash group.
 It’s so pretty! I think I’m going to save the rest of this lace for another bra rather than use it up on panties. It’s just too pretty.
 One of the things I like about the Ruby pattern is the underarm is nice and short. I don’t have to take it in.
 Ooh, I love that strap elastic. It’s very firm, and I like the detail on it.
 This is also a nice close-up of that lovely strap elastic.
 Hmm. I’ll keep thinking.
 A small black bow with a pearl for the center front, and two small black bows without pearls for the straps.
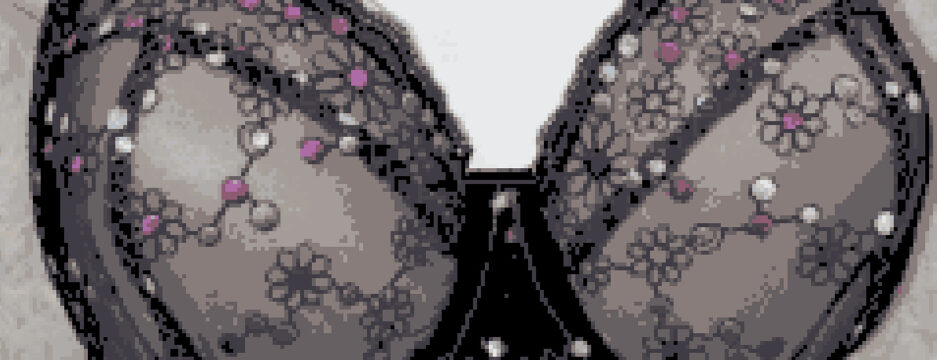
 Below is a photo showing the inside of a bra. It’s showing the Gothic arch, but it also shows the elastics I use along my upper cup.
 I first used this elastic when making the Sewy Rebecca pattern. I really liked how the upper cup fit this way, so I do this for all my lace-cupped bras.
 It’s very narrow, and fine. I’ve checked everywhere for it. I have a little left from a grab bag I bought years ago from Merckwaerdigh’s now-closed Ebay store. Seeing as I use it all the time, I don’t want to run out. So I’ve been looking. All I have left in that grab bag are colors I’m not so thrilled about using.
 I wonder how long all this will last?
 The second lace he brought me is this one:
 He also picked out three kits with me. He kept holding them up and asking me if I liked them. Well, silly. I liked them all. And he spoiled me even a little more than I asked. I asked for two kits, and he said he was there, so we should get three.
 It’s so pretty.
 And the third kit is a coral pink and grey lace with coral Lycra – with pink sheer cup lining. Oh my!
 They’re all so lovely! My hubby did really well.
 The Angie pattern doesn’t have an upper cup like so many bra patterns. In fact, I can’t think of another pattern that doesn’t have an upper cup. There are four pattern pieces to the cups, but none of them are upper or lower. The cup is completely different due to it being all vertical seams.
 These Lavender and Lace bras are lovely, but back to Angie for this post.
 I was also happy with the adjustments I made to the cup to make this fit me and make it fit in the frame so neatly. No more puckering on the cups! I’m not going to get tired of that any time soon.
 If a bra I’ve made has a bow on it, you know I’m happy with it! It’s bow-worthy.


 Recognize this? I just used this gorgeous cotton Lycra to make my
  I think it’s adorable! However, it’s a smidge small in the cups.
 I need to gather the elastic under the arm more. I’m very shallow there, and have to make that adjustment on almost every bra I sew.
 Look at this nice deep back.
 This photo shows the side seam and the under-bust seam. Both are enclosed. It’s a very nice feature. The only seam not enclosed is the center front.
 Do you see that nice wide elastic at the bottom edge? That’s 3/4″/19 mm elastic. Another supportive feature of this bralette.
 This looks the same on the outside, but the inside is lovely soft cotton Lycra.
 Soft, comfortable, and those lovely enclosed seams. It’s really nice.
 What a cute set!
 This fits really well. And those vertical seams really give great lift.
 There are little bits of elastic that are sticking out all over this bra that got tucked away for the nice photo.
 You can even fold elastic so it’s out of the way, and sew over it like I did for the hooks and eyes.
 The only finishing on this bra that’s been done is the top-stitching. I was pretty sure these cups were going to fit perfectly, so got them all ready for the next time I sew them.
 I can’t wait to sew this up knowing it’s going to fit so nicely.
 I even tried making the cup size in Swedish tracing paper just to see if it was close. Just in case, I sewed my bra with wash-away thread.
 Let me tell you there is lift happening with this lovely pattern. I do need to go back to that first cup size though. I’ll try it with elastics this time.
 Do you see all those vertical seams? Vertical seams really lift. The cup has a lovely round shape as well.
 I really like the shape of the cup, and especially at the side. This fit me quite well, which is encouraging. I usually need to take the underarm in, and I won’t need to on this pattern.
 I’m very impressed with my first attempt at Angie, and only wish I’d gone with my first cup size choice.
 Ingrid is a non-wired bra pattern, with three front-closing options, as well as a comfort band option.
 I really like this bra. I’m rather impressed with the support it gives for not having a wire.
 I looked for a grey hook and eye set, but my stash seems to be very low on hooks and eyes. That’s something to stock up on. So rather than grey on the back, it’s white. If you look closely, you’ll see I didn’t have 3/8″ upper band elastic in black or grey. Again, I had white on hand, so that’s what I used.
 Here’s the back of the repair. There’s double-sided interfacing fused between the duoplex and that little strip.
 Thankfully, the majority of this repair isn’t seen in the bra – it’s in the seam.
 I also like the power net inserts at the front. I think it looks unique.
 You might recognize the lace I used in this Watson as the same lace I used in the first Watson I made for Em. I thought the peach would look really nice with the charcoal mesh.
 Em loves the new color combination. That’s good news. I have more charcoal mesh for the next bralettes I make for her.
 I’ve used fusible knit interfacing for the front cradle. I might need to buy some in black to use with the rest of the charcoal mesh I have. I don’t love the white behind this.
 There’s a little fold in the material where the band meets the hooks and eyes. Em lost some weight and the bands were too loose on her this time. I measured her again, and she’s two inches down around her rib cage. I had to take these in after I’d made them.
 I think this one is just adorable. The lace is from
  I thought both of these were lovely, and fun.
 And the back.
 There’s the same little tuck in the fabric on this bralette as on the long-line. It’s not too noticeable, and it did the job. It took the bralette in enough for her to wear them and adjusted the pattern for next time.
 You might have noticed, I haven’t added any bows. It’s not because it’s not bow-worthy this time. I’m not sure I want bows. I made some. I pinned them on to see what I thought, but I wasn’t over the top in love with the bows on it. I may look for a little golden leaf charm. I think that would look great on this bra and mirror the gold leaves in the lace.
