Announcing The Canada Cups – Cross Your Heart Relay Blog Tour

Over the last week, I’ve posted a couple of teasers for our upcoming tour.

picmonkey-image-banner-2016Well, the wait is over. The tour starts today!

Welcome to the Canada Cups – Cross Your Heart Relay blog tour, 2016!

The tour begins with the incredible Fairy Bra Mother herself – Beverly Johnson. Pop over to the Fairy Bra Mother’s blog for a great kick-off post!

Fairy Bra Mother’s blog

Happy creating!

The Pasha Pleated Clutch

The Pasha Pleated Clutch is an adorable clutch pattern by Betz White. You can find the pattern in her book: Present Perfect.

61p8xMOmlUL._AC_US160_

I first saw the clutch last year when it was blogged about on the Sewing Collective. You can see that post here. I loved it from the moment I saw it, but was looking for the just perfect material and hadn’t made it up for myself yet.

Then a friend’s birthday was coming around, and I had to make something for her. I decided to make her a clutch – but not the Pasha Pleated one. I don’t know why not. I didn’t even think of it. I just picked another pattern from my pattern stash.

That pattern really didn’t turn out. I tore out my stitches five times, all in different places. Then at the last, when I should have been finished, it was still wrong. I had no heart to try again. I cut my hardware out of it and moved on.

Garbage

Sadly, there it is. There won’t be any reminders after the garbage goes out. Just after I tossed it, I remembered about Pasha Pleated Clutch pattern.

Pasha isn’t a hard sew, and really looks so pretty. Pamela, from the Sewing Collective, added a zipper. I think I’ll try that the next time I make it. I’m also thinking a wrist strap will be nice too.

Here’s my Pasha for my friend’s birthday:

Bag front

I love these materials together! You can see here how the pleats are on the front, and why it has its name. They take a little time to create, but are very worth the bang the bring.

Pleats

Here’s the inside of the bag. The lining is very nicely done – it doesn’t turn out loose or baggy. I’ve made a couple of bags that I haven’t loved the lining. I want the inside of my makes to look as nice as the outside – bras, bags, whatever I make. I love everything to look nice and neat inside and out.

inside-of-bag

Lastly, here’s the back of the bag. Nice, neat, pretty. I’m quite liking this pattern. And I really like how I didn’t fight with every step.

Back

Happy creating!

The Great Canadian Craftsy Bag Tour Give-Away

Please note, all contest links have been disabled as the contest is now over.


Hello again!

We’ve just barely made it home after our Craftsy escapade all across Canada. We’re unpacking our luggage and finding some great souvenirs from the trip, but it’s just too much to keep for ourselves. And because you’ve been such perfect road trip companions, we’d like to share them with you. Up for grabs are 4 coveted prize packs from our travels, as well as the special gift that Craftsy sent to us while we were gone gallivanting.


* This post contains affiliate links. If you visit one of those pages via my link, I may receive a small commission from the seller, at no additional cost to you.

12795131_10153307342291949_7066404965296167236_o

First up is the Craftsy gift:

* Please note: If you entered this giveaway before Friday, April 8, your entry may not have been recorded correctly by Craftsy. Please enter again. This colourful tote bag kit includes the Rowan Three-Quarter Patch Tote pattern, some stunning Kaffe Fassett fabric, plus all the Pellon Fusible Fleece stabilizer you will need for the project. The only things you would have to add to this are a coordinating button, some thread and your time. Voila! You have a gorgeous tote that will be the envy of tote-al strangers. It’s almost like instant Jello pudding, only better! Follow this link to enter before midnight April 11, 2016:


The Souvenir Prizes

Prize A (Canadian, US and International entries accepted)
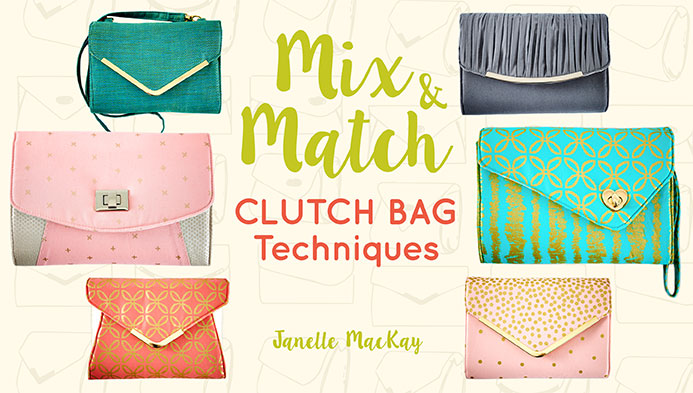
  • 1 Craftsy Class: “Mix & Match: Clutch Bag Techniques” by Janelle MacKay of Emmaline Bags
titleCard
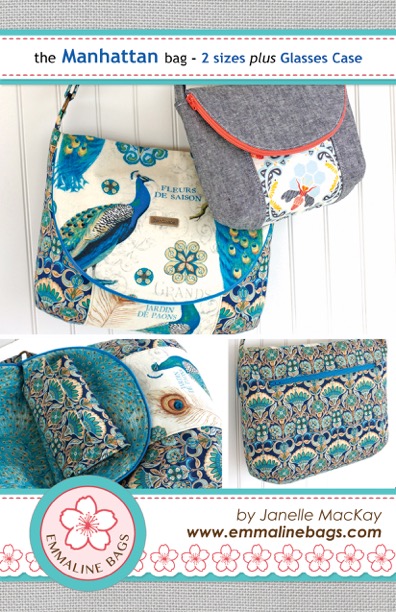
Prize B (Open to Canadian residents only)
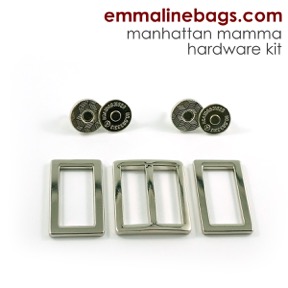
manhattan cover for web Manhattan mamma hardware kit in nickel finish
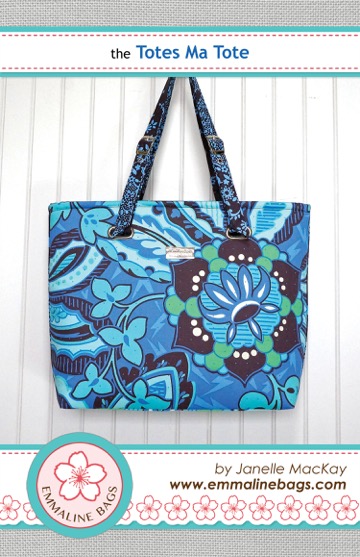
Prize C (Open to Canadian residents only)
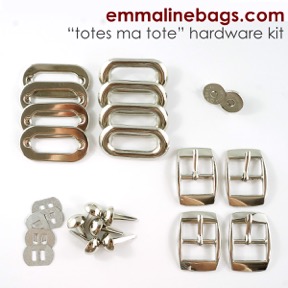
TMT cover Totes Ma Tote Hardware Kit
Prize D (Canadian, US and International entries accepted)

(You choose the pattern!)


Giveaway Rules:

  • Prizes are awarded “as is”. No substitutions.
  • Deadline for entries is 10 AM PST on Monday, April 11.
  • Winner’s will be notified by email within 3 hours of the contest closing, and will then have 24 hours in which to respond to the organizers.
  • It is each participant’s responsibility to ensure they sign in to Rafflecopter with a valid email address, and also check their email accounts for notification.
  • Entries requiring a blog post comment, social media follow, or trivia answer will be verified using the name provided by the participant.
  • The giveaway is open to anyone worldwide. International or US residents who win a prize designated as for Canadian Residents Only may be required to pay for the additional shipping, or forfeit the prize. If said winner chooses to forfeit the prize, another winner will be chosen from the remaining eligible entries.

Many, many thanks to all the wonderful people who’ve followed us on The Great Canadian Craftsy Bag Tour. We hope you learned a little about our very large, diverse and beautiful country while you got a peek into some of our favourite Craftsy classes.

And very special thanks to the amazing, supportive people who helped make the giveaway and our graphics just that much better: Celine from Blue Calla Patterns and Elle from Brand UR Shop Graphic Design. Take a bow ladies! Prize Sponsors

Happy travels until the next time we take you tripping and traipsing!

Marsha, Janelle, Deb, Fiona, Michelle, Reece, Shelaine & Ula

Please note, all contest links have been disabled as the contest is now over.


Coraline Clutch

Oh, I think I love bag-making as much as I love bra-making. I made another Swoon. I must say, I love it. I used it the same day I finished it, and was so happy with it. Here’s my Coraline Clutch shown with the pattern.

with-pattern

I made this out of the same fabric I used to make my Agnes-inspired skirt, and the temporary dog boots. (I told you you’d see more of this, but I think I’m pretty much done with the material now.) This is a thick flocked knit. I really do love this material. I have a little more in black. I also have a similar black flocked stretch denim. So many things to sew still!

Back to Coraline. Here’s the inside of the bag.

Inside

The pattern is a great pattern, and it all comes together easily. Swoon has a Facebook group for support, and that group lists a bunch of files. One of those files is a video tutorial that I used to help me make this bag – just to make sure I was doing everything right.

I added a fun little bracelet charm to the zipper to give it a little more oomph, and to make it easier to pull that little zipper.

zipper-pull

Here’s the backside of the zipper pull:

back-of-zip-pull

I love that it is two-sided. Regardless of which way it shows, it looks pretty.

I worked to pattern-match the fabric so I’d have the same pattern showing on both the front and the back. I could have done a tiny bit better with my pinning because I noticed the bottom seam doesn’t match perfectly, but I’m pretty pleased with it overall. Most of the time I won’t be looking at it from the bottom, so the sides match well. There’s always something to work on for the next project, isn’t there?

pattern-matching

One change I made to the pattern was to simply attach my strap into the bag’s seam. The pattern calls for a 1″ D-ring and a 1″ swivel clip. I didn’t have those on hand, and didn’t have time to run to any store. I made this up, showered, and went out to a banquet. I love it as is, but also think I’d love to see it with the D-ring. I have another planned already.

Here’s my new Coraline with Catherine, just to show you the size.

On-Catherine-with-new-drape

Catherine is draped in some lovely fabrics that I’m hoping will make it into a holiday skirt.

Happy creating and have a very Merry Christmas!

My ‘New’ Serger

Many, many years ago, my wonderful husband bought me a serger. He surprised me with it, so I hadn’t had any input into the decision. He just wanted to make me happy. And he did!

The serger, however, did not. It was a Kenmore. I don’t remember the model, but it was nothing but trouble. It would not stay threaded no matter what, and that was only one of its problems. I’d taken it back for repairs three times while it was still under warranty. Finally, the last time I took it in, I found out there had been a recall on it. The store replaced it on the spot. That was wonderful!

The big problem was, I wasn’t in love with the idea of a serger anymore. Yes, they can be great, but after three years of nothing but trouble, I didn’t even want to use it. I wasn’t using it. It sat for years. I finally sold it.

There were times I did regret selling it. Every once in a while I’d borrow one from a friend, because they are great in finishing everything so quickly and neatly. When they work, they’re the greatest.

Do you remember a while back I mentioned a friend had let her serger and Cover Pro machine come and stay at my house? I was going to let the Cover Pro stay here, but her serger didn’t work very well. I had taken it in to be repaired and the repair man said it wasn’t a very good machine – it wouldn’t hold the thread, it was loud and it shook a lot. Hmm, that was not what I was wanting… again. After struggling with it, I called her up, thanked her for her kind offer and gave it back to her. Now, in her defense, she’d never even used it, so had no idea.

untitled

untitled (2)

     I wasn’t having the best of luck with sergers, was I? However, if you’ve read my blog for any amount of time, you’ll know, I don’t give up.

Just a few weeks ago, I called another sewing friend to ask if I could borrow her serger. She said, ‘Yes, of course.’ Then she said she’s selling it and wanted to know if I was interested.

Well, to make a long story a little shorter, look who came to stay at my house:

products_machines_1300mdc_header

This is the Bernina 1300MDC. Just to assure me she’s a great machine, she came with a sticker on her front saying she’s the Consumer Choice 2010.

I just (finally) had time to sit down and start reading through the manual. I didn’t get very far before I was absolutely stunned by what I was reading. I was reading how to insert the needles, and it said how to change the Left Needle for Cover Stitch, and the Center Needle for Cover Stitch, then the Left for Overlock, and the Right. I stopped reading. I read that all again. This is a Cover Stitch machine too? I had no idea!

I called my friend and asked her. ‘Yes,’ she said. I must have sounded a little odd because I couldn’t believe what I was hearing. I had no idea when I got the machine that it was both. I simply thought it was a great serger.

She went on to say, she’d just had it serviced to make sure it was in perfect working order before selling it. I’m thinking my serger luck has changed! Woot woot!

Happy creating!

Butterick 6031 and The Bra-A-Week Challenge

Have you seen any of the Patterns by Gertie? She has some lovely patterns, and her Butterick 6031 is one of my favorites in my lingerie pattern stash… and it was time to pull it out.

butterick-6031-w

It is so pretty! I love that slip – black and white – such a classic!

Another admission I must make is I love watching The Shopping Channel. There are many Today’s Showstopper items in my house. This camisole was something I found on their website and was an inspiration for me. This, as well as some gorgeous material a friend sent me. The photo is the Rhonda Shear Leopard Lace Cami.

comparison-w

I saw this and loved it, but I wanted something a little looser. I have a favorite camisole, and it’s not a snug fit, so I wanted one more like the one I have. That leopard lace? Love! Yes, it was time to pull out the leopard mesh I have in my stash and make something with it. Adding lace just makes it perfect.

Here’s my B6031 camisole.

Cami

Love, love, love. However, I did have a bump along the way. I’m still trying to figure out what happened. Somehow, after cutting the mesh material for the cups, I ended up with two right cups. Excuse me? I’m completely baffled by this. I really have no idea how I cut out two the same, but I did.

right-cups

That was upsetting. I didn’t want to waste any of the material. I will be able to use the material to make a Shelley though, so I’ll save it for future right and left cup pieces. I wasn’t alone this week though, I was reading on another blog how the blogger cut out two left sides of her top.

To make the camisole I also had to do a Full Bust Adjustment. I’ve done one before when I made my moulage from Suzy Furer‘s class on Craftsy: Patternmaking Basics: The Bodice Sloper.

However, this time I used the information on the sew-along from Gertie herself to adjust my pattern following her instructions. I’m glad I did. The instructions I have would have had me add 3/4″ more than I added. The 1″ Gertie suggested was perfect.

I decided I’d follow along on the sew-along, and the funny thing about following along is once I got started sewing, I forgot about following. I was 3/4s done and remembered. I went back and read through it just to see what it said. The sew-along is for a slip, but all but the hem treatment is exactly the same as for the camisole. I’m thinking of trying the panties from this pattern too. They look really cute and are similar to my favorite TNT Kwik Sew 2286.

I also had some fun making my own bows again. I often like to find some way to do something different or unique. I did that with my bows. The first bow shown here has some mesh with the ribbon, and they’re both tied into the bow, the second bow is ribbon tied with the mess, and the mesh tails hanging down. Both were so fun to make.

Front-bow

Strap-Bow

The materials I used came from BMS (power net), Frog Feathers (lace), and a dear friend, who just happens to be in our Challenge this week, (leopard mesh). Thank you, Ginny! I love how beautiful my camisole is, and will treasure it even more because the material was a gift.

Now onto the Bra-A-Week Challenge. This week we’re on week 29 and we have a great week!

Our first submission comes from Karin of Mrs. Weaver’s Finest Unmentionables.

untitled

This is the Marrakech bikini. It’s based on the Rebecca bikini from the 3 Sisters pattern, a Pin-Up Girls pattern. Karin altered it to make the cups a little more flattering. The back detail is gorgeous and the fabric amazing!

untitled (2)

That is gorgeous! You can read more about this beautiful bikini on Mrs. Weaver’s blog.

Our next submission comes from Amber. Amber made this beautiful bra for her friend, Helena. She started a while ago, but got interrupted in her sewing by having a son. Congratulations on your son, Amber!

untitled-(3)

Amber started out planning to make a basic bra, but then saw this lace and wanted to try a couple of different techniques.

untitled-(5)

Look at that starburst. So very pretty! This is the Pin-Up Girls Amanda foam cup pattern. The pattern, fabric and notions – except for the lace are from Bra Makers Supply or BWear. It’s beautiful, Amber!

Next we have a beautiful bra from Maddy.

Maddy made her third Marlborough with matching Ohhh Lulu tap pants, in coral lace.

img_1670

img_1674

Maddy says, ‘I love this set so much! The fit is lovely and comfortable, and I’m so in love with the lace (and its remnant price tag!)’

I agree with Maddy on that – it’s lovely! And beautiful remnant always feels better than full price. It’s gorgeous! You can read more about Maddy’s Marlborough on her blog, Miss Maddy Sews.

Next we have a beautiful bra by Sofia.

Sofia made a very lacy bra. Is there anything more delicate looking than an all lace bra? She also made a few alterations to her pattern. You can read about that on her blog, Silver Lining.

Lacy-bra

Beautiful. That bow really looks awesome, Sofia! Sofia made her own bow for this bra. It really pops with that deep color.

Our next submission comes from Ginny. Ginny made the Boylston Bra, the newest pattern from Orange Lingerie, and she made it for her niece.

bcu

Oh, that is pretty. Ginny describes the Boylston as ‘a sleek balconette style with self fabric straps’.

Ginny also made some matching panties for her niece. Here is Ginny’s first set featuring Make Bra’s DL21 panties.

bs2

That is lovely. Ginny, your niece will love it! Here’s Ginny’s second set now featuring Ohhh Lulu’s ‘super comfy’ Grace panty.

bs3

I love that floral lace on the sides! You can read Ginny’s guest post on Sewcialists‘ blog.

Our final submission for the week is from David.

David front

David made this bra with pink cups with black lace. The upper part of bra cups are made with black embroidery on tulle.

David side

This bra has a double strapy back and a neck strap.

David back

David is a free-lance lingerie designer. This is really beautiful.

Happy creating!

Favorite Summer Recipes

One of my favorite summer recipes is Bruschetta. My DH can make a meal out if it on its own even, and often does. I’ll get a phone call saying ‘I’m bring home tomatoes. What else do we need?’ and I know. He wants me to make Bruschetta.

Just the other day I bought the most beautiful dark red Roma tomatoes and I made a big jar of Bruschetta.

bruschetta

I thought I’d better get a photo while there was still something left in the jar!

And I thought I’d share my recipe with you. DH says it’s the best he’s ever had. I don’t know about that, but I do like it too.

Bruschetta Recipe

4 Roma tomatoes

3 cloves of garlic, chopped

3 tbsp. olive oil

2 tbsp. Balsamic vinegar

1/4 cup fresh Basil, chopped

1 tsp Salt & Pepper

1/4 cup chopped onion

Pulse in a food processor. I don’t have an electric food processor, but a manual one. So, it’s at this stage I hand it over to DH and make him work for his dinner.

Another favorite recipe of mine, that I enjoy all year round is homemade ‘chocolate’. It’s not really chocolate. I use carob powder in mine.

carob

Here are my ‘chocolates’ all ready to go in the fridge and firm up. Other than the chilling time, they only take minutes to make.

The original recipe comes from the unrefined kitchen.

Homemade Dark Chocolate Chips

2 tbsp. coconut oil

1/4 cup cocoa powder (I use 1/8 cup carob powder)

2 tbsp. honey

1 tbsp. arrowroot

1/2 tsp vanilla

Over a double-boiler that is simmering, melt oil, honey, cocoa/carob and arrowroot. Cook for 2 minutes after it is melted. Remove from heat.

Add in vanilla. Stir.

Lift pan off double-boiler and make sure no water gets into your chocolate. Pour into a pan lined with parchment paper. I used a confectioner tray for mine.

Put in fridge for 2 hours or more. Cut into small pieces to enjoy!

You can read the original recipe here.

Happy creating and enjoy!

A Few Thoughts From Other Blogs

This week I want to share a few thoughts I’ve had from reading other blogs.

The first one is from Erin. Do you follow The Sewing and Life Adventures of Emerald Erin? On her June 11th post Erin made an announcement:

“A Special Summer for the Bra-A-Week Challenge!

Hi All! I said earlier this week that I would announce the summer host for the Bra-A-Week Challenge – and here is the announcement!
f8898-braaweekbutton

I am delighted to announce that the Bra-A-Week Challenge will be hosted by the lovely….

Michelle!
 
 
“Michelle is such a wonderful fellow bra-maker, and I’m sure you’ve all admired her work over the last 21 weeks like I have, and she most generously offered to host the challenge for the months of July and August for me!!”
Thanks, Erin! I’m pretty excited about hosting the challenge, and hoping some of my bra-making friends will join me and sew up a bra or two (or more) along with all the other wonderfully creative sewists who have contributed.  There’s more information on Erin’s blog if you’ve been participating in the challenge already and want to continue. You’ll still send your submissions to Erin. I’ll just be doing the write-up and posting it.
It’s great that the challenge will continue over the summer months!
This next blog comment I want to make really has nothing whatsoever to do with sewing – or does it? My good friend, Valerie over at Intricate Knits has been blogging about and telling me about her favorite author for years now. She just recently posted some scarves she designed that were inspired by Susanna Kearsley’s novel A Desperate Fortune. You can see Valerie’s designs here. After seeing the scarves, and having heard so much about Susanna, I decided I’d get A Desperate Fortune and read it myself.
This photo is from Valerie’s blog and shows a couple of the designs Susanna’s book has inspired. Valerie does such beautiful work. Check out her blog, and if you see something you love, she sells her beautiful creations on Etsy.
adesperatefortune-susanna-short-2
Aren’t these lovely?  This morning as I came into my sewing room, I didn’t even want to sew! I wanted to get back into A Desperate Fortune. So far, I have to say, I can recommend Valerie’s favorite author as well.
Happy creating!

A Pale Yellow Flirt Skirt

I definitely have my favorites when it comes to clothes I’ve made, and clothes I’ve bought. One of my habits is to go through my wardrobe twice a year. I only keep what I can wear in my closet, so if it’s Summer, you won’t find Winter clothes in there. Same goes for Winter time – no Summer clothes.

I take advantage of that twice yearly sorting to clean out anything I don’t wear. I just gave away a few cardigans I hadn’t worn all winter when I did the Spring switch-over. I don’t like to keep things around if I’m not using them.

I also notice when I love something. If I end up wearing a garment all the time, I know it’s a keeper. My denim Flirt Skirt is one of those garments.

100_2881

I found myself wearing the skirt all day, and then thinking it’s needs to be washed, so I’d go home and wash it right away so it would be ready to wear again the next day. I decided, if I’m wearing something that much, I need to make another one.

So, here’s my pale yellow denim Flirt Skirt.

skirt front

This skirt has two things I love: I really love pale yellow. The last two years I’ve been seeing more of it, and I’ve been picking up a bunch of pale yellow garments. So when I found this pale yellow denim, I scooped it up right away. The other thing I love is this pattern.

From the front it looks straight – which is something I can’t wear. I’m just too curvy for straight styles and always have been. I also find straight styles suit taller women – something else I’m not. However, this does look more straight-ish, at least to me. But the back… well, that’s just fun, and whimsical, and flirty.

The Flirty Part

There’s the flirty part of the Flirt Skirt. I love that! It acts a bit like a kick pleat but material has been added to serve the same function the kick pleat serves – it allows me to walk when wearing it! I’ve also hear it described as a fish tale. But no matter how one wants to describe that – it’s just fun. I was wearing my skirt this week, and that flirt part at the back was what was getting noticed and complimented. It is very fun and flirty.

The Flirt Skirt is a super easy pattern, and I made this up in an afternoon. I think these are quickly becoming my summer wardrobe! Both my dark denim and my pale yellow denim skirts just went to the mountains with me. That back flirt section of the skirt makes it great for walking in, whereas a straight skirt isn’t great for that. There’s lots of room for a full walking stride.

Untitled-9

Here I am on a rainy day. My hubby helped me out with some pictures. But he wasn’t the only one helping me out. Our rescue pup, Tiberius, came and helped out too. Anything I’m doing, and he’s right there with me. His toys are all around my sewing room! He’s with me for every project.

Untitled-7

Here we are showing the flirtier part of my skirt. He’s not always quite so agreeable though. I took my son to an appointment, and thought I’d read while waiting. Nope. My pup wasn’t going to let me read. Thankfully, he’s fine with my sewing!

Tiberius on my book

Happy creating!

Two Misses In A Row

A few weeks ago, when my husband and I went away for our anniversary, he was sick. The week before that it was my DS1’s turn. Well, when we got back from our trip, it was my turn. Sadly, my sewing has really been affected.

The first mistake I made was last week. I was all ready to make some matching panties for my new bra. I decided to make a new pattern from some RTW panties, and everything was looking good. I traced out the pattern, and was all ready to cut out. I even thought everything looked pretty good when I finished cutting them out.

100_2983

It wasn’t until I picked up the back of the panties that I realized something really didn’t look right.

100_2984

There was no fixing that, and there isn’t enough material left for a second back to be cut. Sigh. Note to self – don’t try to sew when you don’t feel well.

I did dig out my beige cotton spandex from my stash. Nope, there wasn’t enough material there for a pair of panties either. I saved it thinking it would be great to use for making the gussets for panties. I do the same with ends or bits of Duoplex  – save them to make bridges.

So, I put all my sewing aside and rested for most of the week.

I was starting to feel better and wanted to get sewing again. So out came the cowl neck top I’d started to work on.

100_2947

I’d used my knit sloper and traced out a pattern that was ‘curvier’ than the original pattern to better fit me.

It was coming together quickly and looking wonderful. Then I sewed up the side seams and thought, ‘Hmm, that looks small.’

100_2978

Yup, it’s too small. I didn’t add in ease, or at least not enough. I am thinking too small is a nice change from too big… I don’t think I’m quite up to sewing just yet. I think I’ll give it another few days.

The one highlight of my sewing right now is my companion:

100_2974

Here’s our adopted pup, Tiberius. He often looks for a spot of sun on the carpet, but will settle for a spot under my cutting table just to be close.

Happy creating!