A Third Bra Draft

My third bra draft really was a success!

A Few Differences

There were a few things I did differently this time. One of the changes I made was to use water-soluble thread – and it came in handy! I realized very quickly I had mis-measured my cradle for the elastics. A quick little soak in some water, and it was all bra bits again rather than a partially-sewn bra meaning I’d have to start over or unpick the whole thing.

 I was not expecting to have a bra when I was done. I was simply seeing how my draft fit and what changes I needed to make. That is a very freeing feeling.

My Pattern

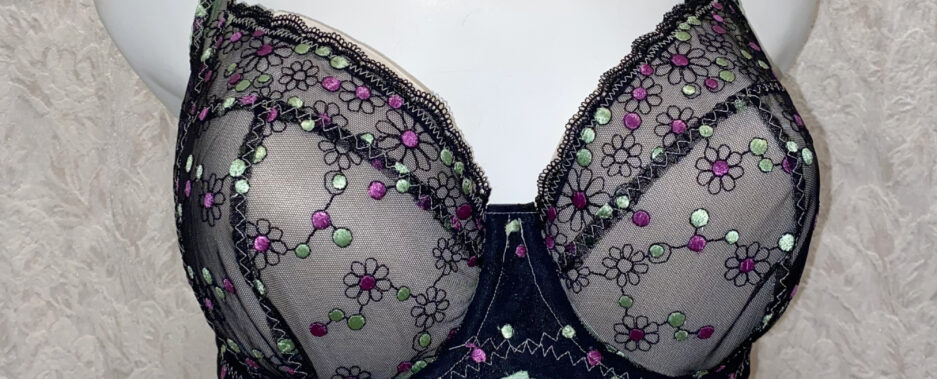
I made a diagonally seamed bra with a split lower cup. Nothing fancy for this bra – I only want to see the fit.

My ‘Kit’

  The same attitude I had for the pattern, I had for the kit. Nothing fancy, just bits of this and bits of that. Not all the bits were even matching, but they worked for their purpose.

In this little pile of a kit, I have beige Duoplex and Power Net, some beige and some white bottom band elastic, white upper band elastic, white strap tape, and blue trim! I’m really not expecting this to look good.

As well there’s the YLI Wash-A-Way thread. If you haven’t tried it, it’s great! It works perfectly for testing a pattern like this.

A Hot Mess

Honestly, the sewing on the bra looks terrible. Well, not the sewing really. It’s more the techniques or lack there of. It’s a mis-match of colors, and I didn’t do a lot of the things I’d normally do to ‘neaten’ things up. Just look at the bottom band elastic.

 Normally, I trim the elastic under the channeling – I like a thinner band running under the cups. Not this time. This time I’ve simply folded the channeling over the elastic and pushed it out of the way.

It’s looks so bad.

 While we’re talking about the bottom band elastic, I used two colors because I didn’t have enough of one color to do the full band. I used a great technique of piecing together bits of elastic. I saw Monica Bravo do on a YouTube video. It’s quick and it really doesn’t show at all from the front. You can view the video here.

You can see I wasn’t trimming anything, not even threads. This was a quick sew to see how things were going to fit. That’s it.

Does It Fit?

I have to say I am so surprised by the outcome of this drafting experience. First off, I never thought I’d be drafting my own bra pattern from measurements!

Secondly, I made a very wearable bra! Well, it would be wearable if I hadn’t used the water-soluble thread! But it fits. There are a few tweaks I want to make, but it fits.

The whole time I was sewing this, I kept thinking how I’d never sewn/thrown a bra together like this. There are bits hanging or sticking out everywhere! The upper band elastic is hanging out of the side of the cup because I didn’t finish the straps; on the other side it’s hanging down the back at the hooks and eyes. The channeling is sticking out. It really is a mess to behold!

There’s not a top-stitch to be found, and barely a back-stitch present. I sewed it just enough to hold it together to try it on… well almost. I did pull on the strap a bit too much and pulled it off! I had a pin handy, so was able to continue in the trying-on/evaluating process. 

Adjustments

  There are only a couple of adjustments I want to make. I plan to add a little more coverage to the underarm area – probably a half-inch will do. I want to lower the bridge by about a half-inch as well. Rounding the apex and adding a power bar will complete this. I’ll also likely do another test run. Then I should have a perfectly fitting self-drafted bra and pattern. What a feeling!

Happy creating!

Waiting for Wires

I’ve ordered a few more sizes of underwire and am doing my best to patiently wait for them. I need these new sizes for drafting.

The Problem

I’ve said this before, but I am incredibly fortunate to know more than one professional bra-maker. Karin of Mrs. Weaver’s Finest Unmentionable helped me figure out what I was doing wrong in my drafting.

I had followed the instructions both times from the Bra-Makers Manual. And both times I produced a bra that was close.

In fact, there as aspects of how these bras fit that I like better than any bras I’ve made yet. But… they weren’t fitting perfectly and I really didn’t know what I needed to change.

Those Buts

But. I’ve had a lot of those buts in my bra-sewing journey. The problem is the same problem I’ve had all along in making bras – I’m an Omega shape. Yup. The Omega shape was causing problems again, although I didn’t realize it.

So what exactly was the problem? I was using what I thought was the right wire – the one that fits me. I was using that wire to draft my cradle and my cup too. Normally, this is exactly what someone should do too.

But not someone with an Omega shape.

It was one of those smack-hand-to-head moments when I realized why both of the bras I’d drafted didn’t fit perfectly. If I want the cup to fit, I’m going to need to use a wire that fits the cup – not one that fits me.

These wires show the difference between what I need for my cradle and what I need for my cup. The narrower wire is what I need for my cradle, but the wider one is what I need for my cup.

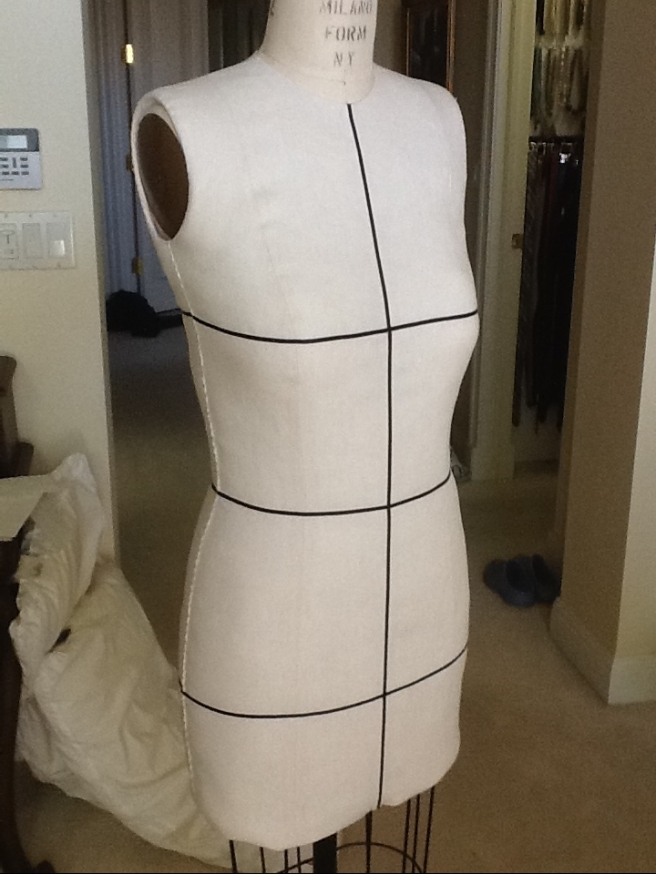
So for my drafting I will need to use two wires. The first wire (the one that fits me) will be for the cradle’s draft. The second wire (the one that correlates to the cup’s size) will be the one I use for the drafting the cup.

Hoarding

 You know, my hubby has some hoarding tendencies. He keeps things. He says he might need them sometime. He could even be right… sometimes.

I’m not like that at all. I think, ‘I’m not going to use this.’ and out it goes. Well, I’m re-thinking that. I had these wire sizes at one time. When I first got into bra-making I had no idea what size I’d need, so I ordered everything around the size I thought I’d need. My cup usually takes a 44 wire, so I had 42s, 44s and 46 wires – in regular and long sizes. I’m going to start hoarding everything bra-making going forward because I just might need it.

Progress

While I’m waiting for my new wires to arrive, I’m still practicing drafting, only this time I won’t sew up a draft. I know my cup won’t fit just right.

Using a larger wire than will fit me to draft will also mean I’ll have to make a few adjustments to the pattern to help it fit into a smaller cradle, but I’ve had lots of experience with that. Almost all the bras I’ve made, I’ve had to make those adjustments.

I’m really looking forward to getting those new wires and making this next draft. I’m hopeful.

Happy creating!

Have you seen Merckwaerdigh has a new Mini Course out? Design your own BRA. Her panty course is great, so I’m trusting this one will be too. I’ll let you know.

Here’s a video Margreet posted on the new mini bra course:


Plans for Another Bra

I have to say, I really do love sewing bras. There is something very addicting about that little bit of lace, material, and elastic. I also have to say, I really loved making a bra from a pattern I drafted. When I made my first bra five years ago, I never thought I’d do this!

I was thinking now I have a pattern I love completely, and that fits so well, it’s time to get on with my Spring Wardrobe. However, I decided one more test bra first. I can always use another black bra.

Materials 

For this bra, I chose some lovely black lace with red details. Along with that lace, I chose black duoplex and power net, but red elastics to make the red in the lace really pop.

This is one of the gorgeous laces I bought at Fabricland last year for $2.50/meter. Oh, I had fun stocking up on those laces.

Alterations

For this bra, I made the underarm smaller. I add 1/8-inch back to the bottom of the cradle as the thinned band under the cradle was a really tight sew last time. As well, I added 1/4-inch to the top of the cradle where the wire ends as it was just a touch short there.

You might be wondering how all these alterations worked out? Let’s take a look.

Here’s my newest bra from the front:

I really love the red elastics on the top and bottom of the band.

Here’s the side:

I’m asking the famous Mrs. Weaver for a bit of help again. The side of my bra is doing what this very pretty Empreinte Maya bra is doing. (Photo from Amazon.ca)

See how the bra pulls in at the wire line at the side? Mine is doing that, and I need to figure out what I need to adjust to make it not do that. Thank goodness for all the professional bra-makers out there!

And here’s the back of the bra:

It’s such a pretty bra! I love the lace and the red elastics. Looking at this photo of the back, I can see I need to trim those red elastics just a smidge more.

Lastly, here’s the bridge – I widened the bottom of it. You can see here with my navy bra beside it that it’s wider.

I need a little more room there, so this is much better.

I’m especially pleased with my sewing this week as I’d hurt my knee and all my sewing was left-footed sewing.

Happy creating!

P.S. You may want to read Just One More Stop at the Fabric Store.

Did you see Orange Lingerie has just published a new bra pattern? It’s lovely!

You can find the Fenway bra on Etsy.

Attempting a Draft

I was going to make a Valentine’s bra for myself. I had everything set out and was getting ready to cut it out. I even knew the one alteration I wanted to make.

Still using my Pin-Up Girls Shelley pattern, I was going to add a little bit of width to the bottom of the bridge.

Right there. I want it just a touch wider, but everything else fits really well. In fact, it’s my current favorite.

However, much like making my Personal Croquis (which I’m still really enjoying), I’ve had another project on my list of things to do for a while now – draft my own bra pattern.

Resources

I have Bra Design & Draft from Beverly Johnson’s Bra-making Manuals.

In fact, I’ve drafted part of my pattern already. The only part of the drafting process that is new to me is the cup. Because of the alterations I’ve needed for my cradle and bridge, I’ve been drafting my own cradle/bridge for a few years now using information from the Manuals.

Even though only part of this process is new, it still felt daunting. I figured the worst case scenario was it wouldn’t turn out, and I’d go back and use my Shelley pattern making that one little adjustment. The best case scenario would be I’d have a self-drafted pattern. I took a deep breath, and started.

Beginnings

 I was geared up to start. I had my paper, pencil and eraser and thought I was all ready. I drew two lines, and then searched the house for a compass. Even my hubby got in on the search. Nope. We didn’t have a compass anymore. Our kiddos are done school, and we didn’t keep any of those school goodies. (I love to declutter!) So, it’s a quick trip to Staples, and now I’m ready again.

 From here, I did what I usually do. I decided it wasn’t just right, so I crumpled it up and started again. I did this when making my bodice sloper too. My sloper was fine, and so was this. But I like things just so, and I don’t mind making sure.

The next step felt like going back to the beginning. I hadn’t drawn out the cradle and band this time. But I needed those before I could say the cup fit. So, re-drew my cradle.

Third Time’s a Charm

 I was happily getting started on my band and cradle, and realized I didn’t have all my measurements! I was drafting away thinking I was doing better than I anticipated, and everything came to a stop. I needed measurements which I couldn’t do on my own. I’d never drafted the band part, so didn’t have those back measurements. My hubby to the rescue.

Sigh

There was one more bump in the road. I got to a point with the drafting and mine didn’t look like what Beverly had in the Manual. It really didn’t look the same, but I knew all my measurements were correct. I was stuck. You can see how I was feeling even. No sparkly stars shining perfection on my draft!

I am so fortunate to have worked on a blog tour with The Fairy Bra Mother and Mrs. Weaver. In fact, I’ve worked on a few projects with Mrs. Weaver. I’d mentioned to Mrs. Weaver that I was attempting a draft. She very kindly offered to help if I got stuck. I took her up on that.

It turns out I was on the right track; it’s just much easier to see what the next step was rather than read it. Thank you so much, Karin!

Next Steps (Finally!)

Here’s my newly drafted pattern from my measurements. I won’t sew this up as it is. I’ll change the lines – add a power bar, split the lower cup – add a few of the pretty details I like in a pattern. Once I make it more a style I want, I’ll make a test bra to see how it all fits.

Happy creating!

A Dress Form Cover

One of the many projects I plan to make is a dress form cover. I love Catherine, but we’re not the same size.

This is something I’ve looked into a bit, but haven’t found that perfect solution yet. I think a lot of the dress form tutorials and classes are all great for sewing, but not perfect for bra-making. From what I’ve seen, most dress form covers result in more of a uni-boob look, which would not work at all for bras.

Here is the first one I found, which I still think is so beautiful! Mary uses the sloper she made from Suzy Furrer’s Bodice Sloper class.

completed me

This image is from Cloning Couture‘s blog post. Isn’t this professional looking? I do love this! If I decide to simply to cover my dress form for sewing clothes, I’ll do this too.

I had similar thoughts about the Craftsy class Customize Your Dress Form. This class takes you through exactly what to do, step by step. I watched this class when Craftsy had their October pass in 2015. I thought it was really great, but again, it wasn’t addressing my desire to have the bust defined. That definition is an important part of bra-fitting.

14154439

So, I kept thinking about how I could adjust my sloper so I could have that bust definition I wanted.

Let me take a side road here and show you why I haven’t been 100% happy with any solution I’ve seen yet. This is the bra dress form Beverly uses in her Craftsy classes; Naomi, of Barely Beige also has one. This dress form is called Ashley. There’s no uni-boob happening here.

sewing-bras-designer-techniques-craftsy-taught-by-beverly-johnson-beverly-feature-image

How am I supposed to be satisfied with anything less than bust definition on my dress form after seeing this?

I recently came across a blog post by Sew Chic Pattern Company. They have a three-part post called Copy your Figure: A Dress Form Tutorial.

 Laura does do a dart to give bust definition, but I’m still thinking it won’t give me as much definition as I’m wanting.

bust-dart

Here’s a photo from her blog. This is getting closer.

I know from making my own sloper that mine doesn’t give enough bust definition the way it is now.

moulage done

Here’s the one I made. There’s a small dart there on the sloper, but…

So what I’m thinking is do some draping with fabric to see what size of darts I’d need, where I’d need them, how many darts I’d need. I might need to play with it a bit, but I think it can be done.

Has anyone made a dress form cover with more bust definition? What did you do? How did it turn out?

Happy Thanksgiving & happy creating!

A Craftsy Review: Design & Sew an A-Line Skirt

I have a lot of Craftsy classes, and I know I’m not alone in that. In fact, I know two other bloggers who also have a lot of classes, and we’re teaming up to post monthly (we hope) reviews of the classes we’ve taken.

Reviewing along with me are Marsha of Flying by the Seam of my Pants and Naomi of Barely Beige. Marsha and I have done a few blog tours together now, so I think you’ll all recognize her. Naomi is just getting started. I hope you pop over and read both of their reviews, and please make Naomi feel welcome .

craftsy-script-with-magnifying-glass-2

Now, let me share with you our real motive behind our plan to do these monthly class reviews – it’s to really watch all of these wonderful classes we’ve bought, and really get the most from them; you know – do the projects, make the wonderful makes, and not just have a lovely Craftsy class collection (as wonderful as that would be on its own). Is there anyone else out there who has classes they haven’t watched yet? I’m so guilty, but don’t tell my hubby!

So, for our first review we’re covering Design & Sew an A-Line Skirt, which was one of my first Craftsy classes.

design-sew

Of all the classes I’ve taken on Craftsy, this will probably be the hardest one for me to review. The reason for that is I’d like to just say great things about this class, or any class. It’s a little harder for this class to do that. Here are my first thoughts on the class from a couple of years ago. And here are a few more thoughts from that time.

However, I like to focus on positives, so I’ll share some really good things about the class now. Let’s cover those first.

One thing I like about this class.

One of the things I really like about this class is it taught me to put in an invisible zipper for the first time. I’d avoided them until this point. A regular zipper was fine, but I had been too intimidated to even try an invisible one. Just the name itself had scared me off.

Deborah’s instructions were very clear on how to install the zipper and I had no trouble. Her instructions were great really.

Here’s an old photo showing the zipper. (Sorry for these terrible photos – I was having camera trouble back then.)

invisible zipper

That zipper is about as perfect as a zipper can get. That’s a great aspect to the class.

I made a skirt that fit.

I did finish my skirt. That’s another positive for the class. Not only did I finish the skirt, but it fit as well. Here’s another (terrible) old photo.skirt

A personal dislike.

The skirt we make in this class sits a couple of inches below the natural waist, and I don’t love that. That’s simply a style preference.

Positive reviews with cautions.

This class is rated for beginners. It has reviews from 87 people and they have given it a 4.5 out of 5 stars. That’s pretty positive. However, there are comments in those reviews questioning whether this is really a class for beginners.

Maybe not for beginners.

The reason reviewers are saying this class isn’t for beginners is this instructor wasn’t answering questions. The fact that so many don’t receive answers makes me think this class might be better suited to someone with more sewing experience.

I had the experience of not having my questions answered when I ran into a bit of trouble. With this class, I made my first sloper. I’d had no previous experience with slopers.

square-up

Here’s a screen shot from the Craftsy class showing Deborah squaring up the pattern she’s making. This was the first area where I had trouble – ‘squaring up’.

My sloper was so curvy (like me) that squaring it was rather hard. I asked my question and didn’t receive an answer. I decided to simply move ahead even though my sloper wasn’t perfectly squared up. I did run into more trouble, and again didn’t have an answer to my question.

I contacted Craftsy about not getting answers.

Craftsy customer service.

ccs

Have any of you had any experience in dealing with Craftsy when a problem comes up? Craftsy is great! They have phenomenal customer service, and they came through for me with my unanswered questions.

When I emailed Craftsy with my frustrations over not having my questions answered, Craftsy checked and confirmed I did in fact have unanswered questions. Then made things right for me. That made me a happier customer. I still didn’t have answers to my questions though, which left a bit of a negative feeling about the class. That’s why this class review is a bit of a struggle. I have some negative feelings about this class.

However, to be fair, there are a few really great aspects to this class. So again, let’s focus on these:

  • I drafted and made a skirt that fit me.
  • I installed my first invisible zipper (and it looks great)!
  • There are a lot of positive reviews for the class.
  • With this class you make a modern A-Line skirt.

I think if you’re a competent sewer, there would be a lot you could learn from this class. So despite a bit of a negative experience, I, along with many of the other class reviewers, will recommend this class with a caution – it’s not for beginners.

I will let you know, we decided to start with our reviews but are taking December off. We’ll pick this up again in January. So no review in December.

Happy creating!

Great Timing!

No tricks today, but hopefully a treat.

I have both of the Bra-Makers Manuals. I have Demystifying Bra Fitting and Construction. I have Bare Essentials: Bras – Second Edition: Construction and Pattern Drafting in Lingerie Design. I’ve taken a few books out of the library as well – like Patternmaking for Underwear Design: 2nd Edition.

bra-drafting

I’ve been reading about drafting my own pattern for a while and decided it was time to take the jump. I started with the instructions in the Bra-Makers Manual Vol 2. I’ve used part of this already to draft my own cradle and band to help fit my Omega shape and had no trouble with it. So, I thought it was time I tried drafting my own pattern.

I did run into a bump drafting and sent off an email to Bra-Makers Supply. It turns out, the information from the manual had been updated, and that new information would take care of my question.

Now, with updated information in hand, I was ready to start again.

Just as I was about to start, there was another very timely post on Facebook. I love the sewing/bra-making forums on Facebook. They are a wealth of information!

untitled

Perfect! Rather than muddling through this mostly on my own, I’d much rather walk through with someone else for a first go.

We’ve just done some measuring so far, so the actual drafting hasn’t started. If you’ve ever wanted to try this out, here’s a great opportunity.

Here’s the blog post if you want to follow along.

Happy creating!