In my efforts to decide if I prefer the Sewy Rebecca pattern or the Pin-Up Girls Shelley pattern, I made another Rebecca. I know I love my last Shelley bra, and wanted another comparison with a few more adjustments made to the Rebecca.
This time I used a little bit of lace that was left over from a bra I’d made for a friend. And I mean there was just a little bit of lace. There was just barely enough for the upper cups – no mirroring the lace here, but they’re close – and then I had to get creative with the scraps that were left over to use them to make matching panties.
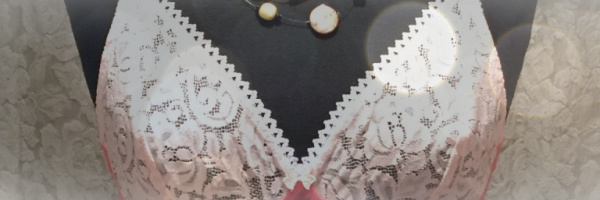
Here’s my very pretty Pink and Ivory Rebecca:

This is so pretty! I love this lace and have looked for it again, but… I can’t find it anywhere. I’d bought it at Bra-Makers Supply, and I haven’t seen it since. I’m ready to start hoarding lace! This is a lovely pink lace with very distinct ivory or cream in it. And it goes so well with the ivory Duoplex and Power net.

On the side view, you can see where I added just a thin strip of lace that was left over. It doesn’t take a lot of lace here to make the side look so much prettier.

And a basic back. I’m still using my alternate method of attaching the straps. I use some of the bottom band elastic on the outside of the band and fold that over the top of the band with a slider attached to it. Using the elastic here allows more stretch and movement than the strap elastic, it also conforms to the U-shape more smoothly. I also use two sliders rather than a slider and ring. I find the strap has a little less movement and making it less likely for the strap to fall off my shoulder.
So, what alterations did I do to the Rebecca to make it fit me?
The first changes I made were to the bridge – I know I have to lower it 1/2″, and an adjust for a flat spot on the bridge too. I also changed the cradle to a smaller cradle that normally takes a 36 wire rather than the 42 cradle the cup needs.
I thought about making small darts in the pattern to take out the excess, and although I love that neater look, I’m finding it does compromise the cup’s fit a bit. I need the extra space those darts take away. So, I put in gathers along the wire line.
The photo below shows the excess cup compared to the cradle. I have to make that all fit.

This photo shows the gathers in the wire line seam. I run a long gathering stitch along the wire line, pull the bottom thread to make small gathers all along the bottom of the cup. Then I sew the cup to the cradle. It works very well, and although there is still the odd little wrinkle where a gather is showing, steaming it well with the iron really does make most of those gathers disappear.

I used the Flexible wires again on this bra. They do make a difference in the fit. They are long enough for me, and conform well to the shape of the smaller channeling and cradle. However, they are not the easiest to get into that narrower U-shaped cradle. I had to fight with them a little. I told myself they are worth the effort. And once they are in, I don’t need to take them out again for a long time.
The inside of the bra is so pretty with its enclosed seams. I really do love that aspect of the Rebecca pattern.

And one last detail:

I sewed a pretty crystal in the inverted V of the bridge. It has movement and does move a bit. It’s so pretty when it catches the light.
Next week some matchy matchy – matching panties.
Happy creating!


