Ivory and Lavender

I just finished reading Mrs. Weaver’s latest blog post. Oh my! That’s about sums it up.

two bras

Honestly, I thought Lavender and Lace was such a lovely bra. This new color combination and the lace simply push it over the top.

Mrs. Weaver has a new website coming and this kit can be ordered on there. Just look how pretty this is:

kit

Oh, that is so pretty! I want. It’s really simple.

Happy creating!

Sleep Masks

I love to wear a sleep mask at night. I don’t want to see the light from the phone, or the alarm clock, or the smoke detector.

We were on holidays when I first realized how great a sleep mask was. The smoke detector was right over the bed and shining its evil green light in my eyes all night long. I went shopping the next day.

The one I’ve been wearing, well, it was old and falling apart. It was long past time for a new one. I looked around the web and found this pattern.

full_901_84191_AdultSleepEyeMask_3

This pattern (and the image) are both from PetitBebeCreatioNZ on Craftsy. The photo has a link in it, so you can just click on that and it will take you right to the pattern.

It’s a great pattern with wonderful instructions.

new vs old

What’s left of my old purchased one is shown at the top of the photo. It was literally falling apart – that’s just the inner piece. There was also the back and front that fell off it. Below it is the sleep mask I made using the free pattern. These are pretty much the same size.

However, it’s summer here and the sun is up early and down late. I don’t want any light at all. It was time to supersize my sleep mask. I found another free pattern on So Sew Easy. I found the instructions so thorough from the first pattern that I used them again and didn’t even glance at the other instructions, just the pattern.

Here you can see the new oversized one compared to the old fallen apart one. It’s definitely bigger.

Old vs Newest

Yes! Now we’re talking block out all the light.

For comparison’s sake, here are both of my new ones.

Newest vs new

That is seriously oversized! But I’m happy with it.

Another definite bonus of making my own sleep mask is I can measure how much elastic I need to fit me. The store-bought mask had Velcro to fasten it – and that Velcro caught in my hair all the time until I replaced it. This is good right from the start.

Happy creating!

Baubles & Backgrounds

Do you see my new blog format? I’ve been doing a little work on it in the past week. I’ll share more on that later in the post.

This week I was playing with beads again. It was time for a new Medical ID bracelet for me, and for a friend.

oldMy friend had purchased this bracelet, but as you can see, after wearing it for well over a year, she needed a new one. The coating on the Swarovski pearls had worn off. Now, she wears her bracelet all the time – in the shower, swimming – she doesn’t take it off.

I’ve used Swarovski crystals and pearls in the past and they haven’t done this, but I haven’t put them through all that hard wearing either. I take my bracelet off daily.

The new bracelet I made her is in the above photo as well, but here’s a better photo:

new over oldThe new bracelet is over the old one. It looks much better. Classic design and lines. It’s lovely. I just might need one too.

While I had all my jewelry-making supplies out, I decided to make myself a bracelet. I love turquoise in the summer but didn’t have a Medical ID bracelet in turquoise. I do now.

bracelet

The center three stone beads aren’t turquoise, but are the same stones I’d used in some earrings – dyed Imperial Jasper. The bracelet also has some lovely Sterling silver spacer and feature beads. I’ve been happily wearing it all week. My earrings, below, show you my matchy matchy. I made these last year.

blue earrings

Other than playing with beads, I mentioned I’ve been playing with my blog format. Do you like it? I love it too. It looks so clean and crisp.

Sadly it took more time than I would have liked. I’m not the most technical person, but I’m learning! Just to give you an example I took a full day to redirect the traffic from my old blog site to my new one. After spending time researching, trying something, it not working, more research and more tries… well, I found out I couldn’t do it myself. WordPress had to do that. It was so easy after I pushed a button and paid them a very small and very worthwhile fee! Done.

After redirecting, I spent some time taking photos for my background. I’d found a lovely lace background that I would have had to pay a terrible price to use – way more than real lace cost! Hmm, time to get some lace out.

Here are a few of my attempts before I found just what I wanted:

sparkle ivory over gold

This is a lovely lace, but I wanted more in my background than just lace. The lace background was my original inspiration, but now I wanted more of me in it.

horizontal black white and gold over goldThis is my kind of lace. This is so beautiful, but I found the black a bit distracting as a background when I was trying to read the text. As much as I loved it, I thought a little less just might be better for a background.

photocopyThis one was a lot closer to what I wanted and what I felt represented me. But It wasn’t quite perfect for me yet. For my final background, you can see I kept my pearls and added my thimble. Perfect!

Happy creating!

The Perfect T-Shirt

Last year I saw a Sewing With Nancy episode – Sew the Perfect T-Shirt. I was so glad I PVRed that episode. I have been wanting to make a T-shirt, and who doesn’t want the perfect one?

You can watch the episodes here: Part One and Part Two.

After watching the episode, I immediately went over to Pamela’s Patterns and ordered her Perfect T-Shirt pattern.

Perfect Tee

The pattern has been sitting patiently on my desk with so many other projects for a few months now, but it was time. I bought a whole whack of cotton/Lycra to make Tees for summer. It was time.

I love the approach Pamela takes on the show. You determine your size, and then start with that sized Tee, any alterations are done to that first Tee and the pattern at the same time. I think that’s a great idea! That way you get a corrected pattern and a correctly fitting Tee with one alteration.

There was one glitch. I started reading the instructions (see, I learned from the last project) and then went to our local fabric store to find Stay Tape. Well, it seems no one in Canada seems to know anything about Stay Tape. The stores don’t carry it. So instead of getting on with my sewing, I was trying to figure out a replacement for Stay Tape. We also had a looming mail strike, so there was no way I was going to order anything and possibly wait three months to get it.

I used woven and knit interfacing in place of the Stay Tape. I found a great blog post on Pattern Fantastique describing  how to make your own Stay Tape and decided I’d try it.

Here’s the interfacing on the shoulders. I used woven interfacing as Pamela said to use the woven stay tape here.

Interfacing

For the neckline I used a knit interfacing. Both were fine. (Sorry for the blurry pic.)

Interfacing on neckline and sleeve

Here’s my Tee:

Front of Tee

I adjusted this pattern to make a size Small top, with shortened armholes, lowered the bust dart, and graded up a size for my hips. The grading up gives this tee a peplum look, which I wasn’t wanting. The hips are a bit loose, so I may try a size Small for my next tee.

And from the side:

Side of Tee

I love how the darts on this disappear. You can’t see them at all. That was a small concern I had before making the pattern. I didn’t want to draw attention to my bust by adding a dart to give enough room for the bust. It might be different on a solid colored fabric, but on this it’s great!

And the back:

Back of Tee

It all came together very well, and I will definitely be making more.

I really like this pattern. Pamela has a second pattern that goes with this one that’s all necklines. I know what I’m ordering soon. I love the darted bust, which saved me from making a Full Bust Adjustment.

I do have a couple of changes to make still. I think I’d like longer sleeves for my tees, and the neckline is a tad loose. I need to adjust the inner shoulders to bring that up.

Here I am on a really feel-good day in a total Me-made wardrobe:  top, bottom, and undergarments. And I’m in the mountains (trying very hard not to squint). My hubby says take off your sunglasses. No sunglasses = squinting.

Me in mountains

Happy creating!

Canada Day Blog Hop – Jalie Sewing Patterns

Tomorrow is Canada Day. Happy birthday, Canada!

For my stop on the Canada Day Blog Hop, I’ve used a pattern from a Canadian pattern company that’s new for me. Although I’ve heard of Jalie Patterns, I had yet to try any of their patterns. Thank you, Jalie, for providing me with your 2568 Camisole & Panties pattern for our blog hop.

jalie-logo

First, I’d want to say, I had a little difficulty finding the sizing for Jalie’s patterns on their website. It’s not prominent, but it can be found. You know all those sayings about reading the instructions first? Well, the sizing information was with the instructions. I could have made things easier for myself if I had started with them. So if you try Jalie’s patterns, don’t search all over their website for sizing – it’s with your pattern.

For anyone who’s wondering, I found Jalie’s sizing spot on. First, I found my size on their sizing charts and marked my multi-sized pattern, then I pulled out my knit sloper to compare. It was so very close, it might as well have been an exact match – my bust and hips on my sloper hit exactly where the sizing charts put me. That’s good! However, I was wondering about the neckline and if it would be too big. I wasn’t sure, so I decided to follow the sizing guidelines. My reason for wondering is I’m a S, M, and XL all wrapped into one. Jalie doesn’t use the sizing S, M, L… Their sizes run from an F to a FF (looking at the Panties). So it’s a completely different way of sizing. Everything is explained clearly, so just follow what they’re saying and you’ll get a great fit.

Jalie’s patterns are multi-sized patterns – 27 sizes in all. Before you faint when looking at all those sizes, take into consideration there are Children, Women’s and Plus sizes all on one PDF pattern. Being multi-sized with so many sizes, there are at times some dizzying lines to follow to cut out your own size, but it’s all doable.

Jalie pattern piece

You can see from this piece of the pattern there are a lot of lines coming together at that one point. I’m used to Adult multi-sized patterns with only four or five lines.

So, how did that neckline fit? It is loose. However, I made this camisole into a nightie, so I’m not minding that it’s looser in the neckline. For a camisole, I would make a smaller size for the neckline and adjust for the bust.

wider lace at neckline

Above you can see the neckline in the pre-sewing stages. I first looked a thinner lace (below), but decided on this one, which is the same lace I used for the hemline.

Lace for neckline

This thinner lace has no oomph at all. The thinner lace was used for the armholes and leg openings.

Here’s my lovely summer nightie:

Nightie 2

To make this I simply added six inches to the bottom of the camisole pattern. It was very easy.  As I mentioned, I added some lovely lace to dress up the hem a bit more too.

Now onto the panties. I chose the low-cut Hipster panties from the pattern. The pattern comes with four different styles of panties to make and match the camisole. There are low-cut Hipsters, high-cut Hipsters, Bikinis, and an all-lace Hipster option.

Hipsters

These panties are super cute. Overall, this is a very sweet camisole/panty set.

Set

In celebration of our blog hop, and Canada Day, and everything Canadian, all of Beverly Johnson’s classes on Craftsy are 50% off! Yes, just follow this link and you can get any of Beverly’s bra-making classes, or her swimwear class – but only until July 3rd. ‘Only in Canada, you say?’ Well, we’re not talking Red Rose Tea here. These Craftsy savings are for anyone! (Sorry if you missed our discount. I’m sure there will be more savings in the future.)

And speaking of the Fairy Bra Mother, if you missed it, pop over to Seam of my Pants to read Marsha’s interview with her here. It’s a great interview! (Why didn’t I think of interviewing the Fairy Bra Mother!!!)

As well, don’t forget all the deals I mentioned when our blog hop started. You can find all the savings being offered on Happy Okapi here.

Happy creating!

a Rafflecopter giveaway


Canada Day 2016 Blog Hop Schedule

Be sure to visit each of these brilliant blogs this week for more on our
outstanding Canadian designers and suppliers:

And, of course, to enter our giveaway for some sweet-like-maple-syrup prizes.

June 24: The Tour Starts HERE at Happy Okapi

June 25: Celine guest posts on Happy Okapi; Marsha @ Seam of my Pants

June 26: Fiona @ Tangled Blossoms Designs; Carla @ Half Dozen Daily

June 27: Sherry @ Thread Riding Hood; Reece @ Happy Okapi

June 28: Nicky guest posts on Seam of my Pants

June 29: Daniela @ On the Cutting Floor; Reece @ Happy Okapi

June 30: Michelle @ Michelle’s Creations

Canada Day–June 31*: Ula @ Lulu & Celeste

July 2: Marsha @ Seam of my Pants

July 3: Keshia @ Sand Dollar Design Studio

July 4: Wrap Up @ Happy Okapi

July 6: Giveaway winners announced

* Yes, we know!


The Pasha Pleated Clutch

The Pasha Pleated Clutch is an adorable clutch pattern by Betz White. You can find the pattern in her book: Present Perfect.

61p8xMOmlUL._AC_US160_

I first saw the clutch last year when it was blogged about on the Sewing Collective. You can see that post here. I loved it from the moment I saw it, but was looking for the just perfect material and hadn’t made it up for myself yet.

Then a friend’s birthday was coming around, and I had to make something for her. I decided to make her a clutch – but not the Pasha Pleated one. I don’t know why not. I didn’t even think of it. I just picked another pattern from my pattern stash.

That pattern really didn’t turn out. I tore out my stitches five times, all in different places. Then at the last, when I should have been finished, it was still wrong. I had no heart to try again. I cut my hardware out of it and moved on.

Garbage

Sadly, there it is. There won’t be any reminders after the garbage goes out. Just after I tossed it, I remembered about Pasha Pleated Clutch pattern.

Pasha isn’t a hard sew, and really looks so pretty. Pamela, from the Sewing Collective, added a zipper. I think I’ll try that the next time I make it. I’m also thinking a wrist strap will be nice too.

Here’s my Pasha for my friend’s birthday:

Bag front

I love these materials together! You can see here how the pleats are on the front, and why it has its name. They take a little time to create, but are very worth the bang the bring.

Pleats

Here’s the inside of the bag. The lining is very nicely done – it doesn’t turn out loose or baggy. I’ve made a couple of bags that I haven’t loved the lining. I want the inside of my makes to look as nice as the outside – bras, bags, whatever I make. I love everything to look nice and neat inside and out.

inside-of-bag

Lastly, here’s the back of the bag. Nice, neat, pretty. I’m quite liking this pattern. And I really like how I didn’t fight with every step.

Back

Happy creating!

The Great Canadian Craftsy Bag Tour Give-Away

Please note, all contest links have been disabled as the contest is now over.


Hello again!

We’ve just barely made it home after our Craftsy escapade all across Canada. We’re unpacking our luggage and finding some great souvenirs from the trip, but it’s just too much to keep for ourselves. And because you’ve been such perfect road trip companions, we’d like to share them with you. Up for grabs are 4 coveted prize packs from our travels, as well as the special gift that Craftsy sent to us while we were gone gallivanting.


* This post contains affiliate links. If you visit one of those pages via my link, I may receive a small commission from the seller, at no additional cost to you.

12795131_10153307342291949_7066404965296167236_o

First up is the Craftsy gift:

* Please note: If you entered this giveaway before Friday, April 8, your entry may not have been recorded correctly by Craftsy. Please enter again. This colourful tote bag kit includes the Rowan Three-Quarter Patch Tote pattern, some stunning Kaffe Fassett fabric, plus all the Pellon Fusible Fleece stabilizer you will need for the project. The only things you would have to add to this are a coordinating button, some thread and your time. Voila! You have a gorgeous tote that will be the envy of tote-al strangers. It’s almost like instant Jello pudding, only better! Follow this link to enter before midnight April 11, 2016:


The Souvenir Prizes

Prize A (Canadian, US and International entries accepted)
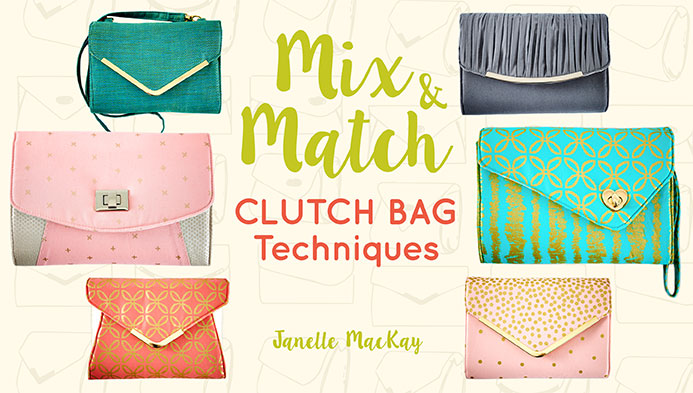
  • 1 Craftsy Class: “Mix & Match: Clutch Bag Techniques” by Janelle MacKay of Emmaline Bags
titleCard
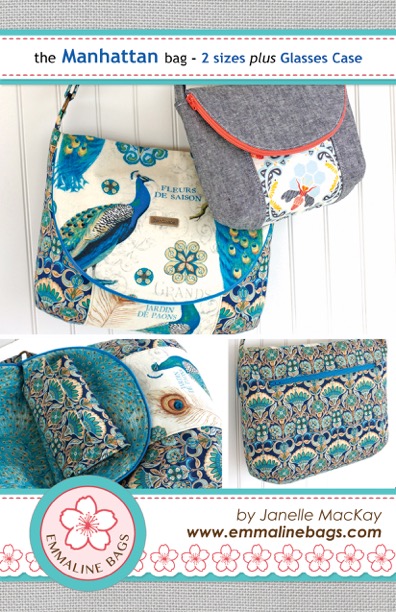
Prize B (Open to Canadian residents only)
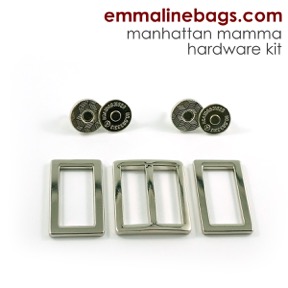
manhattan cover for web Manhattan mamma hardware kit in nickel finish
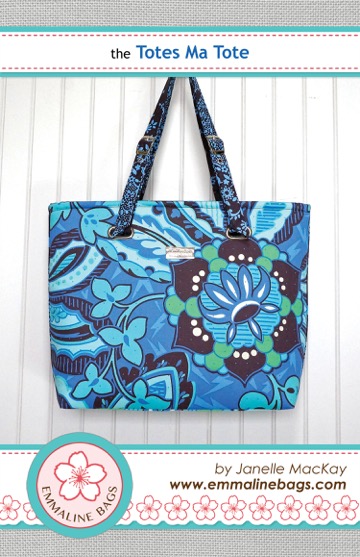
Prize C (Open to Canadian residents only)
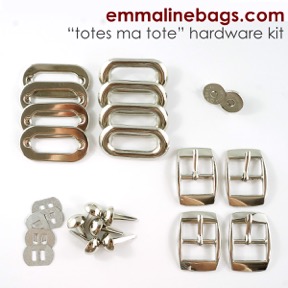
TMT cover Totes Ma Tote Hardware Kit
Prize D (Canadian, US and International entries accepted)

(You choose the pattern!)


Giveaway Rules:

  • Prizes are awarded “as is”. No substitutions.
  • Deadline for entries is 10 AM PST on Monday, April 11.
  • Winner’s will be notified by email within 3 hours of the contest closing, and will then have 24 hours in which to respond to the organizers.
  • It is each participant’s responsibility to ensure they sign in to Rafflecopter with a valid email address, and also check their email accounts for notification.
  • Entries requiring a blog post comment, social media follow, or trivia answer will be verified using the name provided by the participant.
  • The giveaway is open to anyone worldwide. International or US residents who win a prize designated as for Canadian Residents Only may be required to pay for the additional shipping, or forfeit the prize. If said winner chooses to forfeit the prize, another winner will be chosen from the remaining eligible entries.

Many, many thanks to all the wonderful people who’ve followed us on The Great Canadian Craftsy Bag Tour. We hope you learned a little about our very large, diverse and beautiful country while you got a peek into some of our favourite Craftsy classes.

And very special thanks to the amazing, supportive people who helped make the giveaway and our graphics just that much better: Celine from Blue Calla Patterns and Elle from Brand UR Shop Graphic Design. Take a bow ladies! Prize Sponsors

Happy travels until the next time we take you tripping and traipsing!

Marsha, Janelle, Deb, Fiona, Michelle, Reece, Shelaine & Ula

Please note, all contest links have been disabled as the contest is now over.


Announcing The Great Canadian Craftsy Bag Tour

Craftsy bag tour image b

The Great Canadian Craftsy Bag Tour starts today! Just what is the GCCBT? To sum it up, we’re all Canadian bloggers, we all sew, we all love Craftsy, we all reviewed some of the bag-making classes on Craftsy, and we put it all together for you to read over the next week.

The whole time the tour was being put together, I keep remembering an old television ad for Red Rose Tea: “Only in Canada you say? Pity.” Well, the bloggers all may be in Canada, but you can read along from anywhere in the world with no duties, tariffs, or shipping costs.

Head over to Emmaline Bags to start the tour today. And join us every day for the next week on our tour. It’s going to be fun, informative, there are prizes, and discounts too!

Happy creating!

Just One More Stop at the Fabric Store

You all must really be wondering if I’m sewing at all anymore. I am, but I can’t show you… yet. All I can do is give you a tease of what’s to come.

photo teaser

Isn’t that beautiful fabric? I’m going to make you wait to find out what I do with it, but I won’t make you wait very long. Just wait until Monday, April 4th and I’ll tell you more.

So, I have one more adventure to share with you from my recent trip to Ontario. I stopped at Fabricland. In fact, I stopped at Fabricland… a few times. I told my hubby I had to go. I kept remembering all the sewists on a forum I follow who had found wonderful printed Cotton Spandex at their Fabricland stores in Ontario. There was none at my store, so I had check while I was there. I found a store close to my sister’s home. Let’s call this Store One. You’ll understand why shortly.

I scored some wonderful Cotton Spandex at Store One, which I showed you in my last post. Then I saw another store as we drove to my Mum’s. We’ll call this Store Two. I did go in, but there was nothing new there. In fact their sales were different. In Store One, the Cotton Spandex was 50% off, in Store Two it was only 25% off.  Store Two was a different division, I was told. However, there was a new sale starting in a few days, so a few days later I went back to Store Two.

My hubby dropped me off and in I went. Right away I could see the Cotton Spandex was not on sale. I had a few minutes before my hubby came in so decided to look around. Just look what I found:

black lace with gold flowers

black lace with red flowers

black lace 1

I couldn’t believe my find! I also couldn’t believe the price. It was $4.95/meter. Well, forget Cotton Spandex. I was buying lace!

I had just had a big shop at Bra Makers Supply, so I knew I had to be a little more careful with my spending – my Christmas money wasn’t going to last forever. I only planned to buy those three laces. I was really pleased to find them and with their price. Just imagine my delight when I got to the cashier and found out they were on sale by half again! I only paid $2.50/meter for the laces!

My hubby had come into the store by then, and was still helping me keep to our schedule. I really wasn’t in Ontario to shop. Once we were in the car though, I told him I needed to go back to Store One and see if they had laces too. His reaction was typical of a non-obsessed, non-stash-building, non-bra-maker. ‘What? You were just there!’

Then I explained the savings we’d have. This lace is what I need for bra-making. It’s a great saving. It’s only on sale for a limited time. I persuaded him it was a good thing for me to go back to Store One again.

Store One had only one little bolt of lace, but I bought a meter of it.

brown lace

Now my truely obsessive bra-making nature came out. I had to go back to Store Two and had to buy more of the laces. My hubby was done. He was not going back to Store Two for a third time. So this time, after a family visit, my niece and I went back while the sale was on. All these laces were $2.50/meter. Talk about a score.

black lace 2

black lace 3

black lace clovers

purple lace with pink

purple lace with silver

white lace with peach shimmer full

white lace

Once I was back home, a friend wanted to make some panties. Off to the fabric store we went and what do you think I saw? Thankfully, it wasn’t lace! There were bolts of Cotton Spandex though. I’m still very happy with all those trips to Fabricland One and Two.

Happy creating!

A Trip to Bra Makers Supply

We all have plans and we all have schedules. Mine changed suddenly last week, and my husband and I found ourselves flying to Ontario, Canada with only a day and a half notice. I knew right away though, there was no way I was going to be within hours of Bra Makers Supply and not go there. I started to make plans right away.

So here’s a little post about my trip to Bra Makers Supply. I was so excited to go, and to meet everyone. However, I arrived the same morning everyone was leaving for the Bra Makers Cruise. That was a small wrench in my plans, but I did get to meet Beverly and some of the staff. It all worked out great.

Beverly and M

Beverly is as wonderful as you think she is, and so is the store! Due to our schedule, my DH had to rush me a little to get me out of the store. I arrived with a list in hand, and wanted to take my time and enjoy the whole process of being there, looking at everything, selecting what I wanted, taking photos all along the way. Our schedule demanded otherwise.

I did buy all the things on my list, but I didn’t take anywhere near as many photos as I wanted.

There were shelves that went almost to the ceiling. Everything is wonderfully organized; truly a bra-maker’s delight. Along one wall there were plastic baskets of rings, and sliders, and wires, oh my! Along the opposite wall were more shelves with laces, elastics, simply everything we need.

shelves

Just imagine shelves of laces!

wall of lace

Next to these were the Stretch Laces. I really could have spent a lot more time there. Well, my money would have run out eventually.

Below are just a snippet of the elastics. Right in the middle of the lower shelf that’s showing in the photo – the new Grey and to the right of it, the new Black Cherry. Oh so pretty! I heard they are going to be part of complete Finding Kits in those colors. Yay!

elastics

It was so fun, but DH was keeping me to my schedule. So a few quick photos, and it was time to seriously shop and hit the road again.

I bought everything I need for my Spring/Summer bra and panty wardrobe. That will be another post.

haul

Oh, just look at that wonderful stash and me not at home with my sewing machine.

After we went to Bra Makers Supply, we made another quick stop: the location of the original Tim Horton’s restaurant. This may be the original site, but a new building has been put up.

building

This location is part restaurant – you can buy your coffee and whatever else Tim’s offers – but it’s also a museum. It was really a fun walk-through. Here are a few photos from the upstairs.

Does anyone remember these prices?

prices

Here are the original donuts that were offered. I don’t remember any of these.

donuts

I thought this was a cute sign, so took a photo of this too. I have no desire whatsoever to be a Donut Maker, but a Bra-Maker. Yes, please!

sign

This poster was great. I love how it tied the donuts to hockey. For all the non-Canadians reading, Tim Horton was a Canadian hockey player, who after that career, opened this chain of famously popular coffee shops, that are still very popular today.

wall

My hubby is a Timmies fan, so this part of our stop in Hamilton was a highlight for him. With me not shopping, I had a little more opportunity to take  few photos.

D and sign

I can’t wait to get home and start sewing. Happy creating!