When Repairs Don’t Go So Well

There was no post last week because I was busy moving my FIL. There’s no time to sew when you’re packing up someone’s house. It’s been so busy, it’s taken me two weeks to finish this one bra.

A Bra Lament

One issue I’ve had fairly consistently with ready-to-wear bras is the wire on the left likes to break out of the channeling. I’m not sure why it’s only the left side, but it’s been consistent.

I haven’t had this problem with my me-made bras though. At least not until my most recent Ruby, that is. And I like this Ruby SO much. I was wearing it while out one day and the wire poked through the top of the channeling – on the left side. I spent the day trying to pushing it back in without drawing attention to myself and my bra woes.

Once back at home, I attempted a repair. Black thread on black channeling on black duoplex won. I made a hole in my very pretty new Ruby bra while trying to repair it.

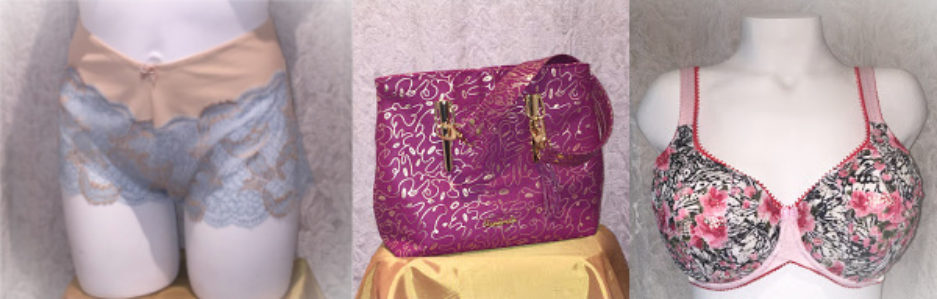
I still have some of this gorgeous lace. So, I decided to make the bra again.Oh, I do like this lace. I’ve made an Angie, a Ruby and two pair of panties with this. And after cutting out a second Ruby, there is still more lace left over.

 My New-Same-as-the-Last Ruby

I’ve measured and re-measured to make sure everything about this new Ruby will be perfect. One of the things I’m still really delighting in is how my cups are fitting into the cradle now – without wrinkles. I just love how it looks now.

Here, see what I mean?There are no wrinkles, no puckers, no gathering. It looks clean and professional. Just the way I want my bras to look. I sent off a message to Jeanette telling her (again) how thankful I am for her class and all her little tips.

I jumped right in there and showed you the side of my new Ruby, so let me show you the front now. It’s almost exactly the same as my previous Ruby.   It doesn’t have its bow yet, but that’s still coming. I wanted to get my post out while it’s still today.

Here’s the back.I hope I can find a little more time to sew this week. My FIL is almost all moved into his new home, so a little bit more decorating, and I should be able to find time again.

Happy creating!

Revisiting McCall’s 6516

Last year, I made a jacket I love. I wear it often. It’s my McCall’s 6516 jacket.

jacket-flap-undone

I love my jacket, but my hubby doesn’t. Now, before everyone jumps all over him, let me tell you exactly what it is he doesn’t love.

He doesn’t love that unfinished look to the flap. ‘Add some lace,’ he says. I have no desire to take the jacket apart to add some lace.

You can see here, the materials shown on the pattern’s envelope don’t have any large white ‘unfinished’ looking flaps, but I love this material.

m6516_a

I do have to admit I don’t love the white flap either. I decided to revisit my jacket. Out came my little black fabric marker.

Here’s my jacket half done.

jacket-both-flaps

 I’ve been sitting and relaxing while I draw inside the jacket. Okay, it does look better.

Here is it all done and laundered.

washed

It did fade a bit in the laundry, but it still looks better. Have you used a fabric marker on anything? What was it? How did it turn out?

Happy creating!

Baubles & Backgrounds

Do you see my new blog format? I’ve been doing a little work on it in the past week. I’ll share more on that later in the post.

This week I was playing with beads again. It was time for a new Medical ID bracelet for me, and for a friend.

oldMy friend had purchased this bracelet, but as you can see, after wearing it for well over a year, she needed a new one. The coating on the Swarovski pearls had worn off. Now, she wears her bracelet all the time – in the shower, swimming – she doesn’t take it off.

I’ve used Swarovski crystals and pearls in the past and they haven’t done this, but I haven’t put them through all that hard wearing either. I take my bracelet off daily.

The new bracelet I made her is in the above photo as well, but here’s a better photo:

new over oldThe new bracelet is over the old one. It looks much better. Classic design and lines. It’s lovely. I just might need one too.

While I had all my jewelry-making supplies out, I decided to make myself a bracelet. I love turquoise in the summer but didn’t have a Medical ID bracelet in turquoise. I do now.

bracelet

The center three stone beads aren’t turquoise, but are the same stones I’d used in some earrings – dyed Imperial Jasper. The bracelet also has some lovely Sterling silver spacer and feature beads. I’ve been happily wearing it all week. My earrings, below, show you my matchy matchy. I made these last year.

blue earrings

Other than playing with beads, I mentioned I’ve been playing with my blog format. Do you like it? I love it too. It looks so clean and crisp.

Sadly it took more time than I would have liked. I’m not the most technical person, but I’m learning! Just to give you an example I took a full day to redirect the traffic from my old blog site to my new one. After spending time researching, trying something, it not working, more research and more tries… well, I found out I couldn’t do it myself. WordPress had to do that. It was so easy after I pushed a button and paid them a very small and very worthwhile fee! Done.

After redirecting, I spent some time taking photos for my background. I’d found a lovely lace background that I would have had to pay a terrible price to use – way more than real lace cost! Hmm, time to get some lace out.

Here are a few of my attempts before I found just what I wanted:

sparkle ivory over gold

This is a lovely lace, but I wanted more in my background than just lace. The lace background was my original inspiration, but now I wanted more of me in it.

horizontal black white and gold over goldThis is my kind of lace. This is so beautiful, but I found the black a bit distracting as a background when I was trying to read the text. As much as I loved it, I thought a little less just might be better for a background.

photocopyThis one was a lot closer to what I wanted and what I felt represented me. But It wasn’t quite perfect for me yet. For my final background, you can see I kept my pearls and added my thimble. Perfect!

Happy creating!

A New Home

I’ve moved! Well, I haven’t moved physically, but my blog has. I’m not longer at eforshopping… Now, if you’re looking for Michelle’s Creations, you’ll find it at www.michellescreations.ca. If you don’t already follow my blog via email, you’ll now be able to find my blog much more easily.

Things have been rather busy of late. I’d love to start posting on my new blog address with something spectacular. Sadly, I only have some matchy matchy to share.

My new Ivory bra now has two beautiful matching panties.

I’ve used my favorite TNT panty pattern – Kwik Sew 2286. One of these days, I’ll have to try another pattern again, but I really love these. It’s a harder-to-find pattern, but if you can find it, grab it!

For these panties, I couldn’t find any Ivory cotton spandex. So, instead of cotton, these panties are bamboo spandex from Bra Makers Supply, and they are so soft! They’re just dreamy. I’m not sure I’m ready to trade in my favorite cotton in for these, but they’re a beautiful alternative.

Bra with panties

The bamboo isn’t an exact match, but let me tell you, Ivory is not an easy color to match. I bought some cotton spandex that is Ivory that didn’t match (It looked yellow in comparison), I bought some lace that didn’t match. Grumble, grumble.

Here are three different Ivories – the bamboo and two laces.

3 ivory

And here are four. The bamboo, the lace I used on my bra, and the two lace trims. Seriously, every shade possible.

4 ivory

Okay, grumbling aside. I took my bamboo to the fabric store with me and matched it the best I could with some lace trim. All these others will simply go in my stash.

My first pair of 2286s is the basic pattern. I do love it, but also like to play with the laces. When I did the cover-up on my bra, it took up the lace I had planned to use on the front of one of the panties, so I needed to think of something else. I decided to do a crisscross pattern with the laces, which form a small V at the waistline.

Front of panty 2

On the back you can see how I trimmed the bamboo from under the laces:

underside of panty 2

I love the look of the pinking sheers for trimming the bamboo or cotton under the lace usually, but my pinking sheers weren’t going to fit in that narrow V shape very well. My small scissor that I use to trim threads worked perfectly.

Underside of panty after trimming

There! Two nice new pairs of panties to go with my Ivory bra.

Happy creating!

An Ivory Bomb

I heard today was National Bombshell day. I wasn’t exactly celebrating, but I made a bomb of my Shelley.

There’s been a lot going on all around my hubby and me, so I’ve been taking my time on any projects – trying to not make any mistakes. For the most part that’s helped. Taking my time wasn’t the issue here though.

Here’s the first of my new Spring lingerie wardrobe:

front

It’s looking pretty good there. I added a Gothic arch (and I know I still need a little more practice.) I also added some fun bling. I even added a crystal to the bow to dress it up too. I really like that!

The sides looked great too. I added a bit of lace to the bottom of the band. I always look at the lace that is left over from the cup and want to do something with it. This turned out well. Everything here was just fine too.

side lace

Here’s the back of the bra.

back

Again, everything worked out just fine for the back of the band. There were no issues at all. In fact, there were no issues until I tried it on.

What the heck! It was puckering out at the underarm. This is my tried and true pattern! In fact, the last time I made my Shelley, I had compared all the pattern pieces to one of my bras and put a big pink check mark on the pattern pieces so I knew they were good. (I have a lot of pattern pieces floating around.) So I knew these fit or at least they fit at the time.

So, really?

What the Heck

Here’s the big pinch I took out of the left side of the bra when it was on me. There’s an identical pinch taken out of the right side. That’s an inch and a half! I am seriously tempted to just cut, overlap and sew the bra back together. It would look terrible, but who’s going to see it but me? It’s been almost a year since I’ve made a bra, and I need to make a few new ones.

I know I’ve lost a little bit of weight, and I really do mean a little bit. It seems I’ve lost a few inches from around my underarms!

As annoyed as I was when I finished this Ivory Bomb, I’ve already re-adjusted my Classic pattern, and will transfer those changes over to my Shelley pattern now. The next one… well, I’m making a muslin of the cup first.

pattern

Happy creating!

Sewing Amidst a Mess

My sewing room feels like a disaster right now. It’s somewhat functional, if I don’t mind stepping around piles of things needing to be sorted and re-arranged. On top of the sewing space feeling like a bomb went off, my camera isn’t working properly. I’m hoping it’s just the USB cord and I’ve ordered a replacement. It will still take photos, I just can’t get them off the camera. So here are some from my phone. (not great quality)

12510893_10208509672839346_380529776_o

This might not look too bad for some, but for me, well, I’m not enjoying my space at the moment.

What happened? Well, remember my new-for-me serger? It’s all computerized. The outlet I had the previously-borrowed serger plugged into didn’t have a surge protector on it – it didn’t need it. That serger wasn’t computerized at all. I live in a town, outside a major city. The city has regulated power. I don’t. When I bought my sewing machine, I was told if there’s a surge of power, it will fry the circuits of my sewing machine, and now my  serger. I needed a solution before I could use it.

It took a while for me to convince my hubby that this was a priority. But it’s done now, and I just need to re-organize.

IMG_0278

Here’s my new little surge protector for both my sewing machine and my serger. This little guy is screwed into the outlet so there’s no chance it will come loose. My sewing machine and serger both have a new desk too.

IMG_0280

It’s cozy, but it works.

I’ve even completed my first project in the new space. Just after the New Year, a neighbor came over asking me to alter her costume for her granddaughter. I don’t enjoy alterations, but because she’s a good neighbor, I said yes. I’m going to have her spread the word that I’m terribly expensive so I don’t get a bunch of costume renovation customers. I’d much rather sew selfishly or for gifts.

IMG_0277

It’s a charming costume, and the alterations weren’t hard. It was too big in the waist and arm, and the shoulders needed to be taken up too. I’m hoping to get a photo of her in the costume.

Now for some me sewing. I have a Swoon Coraline Clutch all cut out.

Happy Creating!

My ‘New’ Serger

Many, many years ago, my wonderful husband bought me a serger. He surprised me with it, so I hadn’t had any input into the decision. He just wanted to make me happy. And he did!

The serger, however, did not. It was a Kenmore. I don’t remember the model, but it was nothing but trouble. It would not stay threaded no matter what, and that was only one of its problems. I’d taken it back for repairs three times while it was still under warranty. Finally, the last time I took it in, I found out there had been a recall on it. The store replaced it on the spot. That was wonderful!

The big problem was, I wasn’t in love with the idea of a serger anymore. Yes, they can be great, but after three years of nothing but trouble, I didn’t even want to use it. I wasn’t using it. It sat for years. I finally sold it.

There were times I did regret selling it. Every once in a while I’d borrow one from a friend, because they are great in finishing everything so quickly and neatly. When they work, they’re the greatest.

Do you remember a while back I mentioned a friend had let her serger and Cover Pro machine come and stay at my house? I was going to let the Cover Pro stay here, but her serger didn’t work very well. I had taken it in to be repaired and the repair man said it wasn’t a very good machine – it wouldn’t hold the thread, it was loud and it shook a lot. Hmm, that was not what I was wanting… again. After struggling with it, I called her up, thanked her for her kind offer and gave it back to her. Now, in her defense, she’d never even used it, so had no idea.

untitled

untitled (2)

     I wasn’t having the best of luck with sergers, was I? However, if you’ve read my blog for any amount of time, you’ll know, I don’t give up.

Just a few weeks ago, I called another sewing friend to ask if I could borrow her serger. She said, ‘Yes, of course.’ Then she said she’s selling it and wanted to know if I was interested.

Well, to make a long story a little shorter, look who came to stay at my house:

products_machines_1300mdc_header

This is the Bernina 1300MDC. Just to assure me she’s a great machine, she came with a sticker on her front saying she’s the Consumer Choice 2010.

I just (finally) had time to sit down and start reading through the manual. I didn’t get very far before I was absolutely stunned by what I was reading. I was reading how to insert the needles, and it said how to change the Left Needle for Cover Stitch, and the Center Needle for Cover Stitch, then the Left for Overlock, and the Right. I stopped reading. I read that all again. This is a Cover Stitch machine too? I had no idea!

I called my friend and asked her. ‘Yes,’ she said. I must have sounded a little odd because I couldn’t believe what I was hearing. I had no idea when I got the machine that it was both. I simply thought it was a great serger.

She went on to say, she’d just had it serviced to make sure it was in perfect working order before selling it. I’m thinking my serger luck has changed! Woot woot!

Happy creating!

Odds and Ends

This week has been a week of making odds and ends and getting caught up on things. I keep looking at my sports bra muslin and wanting to get at it again, but other things needed to be done.

One of the things I made this week was some oil for my hair. I have naturally curly hair and if I don’t want a head full of frizz, it needs conditioner, and then more conditioner. I was out of my conditioner and with the temperatures dropping, I needed it.

hair-oil

A few years ago, I made my own version of Ojon’s deep conditioner – I didn’t use all the same ingredients, but looked at the main ones and used a couple of them. Then over the years, my recipe changed. I now make mine with Shea butter, Palm Kernel oil, Avocado oil and Bees’ wax. I melt them all together and then let them cool in a little storage jar. I use about a teaspoon of the oils every time I wash my hair after I’ve dried it with a T-shirt (yep, no towels for curly hair – they just create more frizz) and it really helps to keep my hair from drying out. Here’s my recipe:

4 oz of Shea Butter

2 oz of Palm Kernel oil

2 oz of Avocado oil

1 tsp Bees’ Wax

In a double boiler, melt the Bees’ wax and the Palm Kernel oil, then add the Shea butter and Avocado oil; let them all melt. Pour into a container with a lid and let cool (uncovered). Once you have the ingredients, it’s very simple and easy to make. It also lasts a long time.

Another homemade recipe I use is for my facial toner and I was out of that too, so made some this week. This one has Orange Blossom water (The original recipe had Rose water, but my DH didn’t like that smell, and after he’d something about an ‘Old Lady’ smell, I changed it.), Aloe Vera juice, Vegetable glycerin and Neroli oil. I spray this on every morning before I put on my moisturizer. I love it! Here’s the recipe for this one:

2 oz Orange Blossom water

2 oz Aloe Vera juice

2 tsp of Vegetable glycerin

2 drops of Neroli oil

The toner won’t stay mixed, so just give it a shake in the morning before spritzing it on your face. It feels so refreshing. As well, I use the same spray bottle the Orange Blossom water comes in and store what I’m not using in a glass jar in my kitchen cupboard.

Toner

So that’s been my week. I hope to get more sewing done next week.

Happy creating!