My Bosom Buddy

Welcome to Michelle’s Creations. Today, it’s not about me at all. Today is all about my Bosom buddy– everyone else was doing right/left bra cup analogies, but we’re making panties… the bra cups don’t fit here or there. I know…. she’s my booty buddy!

picmonkey-image-banner-2016

You’ll read all about our makes and reviews on Friday, but today? Here’s a fun peek at Deb.

14339192_10153706309875764_683850691_o

This is Deb’s favorite photo of herself. Her hubby took this photo of her just a few days ago.

Deb’s favorite bra is a red one!

debs-red-bra

Oh! The pinstripe and the little crystal heart with the bow. I can see why this is a favorite!

Her least favorite bra is “…one that makes my boobs look way too pointy…like Madonna’s cone bras.” Uh, that would be a least favorite of mine too!

8911880c6b88ec0f9bd2db1c41c1bf5a

It’s just not a look that’s in fashion anymore. And just so you all know, this is not Deb.

Deb’s favorite pattern? “Anything Burda. I love their fit and styles.”

“My favorite lingerie pattern? I have a lot of undies patterns (all Jalie) but don’t have a favorite lingerie pattern yet. I’m loving the style of Ohhh Lulu.”

full_706_83266_ohhlulu1315claracamisole_4

“Either the Clara Cami or Hannah Chemise.” Above, Clara; Hannah below.

il_570xn-793472152_tcyf

“My worst sewing mistake was in 2002. I used to make prom dresses. And this is the story of why I don’t make them anymore. I would make a muslin from the lining, then have the girl try on the lining and  sew up the real dress. Two days later she had her dress. Well this one girl did 5 fittings and never wore the same bra twice. It changed the shape of her bust so it never fit the same way. I finally got the dress done 2 days before prom. It was hanging in my living room and I noticed a funny pleat at the bust line. So I turn on my iron to fix the funny pleat in the fabric and I burnt the bodice. I had to start over!”

il_570xn-554139350_e2rx

“The garment I made that I was really proud of myself for making was a jean jacket with top stitching on all my seams. The inside was finished off with bias binding. I didn’t have a serger at that time. It was probably one of the first things I made for me. The pattern was Butterick 6376.”

This is a fun look into my ‘booty’ buddy. Thanks, Deb. You can see Deb’s peek at me here. I’ve had so much fun sharing our makes and working with you on the tour.

bloggers

Above are the rest of our bloggers. What an incredible job you’ve all done!

14339952_10210984887124239_819227118_o

Happy creating!

Canada Cups Posts for Tuesday, September 13th, 2016

picmonkey-image-banner-2016

Here are the tour posts for today. Don’t forget to enter the give-away!

Tuesday, September 13

A big thank you to all of our bloggers! You’ve done an incredible job.

bloggers

And I’m sure we’re all thankful for the sponsors! Thank you for making our tour so much better.

14339952_10210984887124239_819227118_o

Canada Cups Posts for Monday, September 12th

banner-improved

Just to save you a little time hunting and clicking to find the tour posts for the day, here they are. And don’t forget the give-away and discounts!

Monday, September 12

Happy creating!

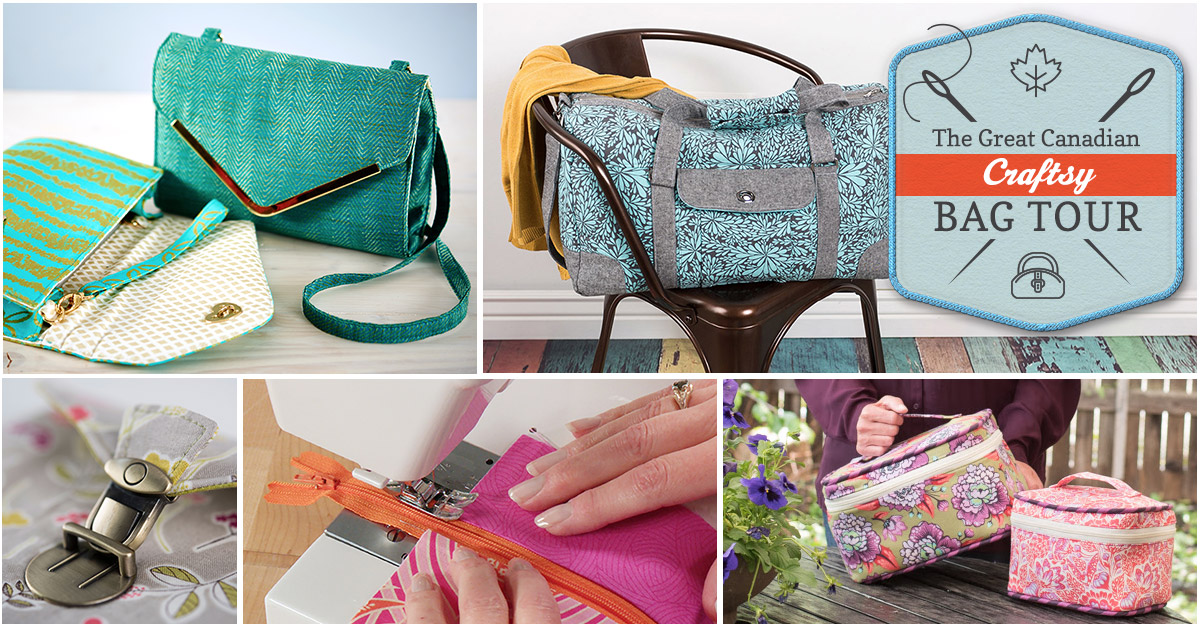
The Great Canadian Craftsy Bag Tour

Craftsy 1200x627_social

Welcome to my stop on The Great Canadian Craftsy Bag Tour! Our tour is made up of Canadian Bloggers, hence the name The Great Canadian… Only in Canada you say? Pity! Well, no, not really. We’re all in Canada, but you can join the tour from anywhere in the world! Sit back and enjoy – no tariffs, no shipping costs, no exchange rates. (Oh, Canadians know about exchange rates!)

Making handbags is something I’d wanted to do for a long time. After hearing of Craftsy, and signing up for my first class with them, I was hooked. I think my first class was Fab Felt Holiday Crafts with Betz White (you’ll see more of Betz on this tour), followed quickly by Design Your Own Handbag with Brett Bara. Brett’s class was the first of many handbag classes I’ve taken on Craftsy. With Craftsy, I’ve found a great learning platform, and I keep going back for more. I love that the classes I purchase are there for me anytime I want to access them, and never expire.

This year I became an Affiliate with Craftsy. On the right side of my blog, you’ll see some links to a few of my favorite classes, including the class I’m reviewing here (which Craftsy very graciously gave me to review for this tour). This list is by no means an exhaustive list, but just a few favorites. I can recommend these classes with confidence as I’ve taken them.

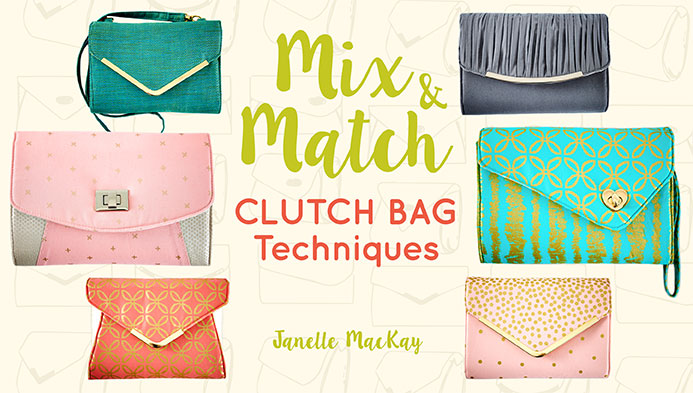
For my part in The Great Canadian Blog Tour, I’m reviewing Janelle MacKay’s class Mix & Match Clutch Bag Techniques.

titleCard

Janelle is a wonderful instructor. She’s very thorough, but without that rushed feeling we can get from having too much information thrown at us. She calmly takes us through each step, all the while giving us so many details of what we need to do, and options to change things up.

Janelle is composed in front of the camera. She definitely knows her material. Her knowledge and warmth come through on the question board too. She’s interacting with participants, telling them she loves the material they’ve chosen, encouraging when someone posts a question and figures out the answer on their own.

The class was a good pace for me. I’m not an overly experienced bag-maker, and I felt very comfortable with the pace of Janelle’s class.

Craftsy rates this class for an Intermediate skill level, and I would agree with that. There are some techniques that aren’t hard, but have a lot of steps that might be a challenge to a beginner sewist. I have read lots of comments on forums where people said how much they learned taking this class, and all the new tips they didn’t know before. There are tips in the class that can be used in any sewing. I loved how Janelle showed us how to deal with thread ends, and how she attached zippers. Both of these, and many more of the tips she shares can be transferred to non-bag-making sewing projects too.

The only difficulty I had with the class was having to draw out some of the pattern pieces. I need all the pattern pieces – even the ones that are simply a rectangle with the measurements given. I have some trouble with numbers. So for me, to have to draw out a rectangle piece… well, it’s a challenge. I have to look at the numbers, check them again, and then again to make sure I have them right in my head. Then a few more times because they can easily get mixed up in my head. It took me three tries to get those simple rectangles. I’m not talking just getting the numbers right, I’m talking drawing out those pieces. (Sigh) Now to be fair, I’ve read many comments on some of those same forums where others have said they hate to see something so simple included in patterns. For me, this is not so simple. I did get it done, and now going forward, I have all my pattern pieces cut out and labeled so I won’t have the same trouble.

Reece, of Happy Okapi, just reviewed the class Sew Sturdy Travel Organizers. One of the comments from Reece was there were no pattern pieces included with that class. Right away, I know it won’t be a class I want to take. Drawing out all the pieces would put me off before I started.

Back to things I love about this class. Here’s my clutch bag:

purse on cutting board

Oh, pretty, pretty. The inside of the bag is as beautiful as the outside. There’s a card slot that holds three cards, and a deeper pocket behind it. There’s a lipstick holder. There’s also a beautifully finished zippered pocket.

inside empty

Here’s the inside with a few basics in it. Sunglasses, keys, a few credit cards, lipstick. The red card is in sideways to show the deeper pocket behind the card slots. I didn’t even need to put anything in the zippered pocket. There’s lots of room in this little clutch! Look how pretty the zippered pocket is too. Janelle takes us through all the steps to make a beautiful, professional-looking finish on everything – inside and out. Here’s a confession: I thought the inside of the bag was so pretty, I took photos to send to a few friends before the bag was done. It looked so nice.

inside purse

pocket

Here’s the clutch on my dress form (Catherine) so you can see the size.

purse on Catherine

It’s a beautiful size and shape. For my first clutch, I chose a fairly basic design. If you look at the Craftsy image for Janelle’s class (above), you can see there are a few different options for the front of the bag, and for the flap. The variety offered is very nice.

One more comment on this clutch bag – I followed the Craftsy course alone to make this. I did use the pattern pieces that came with the instructions, but the class is so very thorough, a bag can be made following along with class instruction alone. It’s a really great class. I definitely recommend Mix & Match: Clutch Bag Techniques by Janelle MacKay, and I can’t wait to make another clutch bag.

Thanks for joining me on this stop of The Great Canadian Craftsy Bag Tour. The next stop is: 20 Essential Techniques for Better Bags with Fiona of Tangled Blossoms Design. If you’ve missed any of the reviews or stops along the tour, here’s the full listing of them:

Tour Dates

Monday, April 4

Seam of my PantsBag-Making Basics: Reversible Tote & Zipper Pouch with Kristin Link and Learn to Sew: Simple Bags with Nicole Vasbinder

Tuesday, April 5

Sprouting JubeJubeSew Sturdy: Home Organizers with Annie Unrein

Lulu & CelesteSewing With Oilcloth: Bags & Baskets with Kathy McGee

Wednesday, April 6

Happy OkapiSew Sturdy Travel Organizers with Annie Unrein

Thursday, April 7

Michelle’s CreationsMix & Match: Clutch Bag Techniques with Janelle MacKay

Friday, April 8

Shelaine’s DesignsSew Better Bags: The Weekend Duffel with Betz White

Tangled Blossom Designs20 Essential Techniques for Better Bags with Lisa Lam

Saturday, April 9

Emmaline Bags — Recap/Roundup

Sunday, April 10

Sur “prizes

Our tour has some amazing sponsors! Craftsy. Emmaline Bags. (Emmaline Bags donated the hardware for my gorgeous clutch) Tangled Blossoms Design. Blue Calla. Sprouting Jube Jube. Lulu & Celeste. Happy Okapi. Seam of my Pants. Thanks to all of our sponsors for generously providing prizes for the tour. You’ll have to wait until Sunday, April 10th to find out more about those. So make sure you come back on Sunday to find out what they are and how you can enter for your chance to win!

Prize Sponsors

Happy creating!

Please note, all contest links have been disabled as the contest is now over.


Swoon Ethel

After making the Conference Tote Bag, I thought I’d like to make more bags. I’ve read a few books, bought a book, reviewed a book, am planning on buying a new book coming out, and took a few Craftsy classes – all on bag-making. I thought it was time to try another bag.

Let me tell you, it’s a lot more of a workout to make a bag than it is to make a bra! I can’t think of a anything that you fight with as much on a bra. The only thing that would come close is stretching the elastic along the band, but that’s nothing. Now, having said that, there are no fitting issues with bags at all.

Before I go on about the fight I had making the bag, let me show you what I made.

Bag-on-Catherine

This is Ethel, a free pattern from Swoon. I love the shape of this bag – that’s what drew me to it in the first place. It’s just a bit different for a tote bag with its tear-drop shape. DS2 came home the day I’d made it and said it was beautiful and what he really liked was the shape too. So, it’s a winning shape.

It doesn’t show up really well in the photos, but there is an outer divided pocket on the front of the bag. That’s something great for phones or keys or lipstick that you don’t want lost in the bag.

I used the same quilting cotton for the lining on this bag as I did on my Conference Tote Bag.

lining

Here’s the outside of Ethel with just a bit of lining showing. I love how these go together.

bag-front-and-inside

You can see that front pocket I mentioned a little better in the above photo.

And here’s the back of the bag.

bag-back

Oh, I love that shape. I’d like to make this again and include a few of the lovely details from the Conference tote – like an inside pocket with zipper, and a zipper closure.

Speaking of detail, here’s a close-up of the floral detail:

detail

I love the gold on there, and the contrast between the dark brown and white.

Now, let me tell you about the fight we had. Well, the bag has interfacing and/or foam on all the pieces to give it structure. I did fight a little bit with the Conference Tote Bag – I’d decided boxed corners and I were not going to be friends. On this bag there are no boxed corners. However, the whole time I was sewing the seams, the foam seemed to want to push against something and I felt like I was fighting to keep my seam allowances straight. Tell me, any other bag-makers out there, is that normal? It felt like an arm workout that lasted too long.

The second fight is leaving that little six-inch gap in the lining to pull the whole bag through! I’ve read different comments where bag-makers have referred to that as birthing the bag. To me, it seemed more like I was trying to rip apart what I’d just fought to sew! Again, it was an arm work out too. Once the bag is turned though, well, that’s when you can see how it’s going to look when it’s finished. There’s just a little bit more sewing and some pressing to do, but the finished look is there. It’s a great moment.

In the end, I’m very pleased with it. This will be making its way to my Mum for Christmas this year. I had a lot of hints and questions after the first bag I made – I knew my Mum would love one too.

Happy creating!

Butterick 6031 and The Bra-A-Week Challenge

Have you seen any of the Patterns by Gertie? She has some lovely patterns, and her Butterick 6031 is one of my favorites in my lingerie pattern stash… and it was time to pull it out.

butterick-6031-w

It is so pretty! I love that slip – black and white – such a classic!

Another admission I must make is I love watching The Shopping Channel. There are many Today’s Showstopper items in my house. This camisole was something I found on their website and was an inspiration for me. This, as well as some gorgeous material a friend sent me. The photo is the Rhonda Shear Leopard Lace Cami.

comparison-w

I saw this and loved it, but I wanted something a little looser. I have a favorite camisole, and it’s not a snug fit, so I wanted one more like the one I have. That leopard lace? Love! Yes, it was time to pull out the leopard mesh I have in my stash and make something with it. Adding lace just makes it perfect.

Here’s my B6031 camisole.

Cami

Love, love, love. However, I did have a bump along the way. I’m still trying to figure out what happened. Somehow, after cutting the mesh material for the cups, I ended up with two right cups. Excuse me? I’m completely baffled by this. I really have no idea how I cut out two the same, but I did.

right-cups

That was upsetting. I didn’t want to waste any of the material. I will be able to use the material to make a Shelley though, so I’ll save it for future right and left cup pieces. I wasn’t alone this week though, I was reading on another blog how the blogger cut out two left sides of her top.

To make the camisole I also had to do a Full Bust Adjustment. I’ve done one before when I made my moulage from Suzy Furer‘s class on Craftsy: Patternmaking Basics: The Bodice Sloper.

However, this time I used the information on the sew-along from Gertie herself to adjust my pattern following her instructions. I’m glad I did. The instructions I have would have had me add 3/4″ more than I added. The 1″ Gertie suggested was perfect.

I decided I’d follow along on the sew-along, and the funny thing about following along is once I got started sewing, I forgot about following. I was 3/4s done and remembered. I went back and read through it just to see what it said. The sew-along is for a slip, but all but the hem treatment is exactly the same as for the camisole. I’m thinking of trying the panties from this pattern too. They look really cute and are similar to my favorite TNT Kwik Sew 2286.

I also had some fun making my own bows again. I often like to find some way to do something different or unique. I did that with my bows. The first bow shown here has some mesh with the ribbon, and they’re both tied into the bow, the second bow is ribbon tied with the mess, and the mesh tails hanging down. Both were so fun to make.

Front-bow

Strap-Bow

The materials I used came from BMS (power net), Frog Feathers (lace), and a dear friend, who just happens to be in our Challenge this week, (leopard mesh). Thank you, Ginny! I love how beautiful my camisole is, and will treasure it even more because the material was a gift.

Now onto the Bra-A-Week Challenge. This week we’re on week 29 and we have a great week!

Our first submission comes from Karin of Mrs. Weaver’s Finest Unmentionables.

untitled

This is the Marrakech bikini. It’s based on the Rebecca bikini from the 3 Sisters pattern, a Pin-Up Girls pattern. Karin altered it to make the cups a little more flattering. The back detail is gorgeous and the fabric amazing!

untitled (2)

That is gorgeous! You can read more about this beautiful bikini on Mrs. Weaver’s blog.

Our next submission comes from Amber. Amber made this beautiful bra for her friend, Helena. She started a while ago, but got interrupted in her sewing by having a son. Congratulations on your son, Amber!

untitled-(3)

Amber started out planning to make a basic bra, but then saw this lace and wanted to try a couple of different techniques.

untitled-(5)

Look at that starburst. So very pretty! This is the Pin-Up Girls Amanda foam cup pattern. The pattern, fabric and notions – except for the lace are from Bra Makers Supply or BWear. It’s beautiful, Amber!

Next we have a beautiful bra from Maddy.

Maddy made her third Marlborough with matching Ohhh Lulu tap pants, in coral lace.

img_1670

img_1674

Maddy says, ‘I love this set so much! The fit is lovely and comfortable, and I’m so in love with the lace (and its remnant price tag!)’

I agree with Maddy on that – it’s lovely! And beautiful remnant always feels better than full price. It’s gorgeous! You can read more about Maddy’s Marlborough on her blog, Miss Maddy Sews.

Next we have a beautiful bra by Sofia.

Sofia made a very lacy bra. Is there anything more delicate looking than an all lace bra? She also made a few alterations to her pattern. You can read about that on her blog, Silver Lining.

Lacy-bra

Beautiful. That bow really looks awesome, Sofia! Sofia made her own bow for this bra. It really pops with that deep color.

Our next submission comes from Ginny. Ginny made the Boylston Bra, the newest pattern from Orange Lingerie, and she made it for her niece.

bcu

Oh, that is pretty. Ginny describes the Boylston as ‘a sleek balconette style with self fabric straps’.

Ginny also made some matching panties for her niece. Here is Ginny’s first set featuring Make Bra’s DL21 panties.

bs2

That is lovely. Ginny, your niece will love it! Here’s Ginny’s second set now featuring Ohhh Lulu’s ‘super comfy’ Grace panty.

bs3

I love that floral lace on the sides! You can read Ginny’s guest post on Sewcialists‘ blog.

Our final submission for the week is from David.

David front

David made this bra with pink cups with black lace. The upper part of bra cups are made with black embroidery on tulle.

David side

This bra has a double strapy back and a neck strap.

David back

David is a free-lance lingerie designer. This is really beautiful.

Happy creating!

A Pale Yellow Flirt Skirt

I definitely have my favorites when it comes to clothes I’ve made, and clothes I’ve bought. One of my habits is to go through my wardrobe twice a year. I only keep what I can wear in my closet, so if it’s Summer, you won’t find Winter clothes in there. Same goes for Winter time – no Summer clothes.

I take advantage of that twice yearly sorting to clean out anything I don’t wear. I just gave away a few cardigans I hadn’t worn all winter when I did the Spring switch-over. I don’t like to keep things around if I’m not using them.

I also notice when I love something. If I end up wearing a garment all the time, I know it’s a keeper. My denim Flirt Skirt is one of those garments.

100_2881

I found myself wearing the skirt all day, and then thinking it’s needs to be washed, so I’d go home and wash it right away so it would be ready to wear again the next day. I decided, if I’m wearing something that much, I need to make another one.

So, here’s my pale yellow denim Flirt Skirt.

skirt front

This skirt has two things I love: I really love pale yellow. The last two years I’ve been seeing more of it, and I’ve been picking up a bunch of pale yellow garments. So when I found this pale yellow denim, I scooped it up right away. The other thing I love is this pattern.

From the front it looks straight – which is something I can’t wear. I’m just too curvy for straight styles and always have been. I also find straight styles suit taller women – something else I’m not. However, this does look more straight-ish, at least to me. But the back… well, that’s just fun, and whimsical, and flirty.

The Flirty Part

There’s the flirty part of the Flirt Skirt. I love that! It acts a bit like a kick pleat but material has been added to serve the same function the kick pleat serves – it allows me to walk when wearing it! I’ve also hear it described as a fish tale. But no matter how one wants to describe that – it’s just fun. I was wearing my skirt this week, and that flirt part at the back was what was getting noticed and complimented. It is very fun and flirty.

The Flirt Skirt is a super easy pattern, and I made this up in an afternoon. I think these are quickly becoming my summer wardrobe! Both my dark denim and my pale yellow denim skirts just went to the mountains with me. That back flirt section of the skirt makes it great for walking in, whereas a straight skirt isn’t great for that. There’s lots of room for a full walking stride.

Untitled-9

Here I am on a rainy day. My hubby helped me out with some pictures. But he wasn’t the only one helping me out. Our rescue pup, Tiberius, came and helped out too. Anything I’m doing, and he’s right there with me. His toys are all around my sewing room! He’s with me for every project.

Untitled-7

Here we are showing the flirtier part of my skirt. He’s not always quite so agreeable though. I took my son to an appointment, and thought I’d read while waiting. Nope. My pup wasn’t going to let me read. Thankfully, he’s fine with my sewing!

Tiberius on my book

Happy creating!

A Summer Jacket – McCall’s 6516

I recently made the McCall’s 6516 jacket and love it! I made view D. I was thinking Summer jacket, cool evenings. I wanted there to be lots of options to cover me up and keep me warm – collar, sleeves, as much as I could get. I’m always the one wrapped in a blanket in front of the fire pit trying to stay warm.

M6516

The material I chose is perfect too. I’ve shown this before.

100_2985

It’s a beautiful cotton with a waffle texture to it, and a gorgeous floral pattern.  I love this material. I went to the fabric store and saw it. It was not on my list so I left it, and then turned right around and went back in knowing there was no way I could leave it behind. I knew it would be a great jacket. And a jacket for summer was on my sewing list.

This jacket is perfect for cool summer evenings, and not too heavy if I have to carry it around during the day. It just made a trip to the Rocky Mountains with me for a couple of days, and as the weather was calling for rain, I carried it around a fair amount. I also love those big front panels that lay open – when it’s a bit cooler, they’re wonderful to wrap around me and cover me up more. See, I’m all about trying to stay warm.

Jacket Front

The jacket went together smoothly and quickly. It’s a great and fun jacket to wear. I’ve had lots of compliments on it already.

Jacket Side

Here’s the side.

Jacket Back

And the back.

One nice feature on this jacket is the faced cuffs. I really like that when I fold the cuffs up, the facings there make it look more professionally finished. Nice touch!

Here I am in my new jacket. I have both sleeve cuffs folded up, so the sleeves hit just above my wrist. You can also see my white stripe in my hair. I’ve decided to let it come in. It’s a bit Cruella or Rogue, depending on your age and your frame of (movie) reference. A friend encouraged me to let it show. ‘Not everyone gets to have a stripe. Wear it with pride.’ I’m not minding it most days.

image3b

There’s a little bit of material left over from my jacket, and it’s just too pretty not to use. I’m planning a denim quilt. The first of the squares have been cut out. These photos show the waffle texture of this material too.

Squares

As much as I love my new jacket, a fitted jacket is something my wardrobe could really use. Finding one that fits a short curvy girl like me is a challenge. So, recently when I saw a class on sale at Craftsy, I signed up. It’s Jacket Fitting Techniques with Pam Howard. The class comes with the McCall’s pattern 6172 for three styles of jackets, including a fitted jacket. I’m trying to work up my nerve to attempt this for my curvy curves. I love Pam’s Flirt Skirt, so thought I’d try one of her classes. I’ll let you know how it goes.

Schnittmuster-McCalls-6172-Jacke

Here’s the photo from the front of the M6172.

Happy creating!

My Sloper Versus A Couple of Patterns

This week was a non-bra week, in keeping my hubby happy. Even though he loved my last bra, he does let me buy material without grumbling about it, so I don’t mind honoring his request – that I sew with all the material I have.

I have some lovely material for a cowl neck top. And I bought Deby Cole’s Cowl Neck Top from her Craftsy store. I think I’ll really enjoy wearing it too. I love this material paired with my denim Flirt Skirt.

100_2879

However, if you’ve followed me for any time at all, you know I usually have two, or three or more ideas and projects on the go. Before I jumped into the cowl neck, I wanted to re-visit my Ann-T-Top from Style Arc.  I printed off the next size down, and compared it to my sloper.

100_2945

Here’s the Ann T-Top with my sloper over top. I outlined the side of my sloper in black so it shows up better against the pattern. This size is much better. I still have a hard time believing how far off I am from the size charts. On this, I might want to shorten the upper bodice by 1/2″ so the underarm is hitting where my underarm hits, which will also help the waist hit at my waist. However, I do think this is a much closer fit, and one more size down would be too small. And although it doesn’t show, the neckline is much better too. There’s a 1/2″ difference, and I think I’ll like the little bit looser neck. I think I’ve found my size! I will need to make a hip adjustment, but if the base of the garment fits better, the rest can be done.

Carmen, one of my blog readers, mentioned using the upper bust for the pattern size, and this is something Kathleen Cheetham teaches in her Craftsy class, Adjust the Bust. I just picked up that class, and I’m sure it will be useful. Thanks, Carmen!

I also started to work on Deby Cole’s Cowl Neck Top.

100_2947

I have my sloper laid over Deby’s pattern. Again, what I’m dealing with is I don’t fit into just one size, or even two. I’m three sizes in all! For this pattern, I started off tracing the small shoulders and neck, and then loosely followed my knit sloper for the rest of the pattern, so my cowl neck top will be more shaped than the original.

Everything for my cowl neck top was cut out, and that’s as far as I got. I didn’t get any sewing done. I don’t even have a photo to show you – the cut material is pinned to my dress form. And I can’t even take a photo for you. I’m not anywhere near my sewing room. I’m in the mountains enjoying my anniversary. Any and all sewing will have to wait until I get back.

Here’s the view from our room. Oh, I love the mountains.

IMG_0021

This is my view from sitting at the kitchen table. We’re here in the mountains celebrating our anniversary, but my DH isn’t feeling wonderfully right now, so we’re having a quieter afternoon.

IMG_0022

I have windows on three sides, and there are mountains out each window. Oh, how I love being here.

IMG_0023

And the last view. Oh, I’m enjoying my time away, but if I want to submit a bra in Erin’s challenge this week, I’m going to be very busy sewing when I get home. That means a top and a bra in a couple of days! I don’t know if I’ll get all that done, but it will be fun to try.

Happy creating!

Size Chart Woes

I had two experiences this week that I want to share with you. Both were basically the same thing – and both dealt with size charts. I have a question to ask you: Do size charts actually work?

My first experience was when I ordered the Rhonda Shear 3-Pack Pin Up Lace Leisure Bra. I heard on the video how Rhonda said to ‘order your top size.’ Well, great, but when I’d looked at the size chart that didn’t make sense. There was no way my top size, usually a Medium, was going to work, or at least that was what I was thinking. My bust and their size chart put me in the XL range. I was too hesitant to order my top size, so followed their size chart.

Rhonda-Shear-Size-Chart-REVISED-1

Here’s their size chart. The photo is from The Shopping Chanel.

The bras arrived yesterday, and they’re lovely leisure bras. And they’re too big. Not a lot too big. The Medium would not have been a better fit. I think, judging by how the bras fit me, the Large would be my best fit. However, they are for leisure, so a little loose will be okay. I’ll know for next time.

Here’s one of the bras on Catherine.

100_2915

For on Catherine, I’ve added foam cups, so the bra is filled out the same as when I wear it. It’s really lovely and very comfortable. I was thinking when I bought the bras that I just might be interested in cloning them at some point.

100_2917

Here’s the back. It’s super smooth on, and again, very comfortable.

My other experience this week with size charts was with Style Arc. Style Arc’s Ann T-Top on Etsy. Again, I looked at the size charts and saw where I fell by my measurements. And I ordered that size for the top.

Nope. Again. Too big.

Style Arc chart

Here’s a screen shot from the Style Arc Web site showing the size chart.

This time the size was off, not just by one size, but by two. This time the charts put me in a 16, but when I printed it off and laid my sloper over it, it was way too big. So I contacted them and ‘exchanged’ the pattern I’d bought for a smaller size. I made up the 12, and it looked close when I laid my sloper over it.

100_2918

Here’s my Ann T-Top. This top has some elasticized gathering at the waist. I think that little detail is very attractive.

100_2919

Here it is from the side. I have the same Rhonda Shear bra under the top to give it a more realistic fit.

100_2920

And from the back.

Here’s me, (finally getting a photo) in both my denim Flirt Skirt, and my Ann T-Top.

100_2928

And a tired me (it’s almost midnight), in my Ann T-top. It’s too big.

The highlight of my week was ‘a little lingerie surprise parcel’ that came in the mail for me. Thank you, Ginny! What a treat!

100_2929

After watching Beverly’s newest bra class on Craftsy, I have lots of ideas for how to use this lovely lingerie fabric!

Happy creating!