A Red Rebecca

I knew when Erin from The Sewing and Life Adventures of Emerald Erin put out her Bra-a-Week Challenge, I wouldn’t be making a bra each week, but I have been trying to keep up with a submission every other week. And this week I have one.

My Red Sewy Rebecca.

100_2901

I can’t say enough how much I love sewing this bra. As the seams are coming together, they’re turned and then hidden between the lace and lining on the upper cup, or the duoplex and lining on the power bar. And the inside looks so very neat and tidy. It’s really a delight to sew.

100_2895

You can see here the inside of the upper and lower cup but there are no visible seams. Oh, that is such a nice touch.

The bra came together fairly easily, but I honestly think that’s because I have experience sewing bras. The instructions I have are the English instructions from ELingeriA and they’re not my favorite. I find I’m often looking at what they’re saying to do, and then ignoring it and following instructions from Beverly’s Craftsy class, or one of my Pin-Up Girls patterns.

100_2910

There are a couple of things I like about this pattern. One is the lower edge of the upper cup is quite straight. A straight bottom edge to the upper cup gives more lift. I do like that. Another thing I like is the underarm area is smaller and I don’t need to adjust it. The fewer adjustments, the better.

Again, on this bra, I gathered the cup to fit into the cradle. I had intended to adjust the pattern, but my week was going by quickly and I wanted to get sewing and forgot. Next time I’ll make some adjustments and show you what I do for that.

100_2911

The back of the bra is pretty basic. I do like the black findings kit with the red, and the red and black lace. All the materials came from Bra Makers Supply. I already plan to order more of that lace. It is so pretty. When I’d ordered the kit, I put it away for a little while and when I pulled it out again this week, I thought it was just black lace. So when I unpacked it, it was a treat to see those red flowers.

This photo is the inside of the bra. Look how neat that is! Here’s a close up:

100_2913

Love, love, love this!

Enclosing the cup seams would be quite easy to do on any bra, just use some lining material and ‘sandwich’ it when sewing. Let’s talk about that using the upper cup and lower cup. Place the two cup parts right sides together as you normally would. Then the lining material, which was cut from the upper cup pattern goes on the wrong side of its non-matching part – the lower cup. You make a sandwich of the cup pieces with the upper cup material and lining as the bread, and the lower cup as the filling. Sew, trim, and turn the matching upper cups pieces so they are now together. Press, top stitch and enjoy seeing those enclosed seams hidden neatly inside your upper cup.

100_2897

You can see here the seam is exposed still, but has been trimmed. The lining will fold over the seam to meet its matching upper cup and then press and top stitch. It is so neat and lovely.

It’s the same for the power bar. Place the power bar with the cup right sides together – just the same as when you’re sewing it without lining it. Place the power bar’s lining on the wrong side of the cup; sew, trim, press with the power bar and lining together, and top stitch and now your whole cup is so neat and enclosed!

Happy creating!

Whoops! My Flirt Skirt and Another Watson Started

Sorry to everyone who received that unfinished post I sent out. I had a terrible headache (I can count on one hand how many headaches I’ve ever had) and when I went to save a draft of my blog, I hit publish by mistake. Oops. Once that button is hit, there’s no taking it back. However, it wasn’t finished. So here it is (again) in it fullness.

I really like black, and my wardrobe has a disproportionate amount of the color. I have four or five black skirts in my closet right now, and was planning on making another one with the fabric I used for my Mum’s cardigan.

My hubby loves when I wear color, so when he went shopping with me for material, he ‘helped’ me pick out my fabrics. This fabric was one of those helpful picks. Honestly, I’d put off sewing it because I really wasn’t sure I’d like it at all. Turns out I love it. I love the material. I love the skirt.

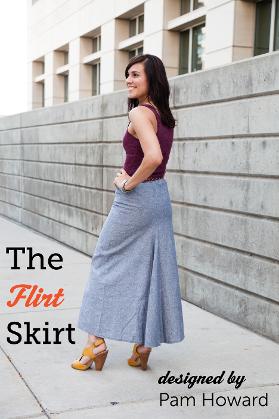
The Flirt Skirt comes together quite quickly and easily. Here’s the link for the skirt on Pam Howard’s website. This is such a pretty skirt. There was also a kit for this skirt on Craftsy, but I didn’t love the material in the kit so just bought the pattern and read through the information in the workshop. (The workshop is no longer on Craftsy.)

When it came time to sew the waistband, I had a memory of using the serger to sew on the elastic. So, I looked it up. I found this blog post on Sewing With Nancy, and the post has more information in there than I’d hoped to find. I followed her suggestion for attaching the waist. I didn’t think of it until I’d sewn the waist on, but I only had three seams to sew that waist down. It wasn’t going to work for this skirt.

While I had the elastic serged on, I thought a blind hem might work. Nope. That was not what I’d wanted. This really was one of those projects that if my hubby hadn’t seen the material and the skirt wasn’t almost done, I think I might have thrown it out. I don’t like re-doing things over and over. I’d rather start again. And that was how it was feeling – like I was doing the same thing over and over. I finally decided to just follow the instructions from the workshop and it all turned out perfectly. Imagine that?

In the end, it all came together and I really love it. I’m thinking my hubby needs to take me out somewhere nice so I can wear it. I also found a lovely scarf that had been given to me that goes so nicely with it.

100_2787

What makes this skirt flirty is there’s a lovely flounce at the back. It looks a lot like a straight skirt from the front, but the back has a little extra. It helps with walking and it’s rather fun to wear.

100_2788

This photo shows the flounce a bit.

And here I am showing the front of the skirt.

100_2790

Sadly, the photo looks washed out, but it was the best we could get. The material is closer to the photos above.

And showing that little flounce at the back:

100_2793

There’s lots of kick room back there. I love it. I may take the elastic at the waist in a bit. It’s looser than I like, but I’d read how curvy girls needed to make sure it would fit over the hips too. The skirt isn’t too tight going over the hips so, the waist band is going to come in.

Lastly, I’ve got another Watson bra cut out for the sew-along. This time in some of the black and beige Lycra I bought. So far, it’s looking darling.

100_2789

Watch the Watson Sew-Along Group on Facebook or Erin’s Bra-A-Week Challenge on Pinterest for the photos.

Happy creating!

For My Mum

My Mum was saying she’d been watching The Shopping Channel and saw a cardigan the same as I’d made her, but in black. She said it was $150, and wanted to know if I could make one for her for less.

I can hardly imagine a little peplum cardigan costing that much, but I assured I could do it for a lot less than that. And I did. It’s an early birthday present for her. My Mum will be 89 this Spring, but I thought she might want to wear this before it warms up too much.

 It was the same McCalls pattern I’ve made a couple of times now, in fact the same style even, so I didn’t need the pattern. I also have some Ponte material.

Once again I’m revisiting McCalls 6844. I think I’ve made most of the sizes now. I had originally made a size Small for my Mum. This time she wanted a size Medium. She wants it big enough to wear things under it. So, my Mum is getting her way. I made her the size Medium – even though I seriously doubt she needs it that big.

The only other change I made this time was to use the serger. My hubby helped me re-thread it (again) and I oiled it (again). The repair man did say to oil it well, so three times is well, and it hums away now. It’s actually hummed away well enough to do a few projects with it.

So here’s my Mum’s McCalls 6844:

100_2768

I dressed it up a bit with a pretty scarf just to add a bit of color. Black on black against beige really doesn’t show much.

100_2769

I really love the shaping on this cardigan. It flatters, well, it flatters me and my Mum and we’re pretty different when it comes to our shapes. She’s always been very thin-hipped, and I’ve been curvy for as long as I can remember. This cardigan flatters both of our shapes.

100_2773

Even the back has a nice shape to it.

I loved having the serger working and making such quick work of this. Every time I’ve sewn it before I not only double-stitched it – where I’d sewn the regular seam and then a second one 1/4″ away from the seam allowance. Then I did a zigzag over the trimmed edge. That was a lot of work. Serging my way through this project made it seem super quick and easy.

One last comment. I made the size Large last time I made this for me and it fits me loosely, which is what I wanted. However, I’ve wondered about making myself a more fitted version as the envelope photo shows a more fitted cardigan.

M6844_xfull_2

So I thought before I send this off to my Mum, I’d give it a quick try on to see what changes I might want to make to a size Medium. And I did try it on, but I didn’t get a photo of me in it! I had another parcel going to the post off that day, and wanted to get them both sent off. Let me just fill you in here on my thoughts.

The first material I used had a lot of stretch to it, and if using a knit like that, I could easily go with the size Medium. However, the Ponte doesn’t have as much stretch and it felt snug in a few places like the arms and across the bust and hips. I could probably make the Medium/Large cross if using Ponte.

Did you notice I have a new badge on my blog? Amy, from Cloth Habit is starting another bra sew-along – and it starts today! I can’t wait. I had so much fun on the last one she did.

Happy creating!

Could It Be?

That was pretty much how I was feeling. Could it be that I was one alteration away from my perfect fit? After all this time, and all these tries, could it be? I have to be honest, I was not hopeful at this point. I have wandered around close for so very long, I just thought I’d be close again. But… I got it!

100_2663

Here’s my perfectly fitting black and ivory bra. I used black and ivory because I didn’t have enough bits of either fabric for a bra in just one color. That’s how un-optimistic I was feeling. And I’m usually a the-glass-is-half-full kind of girl. Heck, if there’s water in the glass, why would anyone complain? But too many not perfects had worn me down a bit. So, I had some black duoplex and some ivory duoplex, power net, and lace (all from Bra Makers Supply), and I set out one more time.

You all know how it is, I had one alteration to make, so that really meant two, and if you’re making two, that’s really four. Every time you change one part of the pattern, you have to change the corresponding part. And every alteration I made, I feared I would mess up the fit completely.

But… IT FITS! I could just keep typing that over and over. IT FITS! IT FITS!…

I watched along with Beverly on the Craftsy class again. I love having her right there explaining and seeing how she does this or that. It’s much more fun than just pulling out the pattern instructions again.

One of the little tidbits she shows in the class is the Butterfly Effect done with lace. I decided I’d do that on this to pull together to two colors a little more.

100_2664

This shows the Butterfly Effect up close. It’s a really pretty options for lace. And of course, if you’re going to have butterflies, then you need flowers not bows. So I added a little black rosette to the top of the bridge.

100_2665

I didn’t add the rosette until after I tried it on though. There must have been some hope somewhere inside because I did do all the top stitching on this bra. Oh, but after changing threads a few times, I’d had enough of that. I still wasn’t sure it was going to fit, so… ivory thread showing on black. I’m going to have to say it’s a design feature at this point. The strap trim is something I’ve been saving for a long time – just waiting to use. This seemed like the right time. The pins on the side are to help get the wrinkles out of the bra on Catherine.

100_2666

This shows the back, showing the hooks and eyes, strap elastic, findings and all the elastics that only peek out are all in black.

Another change I made was to go with the triple hook and eye rather than the double. It really does offer more support and I’m surprised how much more comfortable it is. I had wanted to do what I saw in the Prima Donna bras I’d purchases in the past, but don’t think I’ll do that anymore. I really prefer this. I just have to learn how to get in and out of it as easily as the double hooks I’ve always worn.

One of the alterations I made on this was the bridge… and it’s perfect! Simply perfect. It comes up high enough to offer good support, but not too high as to get in the way and push away from me.

All those really nice fabrics I’ve saved in my stash for that elusive day when I had my fit down… get ready! That day has come.

Happy creating!

A Material Mix-Up

A few weeks ago when my dear hubby surprised me and my Mum with an overnight trip to the mountains, we took in a few stores in Canmore and Banff. In one of the stores I visited in Banff, there were some lovely fall jackets and I went straight to them. I’d seen that material before. I knew it.

Just as I was checking out the jackets, a woman came up to me and asked me if I knew about the store. No, I replied. She told me it was Canadian owned, and they only used Canadian materials and the garments were manufactured here in Canada. While all this was being explained to me, I’m looking at the $100 price tag on the jacket. That’s not too unreasonable, but I knew I had seen that fabric before, and it wasn’t $100.

I left the jacket in the store, but made a note to go to the fabric store when I got home. And I did.

I searched for the fabric and found it, but when I measured it, didn’t think it was going to be enough. Off to another store to look for the same material. At that second store I bought what I thought was the same material.

denim

Isn’t that gorgeous? I love it. But… something didn’t seem right. This is a flocked denim and it does have a bit of stretch, but only a bit. I thought the material in the jacket had been a stretch knit fabric, not denim. And the material at the first store, I didn’t remember that being denim. However, I didn’t see anything else in the store that even came close, so I bought it. But there was still a little nagging doubt that this wasn’t the same material.

A day or so went by and then I went back to that first store to compare what I’d bought with what I’d seen there. And sure enough, it’s not the same material. The material I wanted was a stretch knit.

flocked knit

Well, they do look awfully close. And the good news is there’s just enough material. We pulled out a pattern while I was at the store and it’s the exact amount I need for what I’m making. Seeing as it was 50% off I didn’t even think about it. I bought it right away.

side by side

Here they are side-by-side. They are really close, but not exact matches. I still love them both too. So for the flocked knit (left in the picture) I’m going to make another McCalls 6844, this time a little more fitted. I’m also thinking of frog closures or something to embellish the front.

For the flocked denim (right in the picture), I’m thinking I’ll use that to make the Flirt Skirt. It’s a lovely skirt. Heres the link for the pattern on Pam Howard’s website.

8937_workshop_1

This photo was from the Craftsy web site showing the skirt. They had offered kits and a workshop. I was thinking of making the skirt in a knit, but now might do it in a woven. I also have some lovely black Ponte and dark gray too. Either of those would make a great skirt to go with the McCalls cardigan.

So I may have had a bit of a mix-up with my materials, but I have plans for both of them.

Happy creating! And it’s Thanksgiving day today in Canada. Happy Thanksgiving!

Fantasie to Reality

So, last week I told you how I was altering my cloned Fantasie bra. And now I’m going to tell you how I made it a reality.

I did have a few questions. One was how to adjust for the smaller wire. I thought back to my Craftsy moulage-sloper making class. One of the ways they measure is to turn the measuring tape on its side and follow the line of the pattern that way. I don’t find that the easiest — usually I’ve just moved the measuring tape along by about 1/2-inches. My friend, who also recently made a sloper, said in her class they had a flexible ruler they were using and you just bend it to fit the line. That sounds nice right about now. But what I have is my measuring tape, so that’s what I used.

First, I’ll show you my custom bridge and cradle.

100_2343

Here you can see the little bit of the cradle that comes up above the wire line – that’s the flat spot adjustment I make.

Now onto some measuring, and I measured everything!

100_2344

This photo shows the easier of the measurements I took. For the photo I had my scissors hold the top of the tape against the top of the wire. Then I carefully followed the curve of the wire without any gaps. Basically, I made a new cradle and compared that to the original cloned one. And I measured everything to see where the changes needed to be made.

To be sure, I double measured everything. And after that, I made up a mock cup and cradle and sewed them together. My main concern here was making sure the cup still fit smoothly into a now smaller cradle.

100_2350

And here it is. It all came together quite well. There was one really small adjustment I had to make in the cup, maybe 1/8-inch.

100_2352

You can see in the photo above the cup needed just a touch of an adjustment. So, it was all looking good, so onto the good materials. All my materials were from Bra Makers Supply.

100_2388

Here’s my Fantasie made a reality. The cups are a full cup, not the modified ones I’d been making. And the bridge is a full bridge. There are black foam cups behind the lace/duoplex cups to fill out the shape, but they are not part of the bra.

There were a couple of changes I made to the bridge.  I narrowed the bridge, because the original was too wide for me. On this one the two pieces of channeling for the wire overlap at the top. And the rest of the bridge is still my custom bridge.

Some of you might remember, I had attempted a Fantasie Vivienne before. The lace can be a bit confusing as to which way it goes on the upper cup. And the last time I attempted it, I got it wrong. As that bra was a clone and didn’t have any of the adjustments, I decided it didn’t fit well enough to bother fixing it and continuing. This time I got the lace in correctly. Whew. Another relief.

100_2389

Here you can see that narrow bridge. It’s just the right width for me, and thankfully just enough for the channeling to fit into as well.

100_2390

And here you can see where the lace ends before the strap tab. That was a little tricky, but I got it to look neat.

You might have noticed there are no bows on it yet. I want to follow the same style as the original bra. They used two very narrow ribbons of coordinating colors to make the ribbons and I want to find some black and pink and do the same.

100_2386

You can see here the beige and white ribbons together, as well, how much wider that bridge is at the top. This style of bow is such a pretty and unique feature, I’d like to add that too, so I’ll have to go shopping for some thinner ribbon than what I have.

And lastly, the back of the bra. Again, on this I simply cloned from the original.

100_2391

The only thing I didn’t do the same on this is the original is only two hooks and eyes, and I made this three.

So, does it fit? Perfectly? Almost. It looked great when I put it on, but after wearing it for a little bit, I noticed the bridge does not go all the way back. Almost perfect. My best to date.

I think the difference in fitting is the materials I used. I’ve mentioned before that a lot of RTW manufacturers don’t use duoplex, but rather something more stretchy. I used duoplex for the cups. This gives me more support, but likely took a little of the depth out of the cup too.

There’s another slightly different Fantasie on the horizon.

Happy Creating!

The Other Apron

A few weeks ago I posted about an apron I’d sewn for a friend. And she loved it! I just finished the second apron. And it’s just as cute and original as the first apron was. The apron is a pattern I bought on Craftsy. It’s a pattern by So Sew Easy. She has a number of free patterns I’ve been looking at, and will try at some point. The apron pattern is the Reversible Apron – I’ve got you covered!.

100_2370

The colors of this material are so beautiful. I really enjoyed working with them. And I’m saving all the little bits for that quilt that I’m going to sew one day.

I did make a few changes to this apron. The first change was, it’s not reversible. For that reason, I won’t review the pattern, except to say I do like the pattern, and the instructions were clear up to sewing the two sides together, which I didn’t follow or even read. For that reason, I don’t feel it’s fair to give it a review. But for how I used it, I had no problems.

Another change I made was to add a bow to the front. When I looked at the apron front, I just felt it needed something. My dress form, Catherine, is so small in the waist and hips that the apron ties go right around her and the ties made a bow in the front. When I tied the apron at the back as it is above and will be how my friend wears it, there just seemed to be something missing. So I added a bow in the same glittery black fabric.

100_2371

Here’s one of the sides. I love these adorable pockets! They are so cute. They’re from the same material I used for the front panel on the first apron, but smaller. They’re perfect for pockets.

100_2372

Here’s a close up of the pocket. The folksy theme is so charming to me.

100_2373

Here’s the other side, using a different patterned theme for the pocket.

100_2374

I think I mentioned I love the musical theme to this fabric. I’ve played piano since I was 4 or 5, so it’s bringing a couple of my loves together. And in such a pretty way.

And the last change I made, which I didn’t do on the first apron, was to leave the overlock stitching showing. I decided I liked how it looked on this one, and let it be part of the design of the apron. It doesn’t show up very much against the batik material, but really pops out against the black glittery material.

100_2375

Happy creating!

Sewing for a Friend

So what am I working on? I’ve cloned the Prima Donna Luna bra. It’s a very pretty bra, and my friend is so happy to have a good-fitting bra. But the color is not what she would have chosen. I know that too — when you get outside of standard sizes, you don’t always have the same choices, and pale green would not have been a choice she normally would have made. But when one makes bras, we can choose what materials and colors we want.

prima-donna-luna_0162626_fdp

So, my friend came over and brought her bra. And I set her up on my computer to look at Bra Makers Supply’s kits. She looked through and picked a few she liked. And she found more than a few! But we’re starting with one kit and one bra, and we’ll see from there. While she was looking, I was using the pin-method of cloning. I showed her how by putting the pins into the seams, the fabric isn’t damaged at all.

Here’s the kit she picked. It’s very pretty and delicate looking.

Trio%20ivory%20ivory%20pink%20and%20ivory%20lace

As well as a bra, my friend is moving into a new house, and she wanted a new apron that would go with the colors of her new kitchen. So again, we went shopping – this time to the fabric store, and with pattern in hand, we picked some fun colors for her new apron.

The apron is a pattern I bought on Craftsy. It’s a pattern by So Sew Easy. She has a number of free patterns I’ve been looking at, and will try at some point. But the apron pattern is the Reversible Apron – I’ve got you covered!.

After I bought the pattern and we bought the material, my friend decided she didn’t want a reversible apron. She wants two aprons! So although I’ll be using the pattern to cut out the apron, I won’t be following the instructions as they are written, and won’t be able to give a fair appraisal of the instructions, or at least not all of them. I did follow the instructions up to attaching the neck ties, but not after that. And dropping off in the middle of instructions like that, left me to come up with a way to finish the edges. However, up until that point, she did a great job explaining and showing with pictures how to sew the apron.

Here’s the apron I made:

100_2233

I love that front panel. It’s so charming.

100_2235

And the material here with the sparkles is the neckline trim, ties, the waist band and ties, and the bottom band as well. Why shouldn’t a girl be sparkly in the kitchen as well?

100_2238

This picture really shows why the apron is called ‘I’ve got you covered!’ – it wraps around the hips. That is a very nice touch if you ask me. Much better than just covering the front of the body. This apron wraps right around Catherine (my dress form) as Catherine really doesn’t have any hips at all.

And lastly,

100_2239

Faith, hope and love … and musical notes! It’s even got flowers in there. That just about wraps up everything I love right there.  Hmm, just thinking, it needs lace.

Happy creating!

Slopers and Styles

I saw this and it gave me a smile. I thought I’d share it.

10156141_783375995006343_1467390804011357559_n

The other day my friend came over and she’s taking a class on making a sloper. She was having trouble getting her muslin to fit using the sloper pattern, so we looked at her instructions and it wasn’t making a lot of sense to me. I’m not the best when it’s all numbers.

I finally suggested she put the muslin on and I’d pin the sides where it needed to be taken in. She then traced the pin lines, and laid the pattern over the muslin and traced those lines onto it. And it worked. She sent me a message the next day to tell me I got an A+ on her assignment. We laughed over that. I was thankful her instructor did explain what she’d wanted her to accomplish with the numbers, and our way was just another (non-math) way to do it.

My sloper, or actually moulage, that I’ve been working on for a Craftsy class I’m taking is done. It’s an awesome class by the way – Patternmaking Basics – The Bodice Sloper. Boy is it a detailed class. And remember, I said I’m not a numbers person. There are a LOT of numbers; at times she’s using one set of numbers and I’m having to remember to use my own numbers. Whew! It’s a workout. But I’m trusting it will be well worth the effort by time I’m done.

My class is also fraction of the cost of my friend’s class. She paid over $300 for the class she’s taking. I think the Craftsy class is a much better deal. Oh, and I took another Craftsy class this past year and the instructor never responded to any of my questions – even after I mentioned this to Craftsy. And from reading the questions and comments, I wasn’t alone.  This class, I highly recommend and the instructor gets back really quickly.

One of the things I learned is before you make a sloper, you make a moulage, which is an exact skin-tight pattern. Then you add in some ease and have a sloper. My moulage was done in pencil, and although I took a picture, the paper looked blank. Here’s a sample picture to show what I’ve been working on.

sloper

I bought some fabric today and will sew it up either today or tomorrow. I know I don’t have the shoulders just perfect yet (my dear hubby measured me), but will use that same pinch method to get them better and anywhere else I need to fix. Then I will adjust the moulage.

Happy creating! I’m off to work on my moulage.

Happy Australia Day and More

I’ll start this post by wishing any and all Australian readers and friends a Happy Australia Day! My husband and I are part of the Australian Wine Club here in our town, and although I don’t drink, we have wonderful get-togethers and I enjoy them very much. We just celebrated Australia Day together and just look at our menu:

Pan Seared Chilean Sea Bass topped with Grape Tomato salsa, bedded with braised fennel

Wild Boar Consomme with Julienne green onion cake

Duck leg Confit & Port Belly, dried cranberry Saskatoon glace de viande, garlic asparagus & dilled baby carrots, and Potato & Yam pie

Sticky Date Pudding and Anzac biscuits.

It was delicious! We have such fun with our group.

But back to sewing and other crafts.

I completed my first-ever self-made pattern and sewed up the skirt. I mentioned previously the class Design and Sew an A-Line Skirt on Craftsy. Would I recommend the class? Well, I’m divided on this one.

In other classes I’ve taken on Craftsy the instructor has been great at getting back to anyone with a question. I can’t say the same on this one. I have contacted Craftsy about this, and they’ve been great, but my questions remained unanswered. That right there is why I don’t know I could recommend the class 100%

I did learn the basics of how to draft a skirt pattern myself, and how to do some basic alterations as well. I’ll be taking another go at it too, as this one sits too low for my liking. The instructor suggested a lower-sitting skirt as that’s more in fashion right now, but I’m not completely comfortable in it.

skirt

Here it is on me. It’s sitting about 2-inches below my natural waist. A pretty good fit though. So for that reason, I would recommend the class.

invisible zipper

And I’m thrilled with the invisible zipper here. Great instruction on that part.

I did use a longer zipper and shorten it. Thanks to Threads, I was able to do that easily. I found out an invisible zipper can only be shortened from the bottom. Threads is such a great resource! You can read about how to shorten a zipper here.

So will I recommend the class? I guess I will with one caveat. If you run into problems and ask questions, I don’t know if you’ll get an answer there.

Happy creating!