A New Fantasie in the Works

I get emails from a few online bra stores. They’re full of bras, so full of design ideas. Does anyone else do that?

One came from HerRoom recently with a video attached. The video is part of a fitting series, and was talking about how the ‘center panel’ should fit. The center panel is what I’m familiar with as the bridge. I watched to see what they’d say because I’ve had so many issues with bridge-fitting. You can watch the video here.  A wonderful little extra right under the video is a transcript of the video. Here’s the part that got my attention:

“The center panel should rest firmly against your sternum. If it doesn’t, your bra cups are not deep enough so you need to go up a cup size. If your center panel is significantly pulling away from your sternum, you probably need to go up several cup sizes and down a band size.”

I knew a lot of the information in the video, including the information in the above quote, but it did give me reason to re-think my bra-making bridge issues. I had followed the instructions in the Bra Makers Manuals and ‘Frankensteined’ my bras that didn’t go all the way back to the chest wall. I did this more than once, and one of those times was with the teacher here. And even doing that. I did not get the fit I was looking for. After what felt like too many attempts, I’d given up. It was suggested I just use a lower bridge and that does work. But I’m not really one to leave things alone or give up. I wanted to find a solution to this.

So, with that very persistent personality trait, and the video stirring up questions in my mind, I thought about the RTW bras I have that fit with the bridge going all the way back to the chest wall. The Prima Donna bras I have do not do that. Neither the Deauville bra, nor the Duchess bra achieve that aspect of fit, but the Deauville is somewhat better. However, because they didn’t fit to begin with, I didn’t even look at either of those to help me in drafting a new pattern.

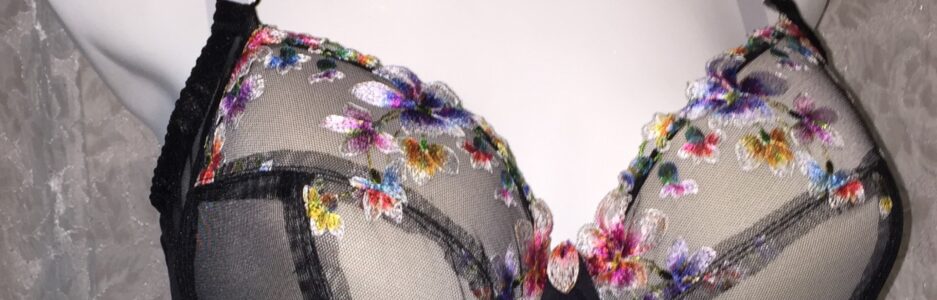
The one RTW bra I have that does achieve this fit level is the Fantasie Vivienne.

non plunge

This picture is from the internet as, at the time of this writing, I had not made a Fantasie clone yet. The cups on this RTW fit perfectly AND the bridge does go all the way back. But the bridge does not fit properly – it’s too wide. The wire is not the correct size either. Although it’s the closest I’ve ever found in a RTW bra. It’s even got Vertical wires. Those wires are one size too big. And too big is still too big.

I was thinking, if the bridge not going all the way back is a cup-depth problem… and these cups fit perfectly… then I can use the cups. And I’ll fix the bridge and the wire size. I’d want to fix the bridge, even if the other bridge fit better because I have a custom bridge that also adjusts for a flat spot. I’d also want to use the cradle I made for the Vertical wires I use.

Out came the pattern drafting paper, and I started to re-draw my custom bridge and cradle, starting with my wires. This method is described in the Bra Makers Manual.

100_2341

Here’s the first steps of that new bridge. You can see how it is the same shape as the Vertical wire. I felt like I was off to a great start here. I know the cups fit, so at this point no changes to them (at least not yet). And with the cups fitting, the depth should be spot on.

I now have a cradle and bridge drawn, and the bridge had the custom aspects added, and I have cups that fit. I’m feeling pretty confident at this point.

Now to address how some of the changes I’m making affect the cloned pattern I already have. I’m using a different wire and it’s not the same height as the wires that came in the RTW Fantasie.

100_2342

You can see the difference in the wires here. I have to say, although the RTW wires are a bit sturdier, they are a LOT less pretty to use.

I measured the difference between my new custom bridge and the cloned one, and took that amount out of the upper cup as well. It was only a 1/4-inch, so not a huge amount, but that excess still has to go somewhere. The next adjustments to make will be to the lower cup to help it fit into a smaller cradle.

As this is getting quite long, I’m going to sign off here, and next week I’ll have the conclusion of alterations and hopefully a perfectly fitting bra, with a full bridge that goes all the way back to the chest wall!

Happy Creating!

Another Clone Finished

There were just too many blog posts where I hadn’t finished the bra clone I started. So… I finished it!

100_2042

Here’s my Prima Donna Duchess clone. She turned out really nice. A few minor bumps on the road, but still very nice. I wore this bra on my recent mini-vacation to the mountains and I was very comfortable in it – more so than the original.

One of the things I did was make an ‘exact’ clone of the bra, right down to the wires. I used wires I’d had from an old Prima Donna. I’ve found most RTW bras have longer wires than what I use. They must be extra long, because I buy long wires. I don’t really prefer these longer ones, but didn’t want to do any alterations on this. The only thing still missing is sewing a little crystal & bow on the bridge.

One of the bumps I had was I didn’t have enough channeling in the kit I’d bought! This was a kit from I purchased before they closed. I was surprised there wasn’t enough, but was determined I’d get this done. I didn’t want to use any channeling from any of the other kits I have either, so I used a single bit I had left over from a past bra. I have BAGS of bits and it came in handy.

100_2047

Here’s the inside of one cup showing the beige channeling. This also shows the seam in the lining. I really like that extra seam for the support it adds to the lower cup.

100_2046

And here’s the black channeling. I didn’t have any beige bits! However, I decided this won’t bother me because I’m the only one who will see this – at least when I wearing it every day. Anyone reading this now knows my bra doesn’t have matching channeling!

100_2043

I did like this shiny Lycra that was part of the kit, but didn’t find it really strong, so I lined it with power net. I had a small piece of black (again) and used that. What I ended up with is a really nice supportive band. I like the double material. It feels very comfortable. And it’s not the first time I’ve used it. I did a few bras with Lycra and lined them so they were doubled. Very comfortable.

100_2048

Here you can see the black inside. The only draw-back to this, which I didn’t anticipate is it makes it a little less forgiving when wearing. The original fits snugly, and this fits a bit too snugly now. So I use an adapter so I have that extra set of eyes I need. If I make this again I’ll add 1/8 – 1/4″ to each side of the band to make up adding that second layer of material.

I would have loved to match the lace so it was perfectly symmetrical on both cups, but didn’t have enough for that. Maybe on a future bra.

And the straps were a bit different this time. One these straps I did the lower piece which is covering the edge of the band and ends up enclosed in the hooks & eyes. And then only a one strap piece above that. Previously I had used two pieces above that. It took a little while of looking at it to figure out what I needed to do. I had already sewn the bra straps to the front of the bra, so picked out the stitching. Then I made the strap starting at the back. I put on the slider, then after that was sewn, I ran it through the loop on the top of the band. Then it could be attached at the front. This was how it was done on the original, so I tried this and I think I prefer it. So the last things I sewed together were the straps to the front.

There. Whew. This clone is no longer sitting on my sewing desk waiting for me to finish it. What a relief!

Happy creating!

More Sewing Done

A great way to get some sewing done is take it on for someone else’s Christmas gift! Boy, that motivated me to get sewing. But I enjoyed all of it. Well almost all of it.

I didn’t love how the sleeves were set in on the pattern I was using. The first robe I made I followed all the instructions to a T. And the underarms of the sleeves weren’t as neat as I wanted them.

So on the second robe, I used a flat construction process, which I like so much better. However, I still didn’t love how the sleeves looked under the arm. But other than that, to which my dear husband says, ‘no one but you will even notice something like that’, I’m quite happy with how they turned out.

red robe

Here’s the red robe. And below is the blue one.

blue robe

I wasn’t completely done this one when I took the picture. The sleeves still hadn’t been hemmed, and the belt wasn’t done yet either.

They are very cute though, and should keep those wonderful boys warm.

While my machine was out and I was on a sewing roll, I repaired two bras that had some strap issues. While I was fixing them, I also shortened the straps on both of them.

But one bra that has been really bothering me is the Prima Donna Duchess I have. The left wire was popping out of its channeling and making it very uncomfortable to wear.

wonky bra channel

You can see here how it is a bit twisted. I did try to reinforce the channeling there with some hand sewing, but it wasn’t strong enough. So I popped that wire out and ran a few machine stitches over it. Put the wire back in and am hoping for the best now. Other than that, this is an extremely comfortable bra.

And I also worked on my favorite skirt. Having lost that weight over the last few years, my skirt was too big. But there was no way I was going to put it in the give-away pile. I opened the waistband where it was sewn to the slip, and then again under the elastic. I cut and overlapped the elastic and sewed it back up again. It fits perfectly! I was so happy with that little alteration.

fav skirt

And lastly, I had two jewelry classes this past week. Both classes were wire wrapping classes, where we made earrings. Here’s a sample of what I made in my classes.

black shell blue crystals

These are black shell with blue crystals on gold-plated ear wires.

black shell peach crystals

And a similar pair with the same shells but this time with a champagne crystal. Again on gold-plated ear wires.

bracelets

Lastly, two fun bracelets. The blue one with drusy stones, and the second one with red bamboo coral and turquoise. I love that one.

I hope you have a wonderful Christmas and New Year’s!