This past week I took the Bra Design & Draft course at Central Sewing Machines. I’ve wanted to take a bra drafting course for a few years now. With the course finally coming closer to home, I could do it. It was a pleasant surprise to find I knew the other students. We’d all taken either the Beginner Bra-making class or Shelley class at Central last year. And of course, we’d all taken those classes with Jeanette of Sew Uplifting Bras too. It was like a class reunion.
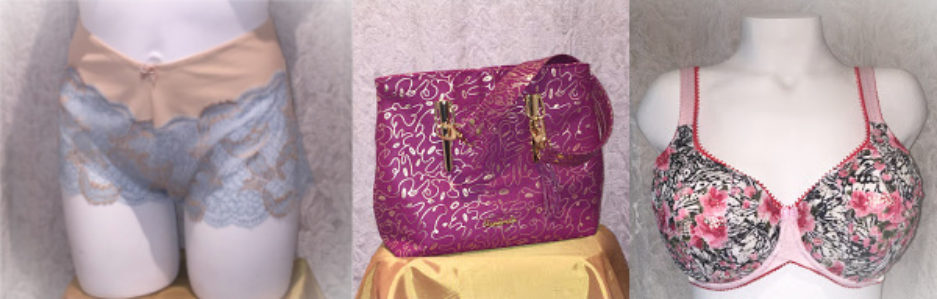
The first day was very exciting. We were all presented with a bag full of goodies. Now, others may not have been so thrilled with the goodies, but for a bunch of bra-makers, it was a thrill! Just take a look. This is the manual we were given. It has the complete Drafting course in it, as well as a bunch of other great resources.
 We also got a full set of Long wires, and a complete set of Classic patterns (all the sizes). There were sample packs of duoplex and power net, a notebook, a binder (shown above), a set of curves, and a bra kit with findings. All in a great bag. I’m pretty sure that was the best swag bag ever.
Fabrics
The first day we learned about all different fabrics that can be used in bra-making or lingerie. Some of them were familiar to me, some were new. We were given samples too, with instructions on how they were best used, and not to be used. It’s all neatly contained in our new binder. One of the students is in a Fashion & Design course, and she said she’d learned more that day than she had in her Textiles class. It really was very useful. By the end of the first day, we’d all been measured and learned how to measure someone else by measuring one another – all under Jeanette’s instruction. We were almost ready for Day Two, but before that, we had homework to do.
Drafting
Day Two was the beginning of a lot of paper and pencil work. We were guided in the art of drafting. We started with our frames. I did something wrong. Jeanette told me what I did wrong, but I was tired and didn’t correct it right away. Let me tell you, all it takes is one little mistake to throw everything off. By the end of the day, we were sent home with homework again. This time we were to practice our drafting. We drafted frames for everyone in the class. Day Three built upon Day Two. We were starting our lower cup draft. Well, we needed our frame to be done correctly at this point, and the one I had with me in the class still wasn’t corrected. Things weren’t fitting together. Again, Jeanette pointed out what I’d done wrong on my frame. I was back to the drawing board. Literally. I’d had a little more practice drawing frames by Day Three after Day Two’s homework, so it went much more quickly. I was on track in no time. We finished the day with a draft of our lower cup, our upper cup, and lots of information on how to do adjustments if needed.
Day Four was similar to Day Three – still more paper, pencils, drafting, and information. Some of us even cut out our newly drafted patterns, and got in some sewing before the end of the day. One woman was almost finished her drafted bra on Day Four. I had my cups finished. I brought them home and put them in my fitting bra frame. I was thinking this would save me the time of completing the whole bra to see how close I was. There was one small little change I needed to make to my draft. That was incredibly encouraging. Something I’ve heard and read repeatedly is: To get accurate measurements you have to start with a well-fitting bra. It’s so true. Jeanette brought fitting bras with her, so we all started with a well-fitting bra to get our measurements. And it works!
Day Five was mostly a sewing day for me. But before I could sew, I had to re-draft my upper and lower cups with that one little change. I worked as quickly as I could so I could get to the sewing. I really wanted to be done by the end of the day. Thinking back, I could have just changed my pattern, but it was a drafting class, and I was getting a LOT of experience with drafting.
The great news is I did it. I finished the Bra Design & Draft course and came away with a perfectly fitting pattern and bra – that I drafted from measurements. On my drafted bra here, I added a couple of features just because I could. I gave this bra a Gothic arch, and a thinned band under the cups. This draft is for a Horizontal seam. This seaming is the basis for the ‘Heather’ bra. The Heather bra is actually a Wacoal bra. It’s the Retro Chic Full Figure Underwire Bra.

You can see this has a horizontal seam going across the cup. It’s so pretty. I’m already planning another ‘Heather’ using my new pattern. If you have the Craftsy Class Sewing Bras Foam, Lace & Beyond, Beverly shares how to make the Heather bra.
It was a great week. I can’t wait for the next course!
Happy creating!
 Oh, a pattern drafted for me? Yes! I was interested. I signed up right away.
 Although this first bra didn’t fit perfectly, I was so happy with it. Let me show you why.
 Do you see how the cup meets the cradle and they’re both the same length? I haven’t had that happen in a bra since my second or third bra when I found out I had an Omega shape. I am so excited about that.
 Overall, even though I could already sew a bra, I’m so glad I took the beginner class.
 On this bra, we’ve lowered the bridge, adjusted the cups for the lowered bridge, and adjusted for my Omega shape. I also added a Gothic arch, but that wasn’t part of the class. However, as a class, we thinned the band.
 Another lovely feature that shows in the side view is the power bar. It’s an S-shape. That was a first for me. It’s so pretty.
 Again, on this bra I’ve used sliders only rather than rings and sliders. It does give a neater line on the back, but I have a lot of rings and sliders in my stash, so I will be using those still.