I’ve really gone back and forth on my Shelley pattern. After I got the official pattern in the mail, I had to open it and compare all the pieces to what I had done. I was very pleased the patterns pieces were mostly similar, but there were a couple of small differences, and I wanted to make a Shelley closer to the ‘real’ pattern.
I think the biggest treat was to have instructions. I was winging it at times, and other times referring to my Bra-makers Manual. Between the two, I did get a few made, but having instructions (great instructions!) really was nice.
That seam allowance! Well, I decided not to add it again. The lower cup really fits better without it. So, that really makes my fit a bit of a challenge and I doubt I’ll ever buy another bra knowing what I know now.
I’ve also been re-reading my Bra-makers Manual again. It’s good to read it again after making a few bras. I’m picking up things I missed or didn’t understand as fully the first time I went through the book. For one thing, I had posted not too long ago that Lycra and I were not going to be friends. Well, we’ve made up! A little tip in the manual and I was off to my stash of fabrics to pull out some Lycra I’d bought and then decided not to use.
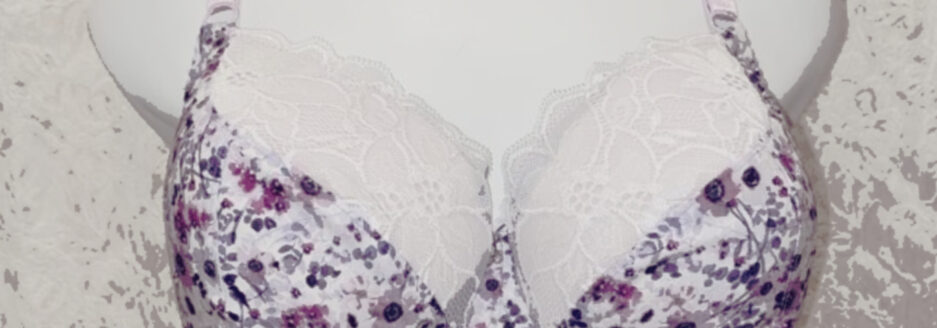
Here’s my Shelley again, but in a lovely Lycra & Lace:

I’m so very pleased with how this bra turned out. I love the combinations. I’m not sure I love using the foam cups to fill out the cups for pictures though. I can see little puckers on the cup that look like darts. There are no darts – just cups not filled out.

And the back. The straps are a little tiny bit closer to the middle on this. Not a big move, but a little one. Still more comfortable and I’m not feeling like straps are falling off my shoulders.
I’ve had some problems attaching my hooks & eyes. I don’t seem to have a sewing machine foot that will let me sew the hooks on easily. So what I did here was I used a straight stitch to attach one side of the hooks (the eyes are never the problem) and then folded it over and did a zigzag. I went on much easier and looks much smoother than some of the other bras I’ve done.

And the side view. You can see the foam cup here. I’m not sure which I prefer – the foam cups or the black beanie forms. I did take a few pictures with the forms in too and was going to have a vote to see which looks better. Maybe next time.
I made this a little higher at the sides to fit a vertical wire. I showed the difference between a long wire and a vertical wire a few posts ago. I’ve been wearing the vertical wire all day and I’m not sure I love it. Thankfully, changing a wire isn’t the hardest thing to do! I may try a long wire and see if I prefer that. It may simply be I’ve never worn a wire that fits so closely before and I’m not used to it.
And I’m probably going to say this again and again, but I really am happy there are no ‘gathers’ along the bottom of the cup (I know they weren’t really gathers, but it almost looked like it!). Easing a larger cup into a smaller wire may be necessary, but I really didn’t like the look of it. This is much smoother and I really am very happy with the way it looks.

And lastly, I finally got a great fit under the arm. So many times, I would take in the underarm on the pattern, but it was still a bit too big. I took this in what seemed would be too much, but it’s perfect.
I have more Lycra in my stash, and am thinking we’re going to be good friends! And that perfect bra my husband is always saying I’m trying to make? This is the closest I’ve come yet! I’d say this is next to perfect. So for anyone thinking of starting a journey in bra-making, I’d say ‘Yes! Go for it!’ It can be a challenge, but it’s also very rewarding.
Happy creating!
