We were heading to the mountains – for a whole week! We haven’t taken a whole week to get away for more years than I can remember. Usually, we’re just gone two or maybe three nights. This was going to be such a treat for us, but … what was I going to do without my sewing machine for a whole week?
Mountain Sewing
I decided I had too many projects to leave them all for a week. There were things I wanted to work on that, with a little planning ahead, I could do while away.
So I packed up my sewing machine in my tote and planned what I would sew.
Here’s my sewing machine, my iron, three cut-out-ahead sewing projects, thread, scissors, and more all packed up and in our mountain getaway. I was so excited to bring my sewing machine with me! I’ve never taken it on a trip before. Probably because, as I said, we usually only get away for a couple of days.
Some dear friends let us have their time share for the whole week! We’re in Banff, Alberta, in the Rocky Mountains.
I’ve claimed half of the table to do my sewing. You can see my computer set up on here. Believe it or not, that table looked a lot worse at the time I wrote this – with all my hubby’s work piled all over it. We got it cleared off enough for me to do some sewing.
Look at my view. Although I do plan to sew and get some work done, I know we’ll also spend some time outdoors.
Matchy-Matchy
One of the sewing projects I planned was to make some panties to go with my new Angie bra. I really like my new Angie and definitely want some panties to match.
Here’s my little set up, and you can see I’ve been sewing. My project is right there on the table with my machine and my computer. It all worked very well.
The first pair of panties I made is my basic pattern. As much as I love lace, I do really like these basic panties. The cotton Lycra is from Black Rabbit Fabrics. Although it’s cream, it matches the ivory duoplex really well. The lace trim is from a favorite vendor of mine on Etsy – Frog Feathers. I love their narrow stretch laces for finishing panties.
The second pair is the same pattern only finished with a lace panel in the front. This very pretty lace is from B,Wear. It’s light beige, but I’ve paired it with ivory a few times and love it. When I was sewing the lace panel onto the front of the panty, I realized I hadn’t brought any elastic for the inside of the waist. On a soft lace like this, it needs some support at the waist. Without elastic, I had to think of an alternative. A strip of cotton Lycra worked just fine.
 Here they are with my Angie. First, the basic pair with Angie.
 And here’s the lace panel with Angie. I only took the front photo for these as the sides and back are basically the same.
 Yes, that cream is really close to ivory. I’m so happy with both of these sets.
Plans
In order to bring these projects along, and not have to bring everything in my sewing room, I had to preplan my sewing. What I was going to make, and then make sure I had everything I needed.
So I cut everything out, including my lace. I only needed to bring thread, the cut material, pins and scissors. And my sewing machine, of course. It’s worked out wonderfully, and I plan to bring my sewing with me again on future trips.
Smoky Mountains?
We were only in the Rockies for a couple of days before forest fires caused our view to look much more like the Smoky Mountains.
Here’s a view of one of the mountains the first day. I love this. It looks like a painting!
And here’s the view two days later. I was glad I brought an indoor activity when the air quality became so poor.
Happy creating from Banff in the Rocky Mountains!
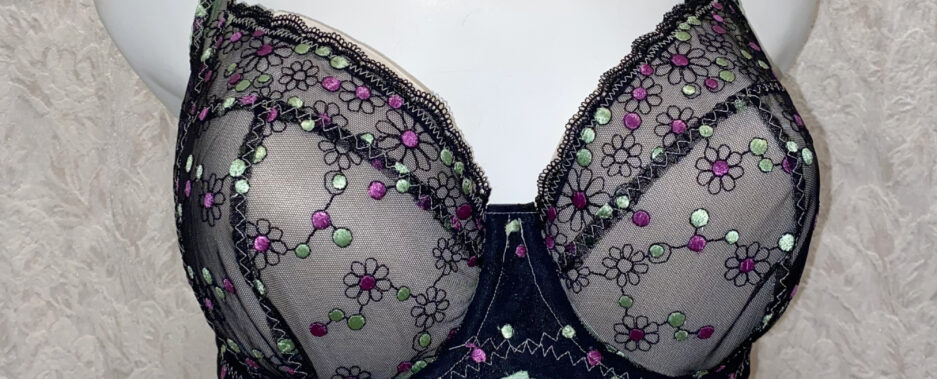
 The Angie pattern doesn’t have an upper cup like so many bra patterns. In fact, I can’t think of another pattern that doesn’t have an upper cup. There are four pattern pieces to the cups, but none of them are upper or lower. The cup is completely different due to it being all vertical seams.
 These Lavender and Lace bras are lovely, but back to Angie for this post.
 I was also happy with the adjustments I made to the cup to make this fit me and make it fit in the frame so neatly. No more puckering on the cups! I’m not going to get tired of that any time soon.
 If a bra I’ve made has a bow on it, you know I’m happy with it! It’s bow-worthy.


 Recognize this? I just used this gorgeous cotton Lycra to make my
  I think it’s adorable! However, it’s a smidge small in the cups.
 I need to gather the elastic under the arm more. I’m very shallow there, and have to make that adjustment on almost every bra I sew.
 Look at this nice deep back.
 This photo shows the side seam and the under-bust seam. Both are enclosed. It’s a very nice feature. The only seam not enclosed is the center front.
 Do you see that nice wide elastic at the bottom edge? That’s 3/4″/19 mm elastic. Another supportive feature of this bralette.
 This looks the same on the outside, but the inside is lovely soft cotton Lycra.
 Soft, comfortable, and those lovely enclosed seams. It’s really nice.
 What a cute set!
 This pattern has quite a few options listed. Foam-lined or all fabric. Underwired or wire-free. The bras I’ve seen sewn up are lovely! Here’s one from the BMS website:
 I’ve made this with sheer cup lining, and black elastics. I think it works very well together.
 Ruby has a lovely shape. It’s definitely a rounder shape to the cups.
 This pattern calls for 1/2-inch elastic for the bottom band, which is a bit of a change for me. I usually use 3/4-inch elastic. However, this is still supportive.
 Ruby doesn’t have fabric straps. For mine, because this is a tester to see how it will fit, I only used strap elastic. However, the pattern suggests sewing some ribbon over the elastic at the front for more support.
 How the straps attach on the Ruby is different too. The strap is attached to the ring at the front, giving it a lovely modern look.
 It’s so sleek and modern-looking!
 She’s lovely.
 This adjustment I’m showing would shave off 1/4-inch from the wire line, but leave the fullness of the cup. You could shave off a 1/4-inch from other cup pieces too – as many as you needed.
 Hello? What’s this? Remember? Remember what? I didn’t read this anywhere!
 I saw, ‘Thank you…’, and skipped right past that paragraph to get to work.
 This fits really well. And those vertical seams really give great lift.
 There are little bits of elastic that are sticking out all over this bra that got tucked away for the nice photo.
 You can even fold elastic so it’s out of the way, and sew over it like I did for the hooks and eyes.
 The only finishing on this bra that’s been done is the top-stitching. I was pretty sure these cups were going to fit perfectly, so got them all ready for the next time I sew them.
 I can’t wait to sew this up knowing it’s going to fit so nicely.
 I even tried making the cup size in Swedish tracing paper just to see if it was close. Just in case, I sewed my bra with wash-away thread.
 Let me tell you there is lift happening with this lovely pattern. I do need to go back to that first cup size though. I’ll try it with elastics this time.
 Do you see all those vertical seams? Vertical seams really lift. The cup has a lovely round shape as well.
 I really like the shape of the cup, and especially at the side. This fit me quite well, which is encouraging. I usually need to take the underarm in, and I won’t need to on this pattern.
 I’m very impressed with my first attempt at Angie, and only wish I’d gone with my first cup size choice.
 Ingrid is a non-wired bra pattern, with three front-closing options, as well as a comfort band option.
 I really like this bra. I’m rather impressed with the support it gives for not having a wire.
 I looked for a grey hook and eye set, but my stash seems to be very low on hooks and eyes. That’s something to stock up on. So rather than grey on the back, it’s white. If you look closely, you’ll see I didn’t have 3/8″ upper band elastic in black or grey. Again, I had white on hand, so that’s what I used.
 Here’s the back of the repair. There’s double-sided interfacing fused between the duoplex and that little strip.
 Thankfully, the majority of this repair isn’t seen in the bra – it’s in the seam.
 I also like the power net inserts at the front. I think it looks unique.
 These aren’t hemmed yet, but I’m adoring them so far. In fact, I tried them on and didn’t take them off. I wore them all day. Love them.
 I found this image on the internet. It shows the knotted pants perfectly. I’m so happy to have found this pattern. They’re also quite easy to make up.
 You might recognize the lace I used in this Watson as the same lace I used in the first Watson I made for Em. I thought the peach would look really nice with the charcoal mesh.
 Em loves the new color combination. That’s good news. I have more charcoal mesh for the next bralettes I make for her.
 I’ve used fusible knit interfacing for the front cradle. I might need to buy some in black to use with the rest of the charcoal mesh I have. I don’t love the white behind this.
 There’s a little fold in the material where the band meets the hooks and eyes. Em lost some weight and the bands were too loose on her this time. I measured her again, and she’s two inches down around her rib cage. I had to take these in after I’d made them.
 I think this one is just adorable. The lace is from
  I thought both of these were lovely, and fun.
 And the back.
 There’s the same little tuck in the fabric on this bralette as on the long-line. It’s not too noticeable, and it did the job. It took the bralette in enough for her to wear them and adjusted the pattern for next time.