A Shout Out and a Few Accomplishments

I’m one of those people who LOVES gifts. Just ask my dear hubby. Our first year married, he got confused because my birthday and a former long-time girlfriend both had our birthdays on the 15th – just different months. It was a lovely fall day, and he was heading into the room I was in with a card in hand and something behind his back. His Mum realized what he was doing, and stopped him. I had no problem with it at all. I just told him I wanted my gift. I didn’t care what the occasion was. I was good with the mix up – just hand over the gift. He made me wait. But that tells you a little of my personality there. I love gifts!

So, I want to say a big ‘Thank You’ to a couple of wonderful fellow bra-makers (whom I met on Amy’s Sew Along) who have sent me the loveliest gifts. Thank you Ginny and Naomi!

A while back, Ginny sent me these lovely laces and elastics.

Laces and elastics from Ginny

I’ve dipped into these elastics on more than one occasion. Elastics have become a valued item here. I hate using precious elastic on something that ends up not fitting! And I have plans for one of these laces on a bra I’ve got all cut out. But not the one I’m working on right now – I ran out of strap elastic for the cut out one.

Ginny also sent some adorable earrings she’d made – which didn’t make it into the shot here. You can see some of her hand-made creations here in her Etsy shop.

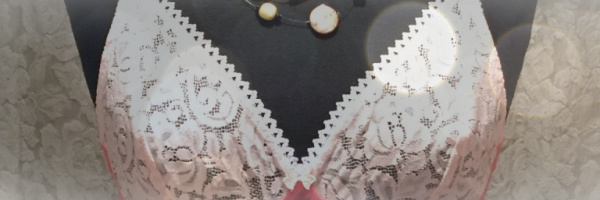
These are the laces I just got from Naomi. I love that beige. I’ve always been a beige or black girl. But there are too many laces out there that are so pretty to stick with that. Pretty colors, here I come!

Laces from Naomi

And a bunch of elastics, straps, upper cup elastic and more. Oh, that dark purple… such a beautiful color.

Elastics from Naomi

So a really big Thank You to both ladies.

And those accomplishments I mentioned? I finished my moulage AND my sloper. Both patterns are packaged away for the time being. I have to sew something now and I’ll pull the sloper out after I get my sewing fix.

moulage done

Here’s the final moulage. I found this great material in the clearance area and it worked better than the printed one I’d used previously. It is such a relief to be done this. Naomi sent me a great idea to transform my dress form using the moulage. Take a look at how Mary did it in her blog Cloning Couture. I’m definitely mulling this idea over. It’s a great idea!

And lastly, here’s an idea I got from Sigrid’s blog. And I looked and looked for this posting from her, and could not find it. Here’s what she said, “Pin (or baste) the cup over a well fitting bra, using the seam allowances for the pinning.”

Testing Bra Cup size

This is a new pattern for me. It’s Kwik Sew’s 3300, and I had to guess which size I was going to be. I did pretty well. This is a great starting point. I’ll have to change it from a partial band to a full band, but I can do that fairly easily knowing the basic cup pattern will fit so well.

Standard alteration to fit in smaller wires

This isn’t the easiest to see, but there’s a pin there at the bottom of the cup where there is excess material. That’s about a standard amount I need to take out to account for the smaller wires I need. So this is on it’s way to being pretty good already. Off to work on some pattern alterations now.

Happy Creating!

A Few Accomplishments!

My husband and I went away last week for our 22nd anniversary. We found a wonderful deal at Christmas time and bought it and put it away for ourselves. We only live 4 hours from the Rocky Mountains, and it’s our favorite vacation spot. Our suite had a tremendous view! Just look at this:

View from Windtower Rm 234

This was the view from the kitchen patio door. I could just sit and look out at that. We spent 4 days with that view, and although there was still snow on the ground, and we even woke up to snow one morning, it was still perfect!

I took a few projects on my trip that I wanted to complete while I was there. One project was to complete the measurements for a bodice sloper. That’s not a big deal, but for some reason those last few measurements just weren’t getting done. They’re done now, so I can work on that.

Another project was fingerless gloves. I was determined to get them done. (I know, Andrea, it’s a bit late in the season.) I’d looked at many patterns, and finally settled on one I found on Ravelry. These are based on the Vanilla Frappe Fingerless Gloves. You can find the pattern here.

I really liked the ‘body’ part of this pattern, and decided to do just that, with a scallop border on the top and bottom. The body is knit; I crocheted the borders, so mine look different than the originals, but I’m happy with them.

fingerless glove 2

I’ve sewn one, and one waiting to be sewn up.

fingerless glove 1

The ball of white yarn is to do some flowers or hearts or some type of embellishment.

So two projects done. I also took my sewing kit to tighten a button on my coat, but that’s still on my to-do list.

And when I got back I had one more accomplishment!

I worked on another bra. I knew the area that needed work – the bridge – so I tackled that as soon as I got home. And another success! I have the best fit I’ve tried for yet! Let me tell you, if you’ve never had a properly fitting bra – one where the bridge goes all the way back to the chest wall – well, it’s a different feeling. I’ve never felt that. It’s not uncomfortable, but it is different for me.

plunge bra prototype

When I started this bra, I have to admit, I wasn’t feeling super encouraged. It feels like there have been too many challenges along the way that left me less than hopeful. I even skipped some of the little finishing details on this bra – finishing details that made it onto all the other attempts I’d made. However, this one only needs minor tweaking. That has me excited!

One of those minor tweaks? The bridge can still come up about 1/4″. But that’s it’s. So now I need to look at plunge styles. I haven’t seen a lot of patterns for plunge bras. Does anyone know of any?

For this bra, I took my Sewy Rebecca pattern and made it into a Classic pattern. I also straightened the lower edge of the upper cup to get the most lift. I decided not to do a three or four piece cup on this so it would sew up more quickly, and also I don’t see a lot of plunge bras that have those features. So, once I had a basic Classic pattern, I used my trusty Bra Makers Manual to change the cup shape to a plunge style, or ‘fake’ demi-style.

plunge back 2

A very basic back, with the Prima Donna U-shaped back. I don’t think they’re the only ones doing this now, but I do remember them advertising this feature.

So a few little glitches I ran into while sewing this? You can see in the above picture that the back band is a bit smaller than the hook and eye closures. That’s a small adjustment. You can see it better here:

plunge back

That’s not a big deal – just a small tweak.

Another small tweak is the lower cup. I still have to make adjustments for the Omega shape, and need to fit a larger cup into a smaller wire. On this bra, (again) I didn’t put a lot of effort into it. So when it came time to fit the cup, I simply put a fold in the lower cup’s material. The cup still fits fine, and the seam line fit as well. I have altered the pattern with a dart to take out that excess on the next one I do.

plunge bra dart

You can see the tuck here. It shows more here than when I’m wearing it.

Bow to cover seam

Lastly, a tweak to make is my order of sewing if I do this style again. On this bra I had the cups sewn into the cradle and then looked and I still had to add the neckline trim. On a style like this, I think it would be better to do that before putting the cups into the bra. It works fine, but would be neater sewn the other way.

So, I’m very happy to say I’ve had SUCCESS! It feels really good to know I’m there with just a few minor tweaks now. Whew! I said a long time ago that I hoped my journey would encourage someone else not to give up! How long has it taken me?

Here’s to happy & successful creating!

Will It Ever Stop Snowing? And Other Greats!

I saw a cute video by Rick Mercer, a Canadian comedian, which depicts how I feel so well:

Yes, that is the sad state many Canadians are in right now. We’re just hoping for warmer weather, and … well, it’s snowing right now. Sigh. So much for the calendar saying Spring.

I’ll happily stay indoors today and work on my pattern, right? Sigh, the pattern. Okay, I’m going to focus on the positives and deal with the challenges next.

I got the short wires from Bra Makers Supply. I’m was hoping for the same length on the side, and shorter at the front to accommodate the lower bridge. Great! But nope, those didn’t work the way I wanted them to – too short on the side. I think I still want the Vertical wires, I’ll follow Amy’s suggestions on her blog (Cloth Habit) for shortening them.

With newly shortened Vertical wires in hand, I got out my Bra Makers Manual and drew a new bridge & cradle for these new wires. Another great! But, I’m not done with this topic yet. More to follow…

Then I decided to make sure my custom bridge really was the best fit I could get. An article from Threads that talks about making a Duct Tape Sloper was my inspiration. I decided to follow the same principle and use multiple layers of tape to make a ‘sloper’ for my bridge. That worked well too. And then I checked it against the custom bridge I’d made. It is almost exactly the same as what I’d done when I followed the instructions in Norma’s book, Demystifying Bra Fitting and Construction. So I have my correct bridge shape. Great!

full bridge

Here’s my little tape sloper. I didn’t continue the sloper past the marker – that wasn’t the problem area, so I focused on the middle of the bridge. The rest of the wire was fitting fine. But that area…

Well, a picture is worth a thousand words, so here is the difference between my little tape sloper and the newly drafted cradle pattern. Yes, there is a problem.

cradle issue

Do you see that area at the front of the cradle where the bridge is? It’s nice and round. I don’t match. So, what to do about that?

I have asked that question before, and didn’t get an answer that was satisfactory. I was told by one person there was nothing to be done about that. But that’s an important very supportive area, and it does need to fit. So, I re-drew the cradle with the custom bridge in place of the bridge here.

Back to those shortened wires. Oh my! I will tell you, shortening them is not a problem. However, covering that rough edge is! I read Amy post, and decided to follow her suggestions for using Plasti-Dip. There was no variety of colors, in fact I had my choice of red or black. That was it.

So with red Plasti-Dip in hand, I came home and dipped my newly cut and filed wires. I let them dry overnight even. They looked great! And then came that magical moment when I went to insert them into the bra channel. I should have taken a picture… I inserted the newly rubberized end of the wire into the channel and pushed, and pushed and pushed. Then I did what I’m sure 99% of married women do when they can’t do something physically — I called my husband. ‘Honey can you help me?’ He pushed and pushed. And then looked at me and said that’s not going anywhere.

It seems Plasti-Dip is a rubber coating. Rubbery is not what I was expecting. I’ve been to every hardware store in 3 towns and no one has anything other than the rubber coating-type Plasti-Dip. Well, that didn’t work.

I have read about others using Goop, but I don’t think that is a preferred method. I bought some heat-shrink tubing and will try that. I’ve said this before, and it’s still true… I’m close.

Happy Creating!

I Tried a Custom Bridge Already

I kept thinking about how to alter the bra pattern sitting on my desk so the bridge would fit and go right back to the chest wall. Last year I spoke with the staff at Bra Makers Supply, and they’d suggested I lower the bridge if it wasn’t going all the way back. That really helped. So that was one of the things I’d done on the custom bridge I made as well as a couple of other changes.

And some of the ideas I was thinking about to alter the bridge, like narrowing the top of the bridge but keeping it a normal width at the bottom, were the same alterations I’d done using Norma‘s book: Demystifying Bra Fitting And Construction. I had no desire to go back down that road again, trying to re-invent this, especially as all the changes I was thinking of were the same as before.

I decided to look at what I’d done last year when I made a custom bridge. I have a bag of bras I’ve made, and they are put into the bag when I’m not completely happy, or I deem them ‘unwearable’. It’s like the Bag of Bra Shame! I’ve kept them all so I can use parts like wires, rings & sliders , hooks & eyes again. So I dug out the bag, and pulled out the bra on which I’d done the custom bridge.

IMAGE_046

I didn’t even finish this completely. The channeling didn’t get sewn down. No little bows to cover up the seams at the straps. Poor little Ivory Shelley. When I made this, I was disappointed in not getting the fit just right (again), and I stuffed it into what seemed to be an ever-filling Bra Bag.

This morning I tried it on again, and there are a few minor adjustments to be made but it does fit pretty well. The bridge works just like it should. It goes all the way back. So I thought some more about what I didn’t like about this bra.

I decided to look at the wires. I originally had put in 38s, then 40s, (my original bra pattern changed shape a bit when I altered the bridge, and the original wires didn’t fit properly.) and although I’d been told I wasn’t likely a smaller wire size, I decided to try one. I had a couple of 38 Vertical wires, which correspond to a 36 wire. It worked out quite well that I hadn’t finished that channeling.

And… drum roll please. It fits! The wires aren’t too tight. I am amazed! In one little experiment, I may have taken care of all my fitting challenges I couldn’t figure out. I’ve had this little Ivory beauty on all day and it’s more comfortable than any of the $200 bras I own.

I am so excited! It’s drafting time again. Now with the bridge problem fixed and past adjustments to the patterns, I’m ready to make something that fits PERFECTLY!

Happy creating!

A Few Projects, Lots of Coughing

After my wonderful trip to the mountains a few weeks ago, I came down with the worst cold I can remember. And I coughed so much my ribs were hurting! I’m finally feeling a bit better and getting at some new projects.

But first, let me share a cute moment from our trip. One of the highlights my husband and I enjoy about going to the mountains is seeing the wildlife there. This trip we saw a few deer, coyotes, and bunnies. Yes, bunnies. At some point in the not too distant past, someone thought it would be a good idea to let domestic bunnies loose in Canmore. Well, it’s not uncommon to see the little furry guys hopping all over the town. But back to my dear husband. He kept saying he wanted to see bears. I reminded him, bears hibernate, but he still kept saying he wanted to see them. On our last day in the mountains, we were driving around and at the top of a road near the Banff Springs we came across this adorable family of bears!

Banff Bears

This made my honey’s trip! He got his bears.

As for me, other than coughing this past week, I did get my scarf done. I love it. I really mentally debated how to finish the outside part. And I actually knit up the better part of a ball of wool in a seed stitch. But I kept thinking with the straight border on either side, the overlapping edges of the middle part would give it a clear front and back side. And I didn’t want that. So, I abandoned the seed stitch and sat (and coughed) and tried to think of something else to give me that black border that looked so nice. I decided just to do some crochet all around the edges and I really like the result.

Red & Black Scarf

I love the contrast between the variegated red and the black. The black wool is 100% Merino.

close up scarf

Hmm. Although I’m using my camera again, and editing my photos. I still don’t love the quality. However, this does show that variegation better. It goes from pale reds to really deep burgundies. Just lovely colors.

And I’ve also been mulling over what changes I’d have to make to my Fantasie Vivienne clone. I knew a few changes I wanted to make. A narrower bridge, and lower too. And seeing as my wires are shorter than the professional wires, I’d need to adjust the side’s height as well. I was also trying to figure out how to adjust the cradle and use my correct wire size which is one size smaller than what was in the original.

So I started that too. No cutting out yet. Just figuring out all the changes. So let’s look at that first one. Narrowing the bridge won’t affect anything else very much. But lowering it will. I had to adjust the upper cup accordingly. Same with lower the side. I adjusted the side panel and then the band. And lastly, the cradle. I was having a little trouble figuring out how to adjust for one size of wires. Would I have to re-draw the whole cradle using the wires as a starting point? I decided to take a 1/4″ out and eyeballing it, it looked good. There’s still some splay room for the wires, so all should work out okay.

bra project

Here are my re-drawn pattern pieces with the adjustments made, my bra kit from Bra Makers Supply in a pretty black with pink detail in the lace, and the picture of the original bra as a reference. I’m thinking with the changes to the bridge I’m making, it may end up looking more like their plunge bra.

plungenon plunge

Here they are for comparison. I’ll have to see if this is more along the lines of what mine ends up looking like.

Happy creating!

Another Clone Finished

There were just too many blog posts where I hadn’t finished the bra clone I started. So… I finished it!

100_2042

Here’s my Prima Donna Duchess clone. She turned out really nice. A few minor bumps on the road, but still very nice. I wore this bra on my recent mini-vacation to the mountains and I was very comfortable in it – more so than the original.

One of the things I did was make an ‘exact’ clone of the bra, right down to the wires. I used wires I’d had from an old Prima Donna. I’ve found most RTW bras have longer wires than what I use. They must be extra long, because I buy long wires. I don’t really prefer these longer ones, but didn’t want to do any alterations on this. The only thing still missing is sewing a little crystal & bow on the bridge.

One of the bumps I had was I didn’t have enough channeling in the kit I’d bought! This was a kit from I purchased before they closed. I was surprised there wasn’t enough, but was determined I’d get this done. I didn’t want to use any channeling from any of the other kits I have either, so I used a single bit I had left over from a past bra. I have BAGS of bits and it came in handy.

100_2047

Here’s the inside of one cup showing the beige channeling. This also shows the seam in the lining. I really like that extra seam for the support it adds to the lower cup.

100_2046

And here’s the black channeling. I didn’t have any beige bits! However, I decided this won’t bother me because I’m the only one who will see this – at least when I wearing it every day. Anyone reading this now knows my bra doesn’t have matching channeling!

100_2043

I did like this shiny Lycra that was part of the kit, but didn’t find it really strong, so I lined it with power net. I had a small piece of black (again) and used that. What I ended up with is a really nice supportive band. I like the double material. It feels very comfortable. And it’s not the first time I’ve used it. I did a few bras with Lycra and lined them so they were doubled. Very comfortable.

100_2048

Here you can see the black inside. The only draw-back to this, which I didn’t anticipate is it makes it a little less forgiving when wearing. The original fits snugly, and this fits a bit too snugly now. So I use an adapter so I have that extra set of eyes I need. If I make this again I’ll add 1/8 – 1/4″ to each side of the band to make up adding that second layer of material.

I would have loved to match the lace so it was perfectly symmetrical on both cups, but didn’t have enough for that. Maybe on a future bra.

And the straps were a bit different this time. One these straps I did the lower piece which is covering the edge of the band and ends up enclosed in the hooks & eyes. And then only a one strap piece above that. Previously I had used two pieces above that. It took a little while of looking at it to figure out what I needed to do. I had already sewn the bra straps to the front of the bra, so picked out the stitching. Then I made the strap starting at the back. I put on the slider, then after that was sewn, I ran it through the loop on the top of the band. Then it could be attached at the front. This was how it was done on the original, so I tried this and I think I prefer it. So the last things I sewed together were the straps to the front.

There. Whew. This clone is no longer sitting on my sewing desk waiting for me to finish it. What a relief!

Happy creating!

Happy New Year!

I hope everyone had a wonderful Christmas and New Year’s. Here’s a little something to remember times past and be thankful for where we are now:

Singer sewing advice 1949

A friend of mine posted this on Facebook, and I got a chuckle out of it. Just had to share.

Over my holidays, I decided to watch one of the Craftsy classes I’d signed up for during the year. Design and Sew an A-Line Skirt by Deborah Moebes.

So far, I’m enjoying it have started to design the pattern. I’m having a bit of trouble ‘squaring up’ the waist seam. Seems I’m really not very straight at all (says the woman with a 13″ difference between her waist & hips). Getting a 90 degree angle at the seam is going to be a challenge for me. I had my dear hubby watching the video and trying to help me. I think the only thing I can do about it is increase the waist so there isn’t so much of a difference between the hip & waist. Then take the extra out with larger darts.

It really must have been bothering me because I dreamt about it last night too, but didn’t come up with a solution in my dream for sure either. Deborah keeps reassuring us this is a first draft and we can still make changes. I may still have changes ahead of me. I do know from anything I buy in RTW, I either have to buy elastic waists for skirt, so or the waist band is too big.

Something I’m excited about is a really neat little book I came across last year, and this Craftsy class will go perfectly with it. The book is 27  Skirts from One Pattern. The author is Maureen Thompson.

27 skirts

I bought that book a year ago this past fall and was excited to get started doing something but our family had a few set backs. Unemployment and a death in the family both kept my motivation quite low. But time and new possibilities are great healers and I’m finally ready to try one of these 27 patterns – once I get this pattern for the A-line skirt corrected.

While I was looking at Maureen’s site, I noticed she has another booklet available now. I’m thinking I’ll have to get that one too!

Bodices by You

And one more little delight for me: I love to start new plants from clippings. This past fall we were at a friend’s home and I saw this adorable variegated African Violet. I really like variegated leaves on plants too. I asked for a couple of leaves and brought them home to plant them. I dipped the leaf stems in some rooting hormone and this morning when I was watering them I saw a new bud!

varigated african violet

Can you see that tiny bit of white at the bottom of the left leaf? That’s a new leaf just starting.

I still have that cloned bra to finish. I’m not that enthused though. The bra isn’t as comfortable as I’d like. That left wire is still not comfortable. It’s not poking through anymore, but I can still feel it every time I wear it. I’m wondering why I didn’t just clone the Fantasie one I have as it fits so much better and is extremely comfortable. But I will get it done. And maybe get my Fantasie pattern out too.

Happy creating!

Finally Some Sewing

Things have been so busy at my house. My wonderful husband has a new position as of Dec. 31st. He’s the Executive Director of a local society, so we are in full gear getting ready for that. My home is filled with phone calls now getting everything ready for a smooth transition for him. And lots of meetings. Many of those I’m attending as well. As if Christmas wasn’t a busy season already, but we’re welcoming the change.

I did finally get some sewing done. Not just hand-sewing this time either. This past week I set up my desk and got my sewing machine out and did some sewing.

But let me start with my new cabinet. I bought some drawer lining paper, and covered the shelves. It looks so much better inside. And I’ve filled it with sewing items.

New Cabinet

Inside Cabinet

I still have a few more things I want to fit in there, but it’s a great start! And I’m sure I’ll organize it more as I go along. I’m so happy to have it. It looks much better than boxes piled up. And those boxes aren’t in my living room or bedroom anymore. I think the best thing is if I don’t get everything put away neatly, I can just close the doors.

So what have I been sewing? I mentioned in a previous post, I’ve been working on a cloned bra. I’m not done yet, but so far it looks like it’s coming together well.

Cloned Bra

Here are the cups, and bridge with band. I haven’t done the elastics, channeling or hooks & eyes yet, but it is taking shape. The cups here are sitting on some beige foam cups to show the shape. The material is a set I bought from ELingeriA. The clone is Prima Donna’s new Duchess bra.

One of the things I like about this bra is it is lined on the inside of the cups. But the lining is a bit different from many other lined bras. This bra’s lining has a seam in it. The seam runs vertically, so it gives more support to the lower cup.

You can see that in the picture below. That seam is in the lining. The lower cup front is one piece. I quite like that extra detail to add support.

Dutchess in Azelea

So ahead I still have some more work to do on this bra, but it has to wait a bit. I also have two house coats to sew for Christmas presents for a friend. I’m using a basic McCalls pattern for that.

And something I was so excited about this week was a great find. I was out looking in the second-hand stores for a sweater. We’re going to a ‘The Good, the Bad, the Ugly’ sweater party, and I don’t have a sweater. So I went looking for one, but had to look in the book section first. Look what I found!

Book Find

I was so excited when I saw these two books. Both are in incredible condition. There was a whole Singer library of books there that day, but I resisted. I was in there for a sweater after all.

And the hand-sewing I’ve been doing? I wanted an abstract-looking poinsettia pin for the holidays. I’ve made a few now and given them all away, but here’s my most recent one – on my coat where I’m planning for it to stay.

Abstract Poinsettia

Happy creating!

A Lot of Jewelry, Not a Lot of Sewing… Yet

Our new space is working out quite well. My DH and I are sharing a computer desk, and we’re actually sharing it. (smile) We both have laptops, so he gets his side, and I get my side. So far, so good.

My crafting desk looks a lot better than in the last picture I shared, but I’m not done setting up. I have a storage cabinet coming in a week or so, and after that things should be much neater. I’ll post a picture after that.

So, what have I been working on? Well, it seems mostly jewelry. However, I did pull out some bra patterns, but I need a big sign on my desk to remind myself not to try to make pattern adjustments after 11 p.m. at night. To be honest, it was closer to 1 in the morning by time I realized my brain really doesn’t want to do this type of thing – at that time of night!

But it’s bright and early in the morning right now, and definitely wintry outside, so this morning is a perfect time to  work on some adjustments to my pattern.

I’m going to make adjustments to my Fantasie Vivienne clone. I really do like the overall fit to this bra. What I don’t like? The bridge is too wide for me. It’s about an inch wide at the top, and I’m not. So I’m going to adjust that. And the wire that’s in the bra is too short for the side panel. There’s more than a half-inch part that flops down when I’m wearing it. So I’m going to adjust that as well, and more than just the amount needed for the bra – the wires I have are not the same length as commercial wires. I’ll need to lower the bridge/underarm area over an inch just to make up for the difference in wires.

A few other modifications I think I’ll make are ones suggested in the Bra Makers Manual, like doubling the power net for the band to give more support. I did that in one of my first Shelley bras. This bra (below) has power net and Lycra and I love how the band feels on this – very firm and secure feeling.

Front View w Foam Cups

Here are a few things I’ve been making in the jewelry classes I’m instructing.

Pearl Turquoise Necklace 11.13.13

I love this necklace & earring set. I made the earrings first in my Introduction to Wire Wrapping class. They’re freshwater pearls and turquoise. I like the stone combination so much, I decided to make a necklace with the same stones the next day in my Introduction to Crimping class. These were from last week.

And I made this necklace as well – just last night. And will likely make a pair of earring to go with this one too.

Mate Onxy Necklace 11.20.13

I think this is so pretty. This is made with matte jasper and dragon blood stones.

This is getting a bit long, but one more quick note. I really loved working with felt recently, and signed up for the Fab Felt holiday class on Craftsy. I bought some cute holiday material yesterday for the poinsettia class on there. I’m sure I’ll have one done before I post again, so you can see what I’ve done.

Stay warm! Did I mention it was -23 C yesterday?

Happy creating!

Making Room to Sew Again

It seems my sewing was interfering with my family’s ability to eat at the dinning room table. I actually had complaints. To be honest, I did leave all my projects out and did take up the whole dining room and part of the living room. So, I packed everything away thinking I’d still do some things, just bring everything out when I wanted to sew and pack it all away again when I was done. That didn’t happen. And I became the one complaining. I miss sewing! Have I mentioned I miss sewing. I really miss sewing. Do you know I’d rather sew than do almost anything else?

My DH got the message and we’re re-arranging a space in our house so I can sew again! And make jewelry because lately my jewelry components have been all over the dining room table. 🙂

So here’s the mess I have to organize today.

Picture 101

I have to find a new home for all of this.

And then there’s this:

Picture 102

And I won’t show you the huge pile of sewing stash etc. in my bedroom! But we’re reclaiming our bedroom even. So I have a little work ahead of me before I can sew. But I’m hopeful!

A few posts ago I mentioned I couldn’t wait to clone my newest bra. I did copy everything out and now I’m going to have space to work on it. I’m also thinking of sewing another Sewy Rebecca. I do like the way the bridge fits on that one, and the cups too. I didn’t love the back though, so would change that. Well there are a few changes I’d make, but those have more to do with fit than style.

Here is part of the cloning process.

Picture 093

Picture 095

These pattern pieces show the seam allowances have been added to each piece. It’s really not a difficult process. The hardest part is the cups because you have to move the material a little and even remove pins as you make them flat. Depending on the cup size, it can be a bit more challenging. I usually do one side of the cup and then remove most of the pins, flatten the other side and start pinning that side.

So now that I’m making a space for myself, I hope to blog a little more often than I have lately. I’m so happy to be setting up my little area today!

Happy creating!