Happy New Year!

I hope everyone had a wonderful Christmas and New Year’s. Here’s a little something to remember times past and be thankful for where we are now:

Singer sewing advice 1949

A friend of mine posted this on Facebook, and I got a chuckle out of it. Just had to share.

Over my holidays, I decided to watch one of the Craftsy classes I’d signed up for during the year. Design and Sew an A-Line Skirt by Deborah Moebes.

So far, I’m enjoying it have started to design the pattern. I’m having a bit of trouble ‘squaring up’ the waist seam. Seems I’m really not very straight at all (says the woman with a 13″ difference between her waist & hips). Getting a 90 degree angle at the seam is going to be a challenge for me. I had my dear hubby watching the video and trying to help me. I think the only thing I can do about it is increase the waist so there isn’t so much of a difference between the hip & waist. Then take the extra out with larger darts.

It really must have been bothering me because I dreamt about it last night too, but didn’t come up with a solution in my dream for sure either. Deborah keeps reassuring us this is a first draft and we can still make changes. I may still have changes ahead of me. I do know from anything I buy in RTW, I either have to buy elastic waists for skirt, so or the waist band is too big.

Something I’m excited about is a really neat little book I came across last year, and this Craftsy class will go perfectly with it. The book is 27  Skirts from One Pattern. The author is Maureen Thompson. Here’s the original PDF file (page 5) where I read about Maureen’s booklet; and Maureen does have a web site here. There’s not a lot of information on there, but you can contact her.

27 skirts

I bought that book a year ago this past fall and was excited to get started doing something but our family had a few set backs. Unemployment and a death in the family both kept my motivation quite low. But time and new possibilities are great healers and I’m finally ready to try one of these 27 patterns – once I get this pattern for the A-line skirt corrected.

While I was looking at Maureen’s site, I noticed she has another booklet available now. I’m thinking I’ll have to get that one too!

Bodices by You

And one more little delight for me: I love to start new plants from clippings. This past fall we were at a friend’s home and I saw this adorable variegated African Violet. I really like variegated leaves on plants too. I asked for a couple of leaves and brought them home to plant them. I dipped the leaf stems in some rooting hormone and this morning when I was watering them I saw a new bud!

varigated african violet

Can you see that tiny bit of white at the bottom of the left leaf? That’s a new leaf just starting.

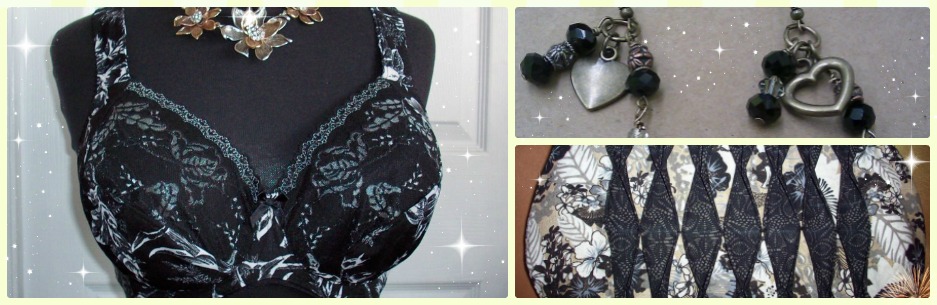
I still have that cloned bra to finish. I’m not that enthused though. The bra isn’t as comfortable as I’d like. That left wire is still not comfortable. It’s not poking through anymore, but I can still feel it every time I wear it. I’m wondering why I didn’t just clone the Fantasie one I have as it fits so much better and is extremely comfortable. But I will get it done. And maybe get my Fantasie pattern out too.

Happy creating!

Finally Some Sewing

Things have been so busy at my house. My wonderful husband has a new position as of Dec. 31st. He’s the Executive Director of a local society, so we are in full gear getting ready for that. My home is filled with phone calls now getting everything ready for a smooth transition for him. And lots of meetings. Many of those I’m attending as well. As if Christmas wasn’t a busy season already, but we’re welcoming the change.

I did finally get some sewing done. Not just hand-sewing this time either. This past week I set up my desk and got my sewing machine out and did some sewing.

But let me start with my new cabinet. I bought some drawer lining paper, and covered the shelves. It looks so much better inside. And I’ve filled it with sewing items.

New Cabinet

Inside Cabinet

I still have a few more things I want to fit in there, but it’s a great start! And I’m sure I’ll organize it more as I go along. I’m so happy to have it. It looks much better than boxes piled up. And those boxes aren’t in my living room or bedroom anymore. I think the best thing is if I don’t get everything put away neatly, I can just close the doors.

So what have I been sewing? I mentioned in a previous post, I’ve been working on a cloned bra. I’m not done yet, but so far it looks like it’s coming together well.

Cloned Bra

Here are the cups, and bridge with band. I haven’t done the elastics, channeling or hooks & eyes yet, but it is taking shape. The cups here are sitting on some beige foam cups to show the shape. The material is a set I bought from ELingeriA. The clone is Prima Donna’s new Duchess bra.

One of the things I like about this bra is it is lined on the inside of the cups. But the lining is a bit different from many other lined bras. This bra’s lining has a seam in it. The seam runs vertically, so it gives more support to the lower cup.

You can see that in the picture below. That seam is in the lining. The lower cup front is one piece. I quite like that extra detail to add support.

Dutchess in Azelea

So ahead I still have some more work to do on this bra, but it has to wait a bit. I also have two house coats to sew for Christmas presents for a friend. I’m using a basic McCalls pattern for that.

And something I was so excited about this week was a great find. I was out looking in the second-hand stores for a sweater. We’re going to a ‘The Good, the Bad, the Ugly’ sweater party, and I don’t have a sweater. So I went looking for one, but had to look in the book section first. Look what I found!

Book Find

I was so excited when I saw these two books. Both are in incredible condition. There was a whole Singer library of books there that day, but I resisted. I was in there for a sweater after all.

And the hand-sewing I’ve been doing? I wanted an abstract-looking poinsettia pin for the holidays. I’ve made a few now and given them all away, but here’s my most recent one – on my coat where I’m planning for it to stay.

Abstract Poinsettia

Happy creating!

A Lot of Jewelry, Not a Lot of Sewing… Yet

Our new space is working out quite well. My DH and I are sharing a computer desk, and we’re actually sharing it. (smile) We both have laptops, so he gets his side, and I get my side. So far, so good.

My crafting desk looks a lot better than in the last picture I shared, but I’m not done setting up. I have a storage cabinet coming in a week or so, and after that things should be much neater. I’ll post a picture after that.

So, what have I been working on? Well, it seems mostly jewelry. However, I did pull out some bra patterns, but I need a big sign on my desk to remind myself not to try to make pattern adjustments after 11 p.m. at night. To be honest, it was closer to 1 in the morning by time I realized my brain really doesn’t want to do this type of thing – at that time of night!

But it’s bright and early in the morning right now, and definitely wintry outside, so this morning is a perfect time to  work on some adjustments to my pattern.

I’m going to make adjustments to my Fantasie Vivienne clone. I really do like the overall fit to this bra. What I don’t like? The bridge is too wide for me. It’s about an inch wide at the top, and I’m not. So I’m going to adjust that. And the wire that’s in the bra is too short for the side panel. There’s more than a half-inch part that flops down when I’m wearing it. So I’m going to adjust that as well, and more than just the amount needed for the bra – the wires I have are not the same length as commercial wires. I’ll need to lower the bridge/underarm area over an inch just to make up for the difference in wires.

A few other modifications I think I’ll make are ones suggested in the Bra Makers Manual, like doubling the power net for the band to give more support. I did that in one of my first Shelley bras. This bra (below) has power net and Lycra and I love how the band feels on this – very firm and secure feeling.

Front View w Foam Cups

Here are a few things I’ve been making in the jewelry classes I’m instructing.

Pearl Turquoise Necklace 11.13.13

I love this necklace & earring set. I made the earrings first in my Introduction to Wire Wrapping class. They’re freshwater pearls and turquoise. I like the stone combination so much, I decided to make a necklace with the same stones the next day in my Introduction to Crimping class. These were from last week.

And I made this necklace as well – just last night. And will likely make a pair of earring to go with this one too.

Mate Onxy Necklace 11.20.13

I think this is so pretty. This is made with matte jasper and dragon blood stones.

This is getting a bit long, but one more quick note. I really loved working with felt recently, and signed up for the Fab Felt holiday class on Craftsy. I bought some cute holiday material yesterday for the poinsettia class on there. I’m sure I’ll have one done before I post again, so you can see what I’ve done.

Stay warm! Did I mention it was -23 C yesterday?

Happy creating!

Making Room to Sew Again

It seems my sewing was interfering with my family’s ability to eat at the dinning room table. I actually had complaints. To be honest, I did leave all my projects out and did take up the whole dining room and part of the living room. So, I packed everything away thinking I’d still do some things, just bring everything out when I wanted to sew and pack it all away again when I was done. That didn’t happen. And I became the one complaining. I miss sewing! Have I mentioned I miss sewing. I really miss sewing. Do you know I’d rather sew than do almost anything else?

My DH got the message and we’re re-arranging a space in our house so I can sew again! And make jewelry because lately my jewelry components have been all over the dining room table. 🙂

So here’s the mess I have to organize today.

Picture 101

I have to find a new home for all of this.

And then there’s this:

Picture 102

And I won’t show you the huge pile of sewing stash etc. in my bedroom! But we’re reclaiming our bedroom even. So I have a little work ahead of me before I can sew. But I’m hopeful!

A few posts ago I mentioned I couldn’t wait to clone my newest bra. I did copy everything out and now I’m going to have space to work on it. I’m also thinking of sewing another Sewy Rebecca. I do like the way the bridge fits on that one, and the cups too. I didn’t love the back though, so would change that. Well there are a few changes I’d make, but those have more to do with fit than style.

Here is part of the cloning process.

Picture 093

Picture 095

These pattern pieces show the seam allowances have been added to each piece. It’s really not a difficult process. The hardest part is the cups because you have to move the material a little and even remove pins as you make them flat. Depending on the cup size, it can be a bit more challenging. I usually do one side of the cup and then remove most of the pins, flatten the other side and start pinning that side.

So now that I’m making a space for myself, I hope to blog a little more often than I have lately. I’m so happy to be setting up my little area today!

Happy creating!

Wrapping Up Those Lose Ends

Ever have one of those moments where you can’t believe what you’ve done? I’ve been trying to find a solution to one for the past week. Last you heard from me I was cloning that very pretty Fantasie Vivienne . I went for basic black, and was quite happy with how everything was tuning out. It wasn’t until I was almost done – and I mean sewing on the hooks & eyes – that I saw this piece of material flapping around. I wondered as I stopped everything I was doing, ‘What could possibly be flapping around?’

You tell me if you see what I did wrong.

Front View

Yeah, something really doesn’t look right there, does it? I can hear other comments, like Sigrid on her blog, saying ‘Ask me how I know.’ She’d had a problem in the past with some lace too, but not sewing it in upside down! Yes, that’s what I did here. The narrower part of the lace is supposed to meet the strap attachment and the wider lace is supposed to meet the bridge. That is not happening here! Oops.

So, I’ve been thinking about it all week. Can I just ‘attach’ that piece of lace anyway, and then ‘tuck’ the ‘extra’ fabric inside somewhere without making the cups too small? Can I take out the stitches on the cross cup seam and sew the lace in the correct way? I’ve ruled out taking the cups out because there is trimming done under the underarm area after the elastic is put on. Hmm. I’m just waiting for that perfect solution to come to me to make this wearable, so it’s not quite there.

Other than that rather glaring problem which makes the bra unwearable, it didn’t turn out too badly.

Being the first time I made this style, I was guessing at what order things would be sewn in. There’s a drawback to cloning a new pattern. If there are different elements than previous patterns, you may have a surprise – like me!

Side View

Everything was fine here in the side view. I actually quite liked the fit for the most part, so this is definitely going to be a pattern I make again… with bold, high-lighted, over-sized instructions for the correct way to attach the lace!

Back View

Here’s another area where I had a bit of a surprise. I wasn’t thinking when I ‘added’ the elastic width to the little dip in the back where the hooks & eyes attach. When I went to attach the hooks, it looked too wide. Hmm. Thinking again, ‘What did I do here?’ Then I remembered, so a quick erase on the pattern, and it will be a two-set of hooks and eyes on the next one. But compared to the lace mess-up, this is no big deal. I’ll probably also bring those back straps in closer to the middle.

Under Cup Detail

And this was a pleasant surprise while sewing the bra. I really like how the cup seam sits right over the bridge-band seam on the cradle. I thought that was a very pretty design element.

So, that’s my first attempt at the Vivienne clone. I should have made a tester, but was a bit too confident. Now that I’ve been bitten, I may be a bit more cautious in the future.

I am very excited about a beautiful set of material I purchased. It was one of those items I acted on quickly because the last time I watched something in Merckwaerdigh‘s store, it was gone the next time I looked for it. So this is going to be a future bra:

black & white Merckwaerdigh

Isn’t that lovely?

And one final loose end – my tray. Well, it seems my dear husband has an opinion on how I finish the tray. He didn’t like what I had proposed, or how it was it was looking. All work on the tray came to a complete halt. I didn’t like what he was suggesting either, so we were at an impasse.

I was dropping my son off at work one day, and dropped into the store there. And I just happened to see a large tray painted all black with a rooster on the bottom of the tray. That gave me an idea. I’m going to paint the whole tray black, same as the cart it sits on, and then I’m going to put a brighter paper pattern on the bottom of the tray instead of the decoupage. My hubby isn’t thrilled yet, but he’s not totally against it either. So, I think this will be my tray solution. Pictures to come.

Happy creating!

I’m Copying Again

I’ve come full circle in my blogging. I started off with a blog called I’m a Copy Cat. Well, it’s been over a year of bra-making and I’d promised myself that even if I was hugely successful at bra-making, once a year I buy a good quality bra and copy it. I don’t know that I’ve been hugely successful, but I certainly can  make a bra.

So I went back to the boutique and bought one of those bras I’d tried on and treated myself.

Vivienne Fantasie

Here’s the bra I bought – but that’s not me in the picture. This is a very pretty bra, and I do like how supportive it is. It’s a Fantasie Vivienne in berry.

Once I got it home, something was bothering me a little. You know, just one of those nagging things in the back of your mind. Then I realized what it was – the underwires weren’t as big as some of the Prima Donna’s I’ve had in the past. The Prima Donna’s are really too big on me, but this one is only about a size too big.

I couldn’t figure this out. From everything I looked at in size charts, the wire should have been the same size of wire as the Prima Donna’s.

To begin, I got my stash of wires out and laid them over the bra’s channeling. I wasn’t getting a match though. This was really bothering me, so out came the seam ripper and I opened the channeling under the arm. I know how to fix it again, so I thought why not? Although I will say it was the first time I’ve ever ripped out stitches on a new bra!

I took out the wire and to my great surprise, it’s a Vertical wire! I was SO very surprised by that. I had to be sure though, so I went to Bra-Makers Supply’s web page and printed out their forms for Vertical wires. Just look under Information to Download, and it’s in that list.

Interestingly, the wire in the bra wasn’t quite a 44VW, but not a 42VW either. Just slightly bigger than the 42VW wire. When I tried the Vertical wires, I was informed that a 40VW corresponds to a 38 wire. I found the 40VW a bit small, so 42VW would be the size for me. And I find this only a tiny bit big. That means very little alterations for me!

And I’ve mentioned this before, but Vertical wires are a much better fit for women like me, dealing with what Beverly Johnson refers to in her manuals as the Omega shape. I had no idea there were bras on the market that used Vertical wires!

I also thought I’d mention a great resource, just in case you’re wanting to clone a bra. For me, it originally came from my first Threads magazines purchase. Sadly, it’s an out of print issue from Feb/March 2002 (#99). Beverly Johnson wrote an article called “Clone a Favorite Bra”. There’s a review of this article  on Pattern Review. I recommend it as well.

But don’t be discouraged that you can’t get that magazine back issue; the same information as the article is in the Bra-Makers Manual; the only big difference is the article had photos with it; the information in the manual has illustrations.

Happy creating!

An Ivory Shelley with a Custom Bridge

One shouldn’t decide to change the bra she’s making 3/4s of the way through. But I did. And I didn’t have the supplies for the change! So, a call to Bra-Makers, and a week waiting for the mail… and then some time to sew. And it’s done!

Here’s my most recent Shelley, and this one has a custom bridge, as well as some adjustments I made after my last Shelley. I used information from Norma’s book to do the bridge. This bra is in a very lovely ivory color.

IMAGE_046

This is pretty good in terms of fit. I will have to fiddle with it a bit. When I did the new bridge, it changed the size of the cradle. When I first put the wires in and tried it on, the wires were flipping outward. I knew this one from another bra I’d made – the wires were too small for the cradle. So, having tried many sizes in and around my size, I have extra wires on hand. I grabbed the next size up and no more flipping.

IMAGE_047

Here’s a close-up of the bridge. It’s still very narrow at the top, and lower too, to better fit the length of my wire. The above picture is also a better indication of the color of the bra.

IMAGE_048

Here’s the side view. It has a nice smooth fit into the cradle. I’m thinking it still may be a bit fuller on the sides than I want. However, it does fit! And the bridge is going all the way back. So the only real fitting issue I would have with this one is the wires are one size too big.

IMAGE_049

And the back. I did do what I saw in the boutique and used the same wide strap elastic at the back to connect to the straps as I was using on the straps. I was quite pleased with the look. As well, I used the same wide strap tape to join to the elastic. That was something I noticed and decided to try – all the straps were using wider strap elastic.

And finally:

IMAGE_050

And a dart. Lowering the bridge means I have to do something to make the upper cup fit into the new lower bridge. On this bra I pinned the cup starting at the underarm, and then pinned around leaving just a bit unpinned between the top of the bridge and bottom. Then I saw how much I needed to take out of the cup. I pinned it and did a dart there – which is very close to what that Prima Donna Milady looked like. The big difference between the two bras is I’m not using a foam liner in the cup.

I did like the dart and it looks quite nice on. I may try something different next time too. I had another idea of how to make the cup fit with the lower bridge – like shortening the lower edge where the upper and lower cup join. Overall, pretty good!

Happy creating!

A Spy in the… Changeroom

I haven’t done any sewing all week! No painting or jewelry either. What have I been doing? Well, a lot of sneezing, sniffling and coughing, and feeling rather miserable. The weather is finally nice and I have a Spring cold.

Both of my sons had dental appointments in the big city next to us this past week, so I found myself with a good two hours before I needed to pick them up. It was too far to drive home and back again, so I was wondering what to do. Then I remembered a bra specialty store that had been close by. It had moved since I had last been there years ago, but my dear hubby googled it for me.

I dropped in, and went for a fitting. I was a bit surprised by the size I ended up in. However, it did fit. But having learned so much about bra-making in the past year, I was curious if the wire size was the same as what I used to wear in RTW sizes. I came home and checked, and yup, same wire size as before.  So now, a smaller band, so a bigger cup.

The most exciting part of being in the boutique was looking at the bras and seeing aspects of things I’d either read, or seen or used!

Like this one: (Yes, I took a few pictures with my phone.)

Prima Donna showing elastic at hooks

Recognize that downward hike on this popular brand? This is something Sigrid uses and mentions numerous times on her blog, and I’ve adopted it too. Beverly Johnson describes how to do this in her Bra-Makers Manual. However, I don’t think my hike is this downward.

And there was this:

Fantasie bra showing same elastic

Do you recognize this? This is the same way I was recently shown how to attach the strap. However, in this case the company used the same strap elastic as used on the strap itself. I think that makes a nice continuous visual line.

And one more:

Fantasie bra showing sheer powernet

On this bra I recognized the power net the company used; I’m pretty sure it’s Regular Power Net. Bra-Makers Supply describes it as looking ‘meshy’. I’ve used it and it looks exactly like this!

I had such fun at the boutique – all for reasons I’m sure most customers don’t experience. But the best moment I had while there? It was when the woman fitting me picked up my bra – the one that I had most recently sewn – and asked if it was a Fantasie! Well, if that isn’t going to make me feel great about my bras, I don’t know what will.

I still have a bra cut out on the dinning room table and plan to get it done this week. I’ve made all the adjustments to the pattern, and even made a custom bridge following Norma’s instructions from her ebook. So my next post won’t be quite as exciting as me sneaking pictures in a dressing room, but I’m sure I’ll be feeling much better by then!

Happy creating!

Something Other Than a Bra

I must admit, I’m a bit of a bulldog when faced with a problem. I simply won’t give up, although I do say that I’m giving up from time to time. I stubbornly stay at something until I figure it out. That’s how I’ve been with getting my perfect bra pattern. But even I need a bit of a break every once in a while.

Here’s my latest distraction:

Wine Cart

This wine cart was one of those wonderful finds. My dear hubby and I were out hitting some garage sales and I saw this. I fell in love at once, and the price was incredible – only $15! I wondered why it was so inexpensive, but when I got home realized it wasn’t level. One of the wheels wouldn’t go in all the way. After trying many ways to get that wheel in all the way, I figured I had nothing to lose and gave it a whack with a hammer. The wheel went in and I haven’t messed with it since.

The one thing I didn’t love about this cart was the color. I’m not a fan of pine. I prefer darker woods. So, this one finally is getting a makeover.

I painting it with Reloved Chalk Paint in Midnight. I’m not done yet, but it’s looking so much better. You can see the original color of the pine on the tray.

The cart is going to be solid Midnight, but the tray is going to be Midnight on the outside, and Barn on the inside. I may mix the colors a bit to get a darker red, but I’ll decide after the first coat of paint.

Tray

I’ve cut out some flowers to do a decoupage on the bottom of the tray as well. So, still a little work ahead of me, but I’m liking it so far.

And on some sewing news:

In some other surprising and sad news, ELingeriA is closing. They’ve set a closing date of May 31st. Currently they’re offering 20% off most items. Again, just click on their name to go to their website.

I will be sad to see them go.

And just an update, I worked on my new bridge over the weekend. I’m still not sure I’ve got it just right, but being as determined as I am, I know I’ll get it. Norma’s book , Demystifying Bra Fitting and Construction, has been a tremendous help. Without a doubt, I recommend it.

Happy creating!

Lowering the Bridge

So, I want to take a quick look at where I was at: the new longer wires I’d tried weren’t fitting properly and it was almost like giving up all the ground I’d gained in getting a proper fit; the bridge wasn’t going all the way back to the chest wall – and I was really beginning to wonder if it was really possible!

I put in yet another call to Bra-Makers Supply with another question. And guess what? Bridges really can go all the way back to the chest wall! I’ve had success!

Something that would have helped me tremendously is Norma’s new book: Demystifying Bra Fitting and Construction. I’d read on someone’s blog (I can’t remember whose blog to give her credit (sorry!)) there is a great section in the book on bridges, and that one section alone made the whole book worthwhile. It really is a great section! I’m hoping to have some time either today or Saturday to try it out. And even if you’re getting a great bridge fit, there is so much information in the book. Well done, Norma! and thank you!

However, I did have more success this week with my bridge. Is it perfect yet? Not quite, but it is actually all the way back to the chest wall. I think I just need to tweak the shape now.

Here’s my most recent Shelley.

Bra front

Most of the materials are from Bra-Makers Supply, but the lace is a wonderful lace I found in Merckwaerdigh’s store.

On this bra I lowered the bridge by 3/4 of an inch. This gave the bridge the room it needed to go all the way back to the chest wall. I also overlapped the wires at the top of the bridge. I tried a tester earlier in the week without overlapping the wires but I still wasn’t getting the bridge all the way back. So, now just to tweak the shape a bit. Even my hubby said this is the best fit he’s seen me get yet.

bra side

Here is the side view. I re-made my Shelley pattern for this bra, but still need to take a bit out of the underarm area – there are a few puckers there, but not so many that it’s unwearable. Everything else was really good. Well, I may move the straps in a tiny bit.

bra back

And the back. I am really loving the new way of attaching the straps. As promised, I took some step-by-step pictures to show what I did.

Top elastic sewn on

When attaching the upper band elastic, don’t take the elastic down around the curve to the hooks & eyes; end it at the top of that curve. This has been trimmed to be nice and neat.

new shoulder elastic pinned

Take some elastic – I’m using the same bottom band elastic here – and pin it on with the little scallops facing outward. Can you tell I like to pin things securely?

shoulder back pinned

Put a ring or slider on the elastic and fold it over. Since the rings & sliders come in sets, I’ve alternated which ones I’m using and they both work great. Here it is from the inside of the bra. And again I pinned it.

strap attached

After sewing it on with a zigzag on both sides of the elastic, I attached the strap. It gives a nice professional finish to the bra.

close up shoulder attachment

Doesn’t that look nice and neat? I will definitely use this again and again.

Next to try again with my Shelley with a couple of tweaks.

Happy creating!