Another class I took this Spring was the Cut and Sew Foam bra class at Central Sewing, again with Jeanette of Sew Uplifting.
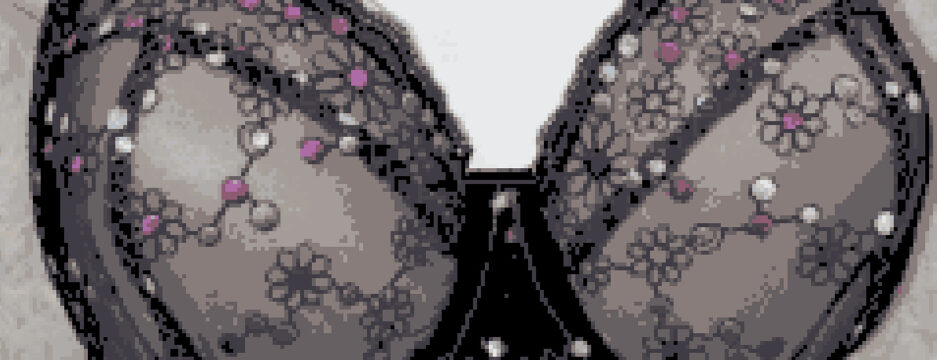
In this class Jeanette was teaching us cut and sew foam drafting and construction techniques with our personal fitted bra pattern. Most of the class sewed a foam bra from our drafted patterns. We all also received the Ruby bra pattern.  Jeanette brought in her own sample foam bra, and we all had to inspect every detail of the bra. One detail I noticed was she used jewelry findings for the rings on the front. I loved that detail!
 The fabric on this is so pretty.
Pattern Problems
I have to say, I really didn’t enjoy the first day of our class. My drafted pattern, which fits, wasn’t converting to a foam pattern easily.
Here’s my drafted bra. This fits me perfectly. To make the pattern work for foam, all we had to do was cut off some of the seam allowances. I did that. I did that three times.
Each time I did it, I kept getting the same result. I was shorter along the cross cup seam on the top than on the bottom. My pattern pieces were not fitting together. Jeanette looked at my pattern pieces, and she tried to make them work. She couldn’t figure out what was wrong with those pieces either. For whatever reason, those pattern pieces would not line up.
It was so frustrating. I was using my original pattern, and had transferred all the markings from it. I cut off the correct seams. It should have worked, but it didn’t. It was out by a 1/2-inch!
So, I finally decided I’d just add that 1/2″ difference at the underarm side, and hope for the best.
My Foam Bra
We used a lovely scuba for the foam bras, and they were all so pretty. Here’s mine. I’ve used the red and black floral scuba with all red findings, including red foam on the inside.
Here’s the side view, showing more of the red.  One small disappointment was my band turned out to be too big. It’s not fitting well on the display either.
 Looking at it when I was sewing it, I thought it might be, so I just have the hook and eye tacked on here. I’ll take that off and trim off a bit from each side. After I measure and compare to a well-fitting band, of course.
Class Details
One of the very pretty features we learned in our class was to do a rolled edge on our bras. Isn’t that a neat and pretty neckline finish? Below you can see it from the inside of the cup.
 We also learned how to stabilize our strap elastics to give better support.
  We’ve sewn non-stretch seam tape to the inside of our straps at the front. It’s nice and soft, and helps keep those elastics from stretching.
My Adjustment
You can see here in the photo below how I added that 1/2″ to my foam upper cup. Have you been wondering how that adjustment turned out?
Well, let me just say I had two choices – I could have made it a little longer, or I could have made it a little shorter. My logic was shorter wouldn’t be better because it could end up too small.
And the results? My bra is 1/2″ too big at the underarm.
Sigh.
The good news is the bra is still wearable, and I’ve adjusted my foam pattern to account for that 1/2″ extra at the underarm. Why it wasn’t all lining up, I’m not sure I’ll ever know, but the pattern has been corrected and is good for my next bra now.
Happy creating!
 Oh, I like this. I also like the Angie’s Twin pattern. Other than a few adjustments for an Omega shape – smaller wires & frame, and a larger cup – I didn’t have to change anything on this pattern.
 There was just a tiny bit of lace left over to add to the sides. Just to add a bit more detail.
 All that red really pops here.
 Oh, such pretty lace!
 I tried a couple of different bows on the front to see what color I liked the best. I decided, even though the pink blends in, it was the only one that didn’t seem to pull the attention away from the lace. I love it too.
 One of the reasons I hadn’t tried the Jessica pattern is I have to make adjustments to my bra cups so they’ll fit in a smaller frame. Omega: larger cups, with a smaller frame and wires.
 This is what I tried, and I have to say, I was pretty close. I still need to take in the underarm a little, but other than that, I got a great fit.
 Well, maybe it’s not so clear. Here’s a close up.
 You can see I just have a little bit folded under there. Probably 1/4″ x 2 removed from the underarm there and it will fit absolutely perfectly. Not bad for a first time testing the pattern. And isn’t that purple elastic so pretty with the navy?
 This is a great adjustment when you don’t want the cup size to be smaller, but just the amount of fabric in the underarm area. This works perfectly!
 I really am happy with this. I didn’t think I could make a cup with only one seam work for me.
 On the bra for the BMS challenge, I used the burn-out mesh on it’s own. On this one, I’ve used it over power net. I wasn’t looking for sheer on this bra.
 It’s so fun! When I first started sewing bras, I experimented a little and I tried using Lycra and mesh over power net. It gives a wonderfully supportive feel. It adds support, but it isn’t too much like two layers of power net would feel. This isn’t too much. It feels a little more supportive.
 When I tried this on to see how the adjustments I’d made were, it fit so perfectly and was so comfortable, I didn’t want to take it off for photos. I did, but there was no way I was going to put on my old bra. I need to sew a few more too. I was down to a RTW stretch-cup bra when my size changed.

 Other than the size being different, I didn’t change a lot else. I used different neckline trim, and made the straps differently this time.
 Here’s Angie’s Twin from the side. I used some of the same tricks and tips I’d learned taking Jeanette’s classes to get my Omega cup into a smaller frame. I like how it’s looking. No wrinkles. It looks like it was made to fit together.
  And the back.
 I sewed non-stretch
 I even have a couple of kits with strap lace in my stash. You know those kits that you save for someday. The strap lace is similar to what’s shown below on this gorgeous bra.
 Just look at these straps from a favorite RTW bra, the Prima Donna Milady. Those little bits of heart lace are adorable. I have some similar bits in kits from Kantje Boord. In fact, I bought the kit for the strap lace.
 This is a gorgeous left & right mirrored lace. It was my first time using anything like this, and it was fun. I chose beige duoplex for my frame because there was some pretty floral detail in beige too. I tried it with brown, but that was just too dark.
 To reinforce them, I’ve used sheer cup lining to make narrow tubes behind this strap lace. It worked perfectly.
 I’ve used the lower edge of the lace with just a little bit of the embroidery on it for the lower cup pieces.
 Lastly, I cut out a tiny floral from some of the remaining embroidered lace and used that instead of a bow on the center front.
 Have you used a kit with strap lace before? I really enjoyed it and want another kit now.
 This is the lovely Ruby pattern. The cups are all lace with sheer cup lining behind the lace. That lining is not my sheer though. You can’t actually see the sheer part of my bra from the front.
 I’ve used this awesome burnout material for the band. It’s a little bit lighter than regular power net, but I couldn’t resist it. And it’s a fun little detail to make the sheer detail part of the band.
 Oh, I love this material! I think a whole bra in this would look amazing.
 There was a Fitting binder, and a bra and finding kit in my bag (not shown). As well as the great canvas tote. For students who hadn’t taken the Drafting course, they got a few more goodies like sample packs of Duoplex and Power Net, as well as a set of Pin-Up Girls patterns. I had all those already.
 On Day Two we were starting to learn what changes to make for different alterations – all using those little tiny bra pattern pieces. It was really great to have these, and to have them to keep as a reference.
 You can see here in this example, it wasn’t a complicated adjustment – just lengthening the band. Having the samples makes it much neater to look and see any of the adjustments – much better than me freehand drawing these examples.
 Overall, I have to say it was a great class, and gave us all some fabulous tools to take and use going forward.
 I really like the Ruby pattern. It gives a round cup shape, which for me, is perfect.
 Isn’t that pretty?
 Then because I like a strap tab and still need something on which I can connect the strap or ring, I cut out the upper cup again with the strap tab in sheer cup lining.
 I’ve added a fabric strap to this one too. I do like a fabric strap, but am thinking I might still have fun playing with different straps for my Rubies. We’ll see what I come up with for straps going forward.
 You can just barely see the pink elastics I’ve used on this bra. I decided the pink was prettier. I also liked carrying the color around to the back of the bra.
 One last little detail.
 I didn’t have a wider pink bow, but did have a narrow one. I decided to change the style of the bow by untying it, and ironing it flat. Then I folded it over, and attached the grey bow over it.
 I love how the two colors of the bra are in the bow too.
 I made this muslin in cotton Lycra, and all seemed to be going well.
 This is where I started to think something wasn’t right. It was too small on the mannequin. I’m bigger than the mannequin. There was a problem.
 And I didn’t enter the Challenge that month.
 Now, I have to share a story with you. Jeanette brings suitcases full of bra kits and finding kits, plus other goodies to these classes. And we all descend on them like vultures. Honestly. Everything in the class comes to a stop when those cases open.
 I was able to bring in my swim bra and use that inside my new swimsuit. So last year wasn’t a complete wash.
 Oh, that front panel is amazing.
 The suit has lovely princess seams. We used the Pin-up Girls Denise pattern.
 I love the keyhole opening at the back. It’s lovely, supportive, and it fits! This is the first time a one piece has ever been long enough for me.
 It was a great class. And I’m already looking forward to using my new pattern, and making a Tankini.