Well. I really liked my newest Josey Bra. So much so that I cut out another one right away and sewed it up.
Yes, I really like it. The only thing I needed to change on that first Josey was I actually made the band too long. I don’t even know how I did that seeing I used my tester frame.
So I fixed the length of the band. On this one I also decided to use the cradle and frame that comes with the Josey pattern. I made sure it was matching my cradle, and the corrected length of my band before I cut it out.
 I used the same lace as from my Summery bra. I love the delicate floral pattern in it. Seeing as it had bright pink, I decided to match it with some fuchsia I had in my stash. My hubby told me he doesn’t like the combo.
Look at those pretty colors in there. Pink, purple, a light orange. I think they’re lovely, and match with the fuchsia well.
 I think it’s a very pretty summery bra.
I also added some lace to the center front. This pattern has a split cradle, so I took advantage of that feature to easily add the lace. My only disappointment at all is the little embroidered flowers aren’t showing on the bridge. One of them is barely showing. Just peeking out from the bottom edge.
I’m sure there will be yet another Josey very soon, and some matching panties too.
Happy creating!
 I grabbed some scraps again, and did a quick tester cup. It’s looking good.
 The bridge is the correct width for me, the cups fit, and the bridge also tacks all the way to the top of the bridge. I hated to take this off for photos.
 Oh, these are adorable!
 I’m a happy bra-maker today, and I’m already planning my next one. However, I also have a dress to make for a family wedding. I’ll have to fit in some time for me too and make a few more pretty Josey bras.
 Oh, I love this lace. It’s so pretty.
 This is the BMS Ruby pattern, adjusted for an Omega shape.
 You can see here where the wires aren’t coming to the top of the bridge. There’s maybe 2 cm, or better yet 1.5 cm and a touch of wiggle room for the wires. It’s a very small adjustment after some of the others I’ve had to make.
 Oh, I’m so happy with this. I used a trick I learned in one of my classes with Jeannette to help my large cup fit into my smaller band – I stretched the frame on the outside, and ‘eased’ the cup in. It works so well.
 I’m so thrilled to have finally found my correct sized wire, and figured out just how to fix my band as well. I have my next bra kit all picked out, and I’m going to sew some more bras!
 This is my drafted frame and the cups from B, Wear’s Angie pattern.
 Something I really like about the Angie pattern is how rounded the cups are. They give such a nice shape when wearing the bra too. However, using the smaller wire size and narrower frame, the rounder shape didn’t seem to be fitting into my frame as well.
 The back is fine. The band is too. It was comfortable, and stayed in place. However, I’m very disappointed this is not wearable.
 Here’s the square I’m blocking right now. It rolls under, and it isn’t actually square.
 After it’s all pinned it’s square. Then I spray it really well with water and leave it to dry. I really am enjoying this. It’s wonderful to unpin each square and see how nice it looks.
 It’s so lovely! It’s also so very comfortable. Everything about this bra is the same as a ‘normal’ bra – channeling, underwire, but it’s all soft cotton jersey.
 To account for the stretchiness of the jersey, the original sewer went down a full size to make her jersey bra. I did the same, and it fits very well. I do need to make a couple of adjustments for my Omega shape, but other than that, this is a very good fit.
 There isn’t anything different about the back except I used jersey again. The whole bra is jersey except for the elastics, and the underwire and wires. As well, to keep this very soft and comfortable, I did not stabilize the frame.
 I pulled out Catherine (my dress form) for this Angie. She’s a little wider through the back than my white dress form. So I thought the bra would fit better around. And it does.
 There isn’t anything different about the back except I did the two stitches to attach the strap elastic again. I do like it better.
  I hope this Angie fits perfectly.
 Yes. A longline is what she wanted.
 Isn’t this pretty? I don’t usually wear white, but I really do like this.
 I can’t wait to see it on her. I know she’s going to be a lot happier with more coverage.
 Unfortunately, due to covid and lockdowns, I’m having to mail her the bra and then we’ll use video to test the fit. It’s not ideal, but I should still be able to get close to what adjustments I’ll need to make.
 The one benefit I had making her bra is I’ve had so much experience with Omega adjustments. She got most of them, and everything came together quite well.
 I did a little something different on the back this time. I don’t love how the lightening stitch looks on the strap elastic, so I decided to look at my RTW bra. It has the same lightening stitch along the outer edge, but it has a zigzag on the other side.
 Isn’t that nicer?
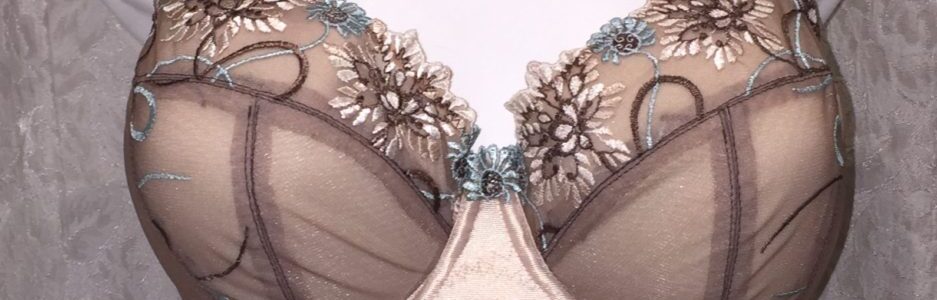
 She said she likes lace, and black, and well, anything but brown. So I gave her the first two choices on her list.
 This is such a lovely lace. Seeing as she doesn’t have any support issues, I didn’t line this. I did line the cradle though.
 The turned out so well. She comes over next week to try it on. (Yes, we’ll have masks on to make sure no one shares anything we don’t want to share!)