The April Bra-Makers Supply Challenge was A Spring in your step – this challenge is about making garments for an active lifestyle. How about jumping into the challenge and working with spandex, Supplex, wickables and other performance fabrics? Any type of activewear is eligible – be it shorts, leggings, running gear or gym wear. You can even make ath-leisure wear, that perfect combination of activewear and leisure wear.
I knew what I wanted to make for this Challenge. I saw the cutest, and littlest pair of athletic shorts on a half-size mannequin at Central Sewing. Jeanette had sewn them to show with the half-size Ingrid on display there. I told Jeanette I was going to copy her idea. These are adorable, and I knew my own pair would go so well with the Ingrid bra I just made.
My Pattern
Last year I made athletic pants for the Challenge. I used my self-drafted panty pattern to get the right size and shape, and the Pin-Up Girls Tankini bottoms to get an idea for the length and how to shape the legs.
For the pair I’m making for this year’s Challenge, I’m going to use the same bases for my new pattern, but change things up a bit more.
This year I didn’t want to make full-length pants. This year, I’m thinking Capri-length will be nice. As well, I’m adding that stripe of scuba down the side. I also wanted a different waistband this year. I wanted a cross-over waistband like in the Miami bikini shown below.
I’ll probably change that a bit too. I’m thinking I want it a bit higher than this waistband.
My Challenge Capris
I’m really happy with how my Challenge Capris turned out.
These are cotton Lycra and scuba from Bra-Makers Supply.
I’ve put the Capri pants on Catherine. I’m working on getting a Legs Display, but until then, Catherine will have to do.
Here’s my Ingrid showing the same scuba. Here’s the scuba panel I added to the side seam.
 The scuba is really nice to sew, and it adds such a lovely pop of color. I’m so glad I saw Jeanette’s little shorts and copied them.
And here’s the back view. Even the back has a little pop of color with the waistband.
Yes, these turned out very well.
I really like this waistband. It’s one piece that wraps all the way around the back to the front and overlaps. I added two inches to the height of the band pattern. I didn’t think the band would look as good if it was a narrower band – at least not on pants. Lastly, here I am putting my new capri-length pants to good use.
 I love these, and am happily planning my next Challenge entry.
Happy creating!
 It was a pleasant surprise to find I knew the other students. We’d all taken either the Beginner Bra-making class or Shelley class at Central last year. And of course, we’d all taken those classes with Jeanette of Sew Uplifting Bras too. It was like a class reunion.
 This is the manual we were given. It has the complete Drafting course in it, as well as a bunch of other great resources.
 We also got a full set of Long wires, and a complete set of Classic patterns (all the sizes). There were sample packs of duoplex and power net, a notebook, a binder (shown above), a set of curves, and a bra kit with findings. All in a great bag. I’m pretty sure that was the best swag bag ever.
 By the end of the first day, we’d all been measured and learned how to measure someone else by measuring one another – all under Jeanette’s instruction. We were almost ready for Day Two, but before that, we had homework to do.
 Day Three built upon Day Two. We were starting our lower cup draft. Well, we needed our frame to be done correctly at this point, and the one I had with me in the class still wasn’t corrected. Things weren’t fitting together. Again, Jeanette pointed out what I’d done wrong on my frame. I was back to the drawing board. Literally. I’d had a little more practice drawing frames by Day Three after Day Two’s homework, so it went much more quickly. I was on track in no time. We finished the day with a draft of our lower cup, our upper cup, and lots of information on how to do adjustments if needed.
 Something I’ve heard and read repeatedly is: To get accurate measurements you have to start with a well-fitting bra. It’s so true. Jeanette brought fitting bras with her, so we all started with a well-fitting bra to get our measurements. And it works!
 On my drafted bra here, I added a couple of features just because I could. I gave this bra a Gothic arch, and a thinned band under the cups. This draft is for a Horizontal seam. This seaming is the basis for the ‘Heather’ bra. The Heather bra is actually a Wacoal bra. It’s the Retro Chic Full Figure Underwire Bra.
 These are my Hipster draft. I made these from black cotton Lycra, and two laces. The multi-colored lace is very light-weight, so that is backed with CL, but the pink/mauve lace is a firmer lace and is on its own with no backing. Because it’s firmer, I didn’t add elastic to the waist at the front either.
 I fully meant to finish the back of the panty the same as the front, with both laces. However, I sewed these up on my trip to the mountains and didn’t remember to either: a) cut the lace out and pack it, or b) pack it. So these will only have the one lace on the back.
 For this Poppy, I made a smaller band and larger cup size than the first two. This one fits me perfectly.
 Poppy is an easy sew, with generous sizing. And it’s really comfortable and although this one is stretch lace and power mesh, it’s still supportive.
 I really wondered how I would like two laces together, but I really like this. And only having one lace on the back of the panty? Well seeing it from the back with the bralette, it works much better this way!
 Oh! These are lovely.

 The Panache is in-between these two patterns, but is a bit closer in shape to the Betty. If you haven’t taken Beverly Johnson’s panty class on Craftsy and aren’t comfortable drafting your own pattern, either of these patterns would get you close.
 Although these come up to the form’s waist, they’re hipsters on me.
 Lastly, I added seam allowances to those new seams, and traced off my new pattern pieces.
 I wanted to change the cups on this to make them a little rounder. I also wasn’t completely happy with my power bar. Something seemed a little bit off where the strap tab and the underarm were meeting. I also changed the band to a downward hike, but it needed work too. More on that later in the post.
 There’s really very little difference between these two, but I decided to use the white. Seeing as my lace is a little bit darker than the ivory duoplex I’m using, I thought the white behind it brightened it up a bit.
 I even enjoyed taking my time with all the top-stitching. I was only finished the cups in the above photo, but they were so pretty I had to take a photo.


 This photo is from the BMS blog. I thought this looked lovely when I first saw it.
 I planned to use my mashed-up
  These are stretch satin and cotton Lycra. Then finished with stretch lace at the waist and leg openings. I’m loving these!
 Here’s the side view.
  And the back. I was almost out of cotton Lycra, so had to make these with a seam in the back.
 I love these! Next I made a the bra to match.
 The whole bra cup and cradle is stretch satin. I’ve lined the cup and cradle with beige sheer cup lining. That little part on the upper cup that looks like there’s nothing there? That’s sheer cup lining. It disappears against the skin.
 Do you see those puckers where I gathered the cup to fit into the cradle? I don’t like that! Those puckers aren’t so noticeable when I’ve used duoplex. That made me sad.
 Oh, the back looks perfect! The red power net really matches the stretch satin well. I debated using the satin for the band too, but had some red power net in my stash, so went with that.
 I love this sheer cup lining detail. It turned out better than I had hoped.
 In the first photo the shorts are pinned. In the second photo they’re unpinned. I definitely have more going on in the hip and thigh than this display!
 Again, pinned and unpinned.
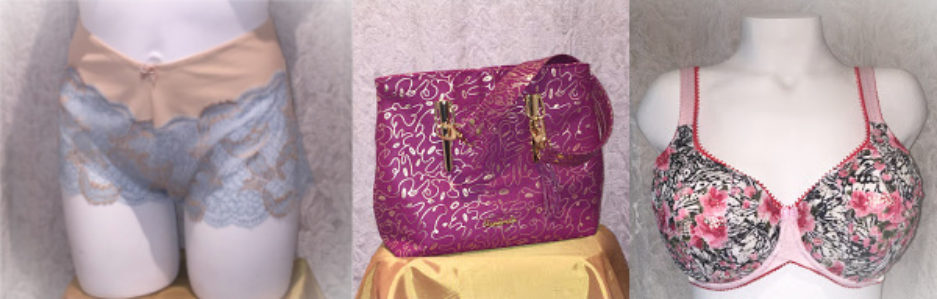
 I LOVE lilac! I don’t know why I haven’t had a lilac bra and panty set before.
 Below, on this side view, you can just begin to get a peek of the back. This is the combo panty I mentioned earlier. It looks like a brief from the front, but a boyshort from the back.
 Here’s the full back view of the bra and panty.
 I am so happy with these lovely sets and am looking forward to the next BMS Challenge.


 Do you see how the 42 Extra Long wire is the same length as the 44 Long wire? My cup size matches a 44 Long wire. I normally wear a 40 Long wire. Using a 42 Extra Long wire to draft my cradle size, I’m able to make my cradle match my cup size perfectly.
 There were only a couple of changes I still wanted to make to this. I wanted to add a bit to the underarm area for more coverage there – just a half-inch. I wanted to round the cups a touch at the apex. And I wanted to lower the bridge a half-inch as well.


 Happy creating!


