A couple of great sewing friends contacted me. We’d all taken classes with Jeanette of Sew Uplifting, but we were all feeling a lack of motivation. We decided to get together over Zoom, and agree to some accountability – we’d all make something by the end of April.
I shared I was just weary, and didn’t want to keep working on my draft right now. I don’t want to give up on it, but I wanted to sew again. So I said I’d sew a bra.
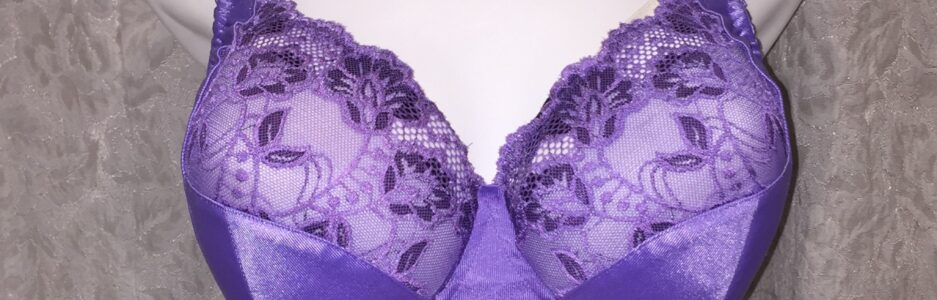
I need a basic beige bra in my wardrobe, so that’s what I made. This is my drafted frame and the cups from B, Wear’s Angie pattern.
This bra is using my new wire style and size, and unfortunately, although that seems to be fitting better, I now need to go up a size in the cups.
The Omega shape is causing problems again.
I’m using a size smaller wire, so I had to lower both the front and the sides of the cups to get it to fit in the frame. This is also a narrower frame – to fit the wire. Once I put the bra on, I could see I really need a power bar to pull in everything on the side.
 Something I really like about the Angie pattern is how rounded the cups are. They give such a nice shape when wearing the bra too. However, using the smaller wire size and narrower frame, the rounder shape didn’t seem to be fitting into my frame as well.
 The back is fine. The band is too. It was comfortable, and stayed in place. However, I’m very disappointed this is not wearable.
I’m off to work on getting my next bra to fit.
Happy creating!
 Here’s the square I’m blocking right now. It rolls under, and it isn’t actually square.
 After it’s all pinned it’s square. Then I spray it really well with water and leave it to dry. I really am enjoying this. It’s wonderful to unpin each square and see how nice it looks.
 For my first draft, I knew to widen the lower part of my bridge. However, when I’d made the bra, I posted a comment in the Bare Essentials support group that no mater what bra I’d ever made, it slides down a bit after I wear it. I’ve worked on my wires, and changed those. I’ve adjusted patterns, and drafted my own. Yet still, I was dealing with this.
 Using the sheer cup lining really helped. I needed to add another 1/4″ to the bottom of the bridge. For the first time, my wires stayed just where they were supposed to stay.
 I also made a mistake when finishing the upper cup. I’ve corrected this on the paper pattern.
 I’ll be honest. I bought one of these after reading it would help to do a root trace. It didn’t help me with that at all. Not one little bit. At least it didn’t help me at all.
 I wasn’t exaggerating when I said it wasn’t pretty! It’s not.
 From the straps being pinned on, thread ends not cut, everything just sewn enough to hold it together to try on once, it has served its purpose.
 Even the strap elastic is only tacked down quickly to work for that single fitting.
  So after a week of watching along, I knew I still needed help. Both instructors were offering one-on-one sessions. I signed up with both of them, and I’m really glad I did. They both come at the process differently, and I think things are finally starting to click.
 I can’t even begin to say how helpful this is. Every mathematical measurement is given here for your draft. You put in your measurements and it does it automatically. You just have to refer back to your numbers to do your draft. It’s very helpful.
 It’s so lovely! It’s also so very comfortable. Everything about this bra is the same as a ‘normal’ bra – channeling, underwire, but it’s all soft cotton jersey.
 To account for the stretchiness of the jersey, the original sewer went down a full size to make her jersey bra. I did the same, and it fits very well. I do need to make a couple of adjustments for my Omega shape, but other than that, this is a very good fit.
 There isn’t anything different about the back except I used jersey again. The whole bra is jersey except for the elastics, and the underwire and wires. As well, to keep this very soft and comfortable, I did not stabilize the frame.
 I pulled out Catherine (my dress form) for this Angie. She’s a little wider through the back than my white dress form. So I thought the bra would fit better around. And it does.
 There isn’t anything different about the back except I did the two stitches to attach the strap elastic again. I do like it better.
  I hope this Angie fits perfectly.
 This is a Northcott panel called Angels Above. As soon as I saw it, I really just had to have it.
  The pocket is the same coordinating fabric I used for the back of the apron.
 Oh, that’s pretty. I’m very pleased with my new Christmas apron.

 Yes. A longline is what she wanted.
 Isn’t this pretty? I don’t usually wear white, but I really do like this.
 I can’t wait to see it on her. I know she’s going to be a lot happier with more coverage.