This past weekend was The Great Bra Sewing Bee. And I have to say, it was great. I was so impressed with how well it was organized, the quality of instructors, and the great content. There was something for everyone – from beginner to experienced bra-makers.
 I think my favorite classes were the Fit Clinics. There were 3 of them, and each had 3 or 4 women who had signed up to sew a bra, and then have the fit evaluated.. Suggestions were then given in the clinic to correct the fit. Not surprisingly, it seemed most of the women had issues with small band/large cups.
I don’t know if I learned anything in those, but much of what I had learned in Jeanette’s Fitting class was re-enforced and affirmed. Jeanette presented a class in the Bee too.
However, I did learn a couple of things.
I didn’t know some bra patterns splay the wire, and some don’t. Hmm. This got me thinking about wires again. I’m still not 100% happy with how my wires are fitting. So, out came my wires for me to look at. And I dragged my hubby along too.
First we did a root trace. This is something I’d been planning to do for a long time. You can read about how to do this in Porcelynne’s blog post here.
What did I find out? Well, if I splay the wire, a 38 works perfectly for me. If I don’t, the 38 wire pinches and I need a 40 wire. So I’ve realized I need to know if a pattern splays the wire or not before I will know which wire size to use.
After watching Jennifer’s (Porcelynne) bra sloper class, I decided to sign up for her drafting class. This is completely different from what I’ve learned so far, and I love learning new things. Yes, This is new territory for me, but I’ve heard such great reviews of this method. It’s time for me to try it. I’ll let you know all about it. You can see more for yourself here.
Something else I really enjoyed about the Bee was hearing from bra-makers all over the world. There were presenters from New Zealand, Sweden, the USA, Canada, and I’m sure many more. Really, all over the world. I loved that. Normally going to a conference means more local speakers, but this being online there were no travel restrictions to hinder anyone.
That no travel restriction allowed me to watch Bodil of B’Wear sew up her Jessica’s Twin pattern. I’ve want to learn some things from Bodil too.
I enjoyed Monica’s Fit Clinic too. You many know Monica from Bravo Bella. My experiences in bra-making have been primarily from using Bra-Makers Supply patterns, and learning Beverly Johnson’s methods. It was very interesting to hear a different method, and I found it very refreshing.
That was something else I appreciated about the Bee – the presenters weren’t all of one mind. There were different approaches, and all were respected. I loved that!
Let me give you one small example of the presenters not all being of one mind on a matter. Monica uses Flexi-Wires, and Porcelynne has had her own wires made, which are not flexible. And both were referenced by other presenters. Neither is wrong. Both are supportive. I really loved that approach!
Lily of Lilypa Designs was there too. One of the things Lily said that I really appreciated was there is more than one way to make a bra – just as there’s more than one route to take to drive home. In the end, we make a bra. There is much wisdom in that statement.
To top the whole Bee off, I won a prize. I won a pattern from Studio Costura. What a treat for me! I chose the Eva panty. 
Aren’t they darling?
If you missed the Bee, and are still interested, you can still sign up for extended access here. It gives you all the same resources and videos. The only thing you’ll miss is being able to ask questions live. However, many of the presenters did to feel free to contact them after the Bee if you had questions.
Happy creating!
 Still, I wanted the experience of doing a root trace with copper wire. And I’m very glad I did.
 This is pretty close. I’d say it would be an exact fit – except for the upper part of the wire. This would explain why I felt the 38 wires were pinching me.
 My trace is smaller at the bottom, but it matches the width at the top of the wire.
 And I have my perfect wire! And I have a whole bunch of 38 Extra Long wires, so this will be very handy to do so I can still use them.
 The next part of the course is to make a fitting band.

 Above is the one I’ve been using.
 And I chose this Watson for my new header. Do you have a preference?
 Oh, this mesh!
 This is also the last of my lovely Café au lait beige. It’s a little darker than a lot of the beige cotton Lycras I’ve seen, and I like it too.
 The lace trim matches the cotton Lycra perfectly, and both are the same Café au lait as in the burn-out mesh.

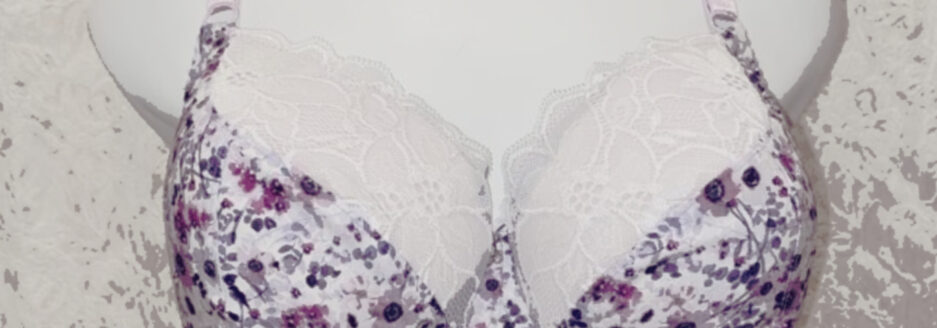
 Oh, I like this. I also like the Angie’s Twin pattern. Other than a few adjustments for an Omega shape – smaller wires & frame, and a larger cup – I didn’t have to change anything on this pattern.
 There was just a tiny bit of lace left over to add to the sides. Just to add a bit more detail.
 All that red really pops here.
 Oh, such pretty lace!
 I tried a couple of different bows on the front to see what color I liked the best. I decided, even though the pink blends in, it was the only one that didn’t seem to pull the attention away from the lace. I love it too.
 One of the reasons I hadn’t tried the Jessica pattern is I have to make adjustments to my bra cups so they’ll fit in a smaller frame. Omega: larger cups, with a smaller frame and wires.
 This is what I tried, and I have to say, I was pretty close. I still need to take in the underarm a little, but other than that, I got a great fit.
 Well, maybe it’s not so clear. Here’s a close up.
 You can see I just have a little bit folded under there. Probably 1/4″ x 2 removed from the underarm there and it will fit absolutely perfectly. Not bad for a first time testing the pattern. And isn’t that purple elastic so pretty with the navy?
 This is a great adjustment when you don’t want the cup size to be smaller, but just the amount of fabric in the underarm area. This works perfectly!
 I really am happy with this. I didn’t think I could make a cup with only one seam work for me.
 On the bra for the BMS challenge, I used the burn-out mesh on it’s own. On this one, I’ve used it over power net. I wasn’t looking for sheer on this bra.
 It’s so fun! When I first started sewing bras, I experimented a little and I tried using Lycra and mesh over power net. It gives a wonderfully supportive feel. It adds support, but it isn’t too much like two layers of power net would feel. This isn’t too much. It feels a little more supportive.
 When I tried this on to see how the adjustments I’d made were, it fit so perfectly and was so comfortable, I didn’t want to take it off for photos. I did, but there was no way I was going to put on my old bra. I need to sew a few more too. I was down to a RTW stretch-cup bra when my size changed.
 You can only find this used now. It’s been discontinued. Although the description on Etsy calls this a bikini, it fits like a hipster on me. And this has been my TNT pattern.
 I used Beverly Johnson’s Craftsy class to draft these, and they’re similar to my Kwik Sew favorite.
 Oh, I love this too! I might have to get some more of this material. It’s a cotton Lycra from

 And the