Here’s a little of the back story to my Jessica’s Twin I shared last week.
I was asked to test Jessica’s Twin. I like the Angie pattern so much, I was happy to test this pattern.
I’ve made a few Angie bras in the past, and I had bought Angie’s Twin. I’d even bought the Jessica pattern, but I hadn’t sewn it up yet. One of the reasons I hadn’t tried the Jessica pattern is I have to make adjustments to my bra cups so they’ll fit in a smaller frame. Omega: larger cups, with a smaller frame and wires.
I’d been told the best way to make these adjustments was in the seams of the bra’s cups. And the more seams a cup has the better. Take a little dart out here and there and hide them all in the seams. It’s a great solution.
But Jessica only has one cup seam. I needed to think of other places I could remove a little without changing the shape of the cup or removing too much volume, because I still need that volume. This is what I tried, and I have to say, I was pretty close. I still need to take in the underarm a little, but other than that, I got a great fit.
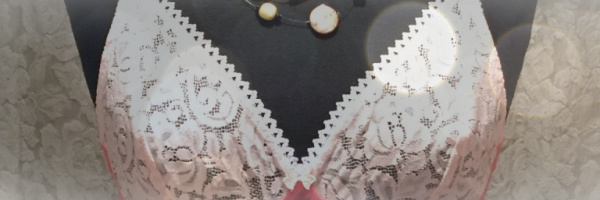
Here is the side view. You can see where I need to adjust the side cup. I have it pinned. Well, maybe it’s not so clear. Here’s a close up.
 You can see I just have a little bit folded under there. Probably 1/4″ x 2 removed from the underarm there and it will fit absolutely perfectly. Not bad for a first time testing the pattern. And isn’t that purple elastic so pretty with the navy?
To make the underarm smaller, I used this adjustment from Cloth Habit’s blog:  This is a great adjustment when you don’t want the cup size to be smaller, but just the amount of fabric in the underarm area. This works perfectly!
And just to share one more time, here is my Jessica’s Twin. I really am happy with this. I didn’t think I could make a cup with only one seam work for me.
Happy creating!
 On the bra for the BMS challenge, I used the burn-out mesh on it’s own. On this one, I’ve used it over power net. I wasn’t looking for sheer on this bra.
 It’s so fun! When I first started sewing bras, I experimented a little and I tried using Lycra and mesh over power net. It gives a wonderfully supportive feel. It adds support, but it isn’t too much like two layers of power net would feel. This isn’t too much. It feels a little more supportive.
 When I tried this on to see how the adjustments I’d made were, it fit so perfectly and was so comfortable, I didn’t want to take it off for photos. I did, but there was no way I was going to put on my old bra. I need to sew a few more too. I was down to a RTW stretch-cup bra when my size changed.
 You can only find this used now. It’s been discontinued. Although the description on Etsy calls this a bikini, it fits like a hipster on me. And this has been my TNT pattern.
 I used Beverly Johnson’s Craftsy class to draft these, and they’re similar to my Kwik Sew favorite.
 Oh, I love this too! I might have to get some more of this material. It’s a cotton Lycra from Smoogie Fabics. It is SO pretty!

 Other than the size being different, I didn’t change a lot else. I used different neckline trim, and made the straps differently this time.
 Here’s Angie’s Twin from the side. I used some of the same tricks and tips I’d learned taking Jeanette’s classes to get my Omega cup into a smaller frame. I like how it’s looking. No wrinkles. It looks like it was made to fit together.
  And the back.
 I sewed non-stretch

 These are my 2nd Sigrid panties. My first were the test pair, which I didn’t finish. The very big difference between my waist and hips made that pair unwearable. Whenever I’m testing a pattern, I make it as is the first time to see how things go together. Often that means things will not fit that first time though, but it gives me a good idea of the pattern.
 You can see a bit of the gathering at the waist on the back more than you can on the front.
 If it does run a bit, the three-step zigzag will help it not fray too much.
 I think these are so fun, and I love the lace trim at the waist.
 Oh, that’s pretty. I got this from
  Isn’t that a gorgeous knit? I really like these. I didn’t have any narrow trim, so I followed the design in the lace and cut it in half to use for the legs.
 Here’s a close-up of the lace at the waist. You can see the line going through the design. It made it very easy to cut and use for the legs. I’d probably put the scallops on the inside next time though. It was a challenge to match them at the seams this way.
 For these ones, it was a basic grey heather for the back and white lace trim at the legs and waist.
 It’s just a folding table, but I’ve got it up on bed risers. I saw this little trick at
  This is
  How adorable is this? Being a musician myself, I love it.
 I made view B with short sleeves for both of the sleep tees.
 I think they turned out quite well. I love the treble clefs.
 I really like the curved hem on these too. I think it’s very flattering.
 Yes, I think these will be warm and snugly.
 My son loved the last few pairs I made him. He’s also told me he wears the ones I make as often as he wears his SAXX.
 If you look at these photos, the elastic all looks the same, but it’s not. The black & white print pair have elastic I bought at the fabric store. It’s not the same as the plush elastic I bought at BMS – so says my son.
 Believe it or not, I couldn’t figure out how I did this. I had to sit down an re-read my old blog post. I just wasn’t getting it when I first started to sew. But once I saw what I’d done, I got it again.
 They don’t fit my dress form as well as my panties, but this works better than pinning them on my dress form.
 On the side view, you can see just how ill-fitting they are. There’s not as much of a difference between the waist and hips on these. And that will fit my son much better than something more curvy.
 And the back view.
 So these are fully equipped. They’ve got the front opening and the sling.