This is just a short sweet little post.
I recently saw an ad for some displays on sale, and they were a great price. A consignment store was closing and these were going far below cost. After making a few pairs of pants and never having a decent way to display them, I thought these legs were perfect.
When I went to pick up the legs, the seller also had these lovely displays for sale and out for me to view. The hanging display went into my car right away. It’s lovely.
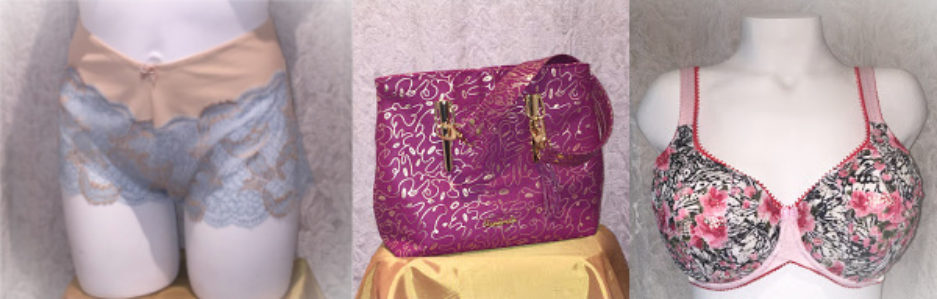
However, I did realize it wouldn’t work as well as I wanted for displaying something from the back. Here are my new capri pants on the display, and the back view is just not at all what I was wanting. But the front and side views are nice. It’s a good thing the legs are free standing and can be turned around.
Right after I brought this home, a friend called asking to borrow my displays for an event she was having. It was nice to see my new display put to use right away. That’s Catherine there too. Both displays were on hand for my friend to showcase her knitting crafts.
Legs
It was time to try out my new legs display and see just how pants would work on it.
The first thing I noticed were the legs are freakishly long. They come up to my husband’s torso! And my husband is over six feet tall. Despite being so long, my capris look much better on this display than any display I’ve tried yet.
Here’s the side view. She’s awfully skinny, so I had to pin the pants on her.
And the back. Yes, this display is definitely much better than anything I’ve had to show pants before. I’m glad to add her to my small collection.
Just a note. Things have been difficult at home, so for the time being I’m going to aim for posting every other week.
Happy creating!
 In fact, these were the left-over CLs I used for my May Challenge entry. I did have enough after cutting out my newest agnes.
 I adore this! Polka dots are a favorite of mine.
 I pulled out my Coverpro machine to finish the neckline, armholes, and hem.
 It really does such a nice job finishing.
 I’ve ordered a few prints from them and have loved them all. For this one, as an agnes, I was thinking something along these lines.
 I’d have the frost detail meet and graduate up and down on this one. I think it will look great.
 I love how this turned out.
 The back is amazing as well.
 Yes. I love this!
 Here’s the view from the side.
 And the back view. Again it’s pretty much the same as the front view.
 All of these were finished with my Coverpro machine.
  I’m feeling very inspired with these new tops, and think I may look at what other fabrics and patterns I have to make for summer.
 I think these are adorable! In fact, I like them so much, I went on to cut out five more variations! I’ll show you those after I show you the side and back view of this first pair.
 And the back view.
 I used up the last of the stripes, and that inspired me to make a pair in the last of the black with white polka dots. These are so cute.
 I have two more pair of white with black polka dot panties all cut out, but somehow with a whole rack of thread, I didn’t have any white thread.

 Aren’t these great? I hadn’t decided if I wanted the black on the bottom, on the top, or color blocked, but I knew they’d be adorable together.
 Here they are side by side.

 I like this one a lot better.
 As I was drawing this, I realized exactly what it was I didn’t love about the first two combinations – I wanted more continuity between the top and bottom pieces. So Rad Patterns’ Panel Undies inspiration struck again. I could do an ombre panel on the tankini bottoms as well.
 I’ve seen some amazing sets made, but I didn’t participate in the testing this time. Look at these makes! Pleather, lace, gemstones. Oh my!
 Again, as with other House Morrighan patterns, there is a lovely range of sizes.
 You can find the Ariadne pattern
  There was a Fitting binder, and a bra and finding kit in my bag (not shown). As well as the great canvas tote. For students who hadn’t taken the Drafting course, they got a few more goodies like sample packs of Duoplex and Power Net, as well as a set of Pin-Up Girls patterns. I had all those already.
 On Day Two we were starting to learn what changes to make for different alterations – all using those little tiny bra pattern pieces. It was really great to have these, and to have them to keep as a reference.
 You can see here in this example, it wasn’t a complicated adjustment – just lengthening the band. Having the samples makes it much neater to look and see any of the adjustments – much better than me freehand drawing these examples.
 Overall, I have to say it was a great class, and gave us all some fabulous tools to take and use going forward.


 Yes, the second one is more flattering on me.
 I told Jeanette I was going to copy her idea. These are adorable, and I knew my own pair would go so well with the Ingrid bra I just made.

 Here’s the scuba panel I added to the side seam.
 The scuba is really nice to sew, and it adds such a lovely pop of color. I’m so glad I saw Jeanette’s little shorts and copied them.
 Even the back has a little pop of color with the waistband.
 Lastly, here I am putting my new capri-length pants to good use.
 I love these, and am happily planning my next Challenge entry.
 I really like the Ruby pattern. It gives a round cup shape, which for me, is perfect.
 Isn’t that pretty?
 Then because I like a strap tab and still need something on which I can connect the strap or ring, I cut out the upper cup again with the strap tab in sheer cup lining.
 I’ve added a fabric strap to this one too. I do like a fabric strap, but am thinking I might still have fun playing with different straps for my Rubies. We’ll see what I come up with for straps going forward.
 You can just barely see the pink elastics I’ve used on this bra. I decided the pink was prettier. I also liked carrying the color around to the back of the bra.
 One last little detail.
 I didn’t have a wider pink bow, but did have a narrow one. I decided to change the style of the bow by untying it, and ironing it flat. Then I folded it over, and attached the grey bow over it.
 I love how the two colors of the bra are in the bow too.
 The fabric on this is so pretty.
 To make the pattern work for foam, all we had to do was cut off some of the seam allowances. I did that. I did that three times.
 I’ve used the red and black floral scuba with all red findings, including red foam on the inside.
 One small disappointment was my band turned out to be too big. It’s not fitting well on the display either.
 Looking at it when I was sewing it, I thought it might be, so I just have the hook and eye tacked on here. I’ll take that off and trim off a bit from each side. After I measure and compare to a well-fitting band, of course.
 Isn’t that a neat and pretty neckline finish? Below you can see it from the inside of the cup.
 We also learned how to stabilize our strap elastics to give better support.
  We’ve sewn non-stretch seam tape to the inside of our straps at the front. It’s nice and soft, and helps keep those elastics from stretching.
 Have you been wondering how that adjustment turned out?