This past week I took the Bra Design & Draft course at Central Sewing Machines. I’ve wanted to take a bra drafting course for a few years now. With the course finally coming closer to home, I could do it. It was a pleasant surprise to find I knew the other students. We’d all taken either the Beginner Bra-making class or Shelley class at Central last year. And of course, we’d all taken those classes with Jeanette of Sew Uplifting Bras too. It was like a class reunion.
The first day was very exciting. We were all presented with a bag full of goodies. Now, others may not have been so thrilled with the goodies, but for a bunch of bra-makers, it was a thrill! Just take a look. This is the manual we were given. It has the complete Drafting course in it, as well as a bunch of other great resources.
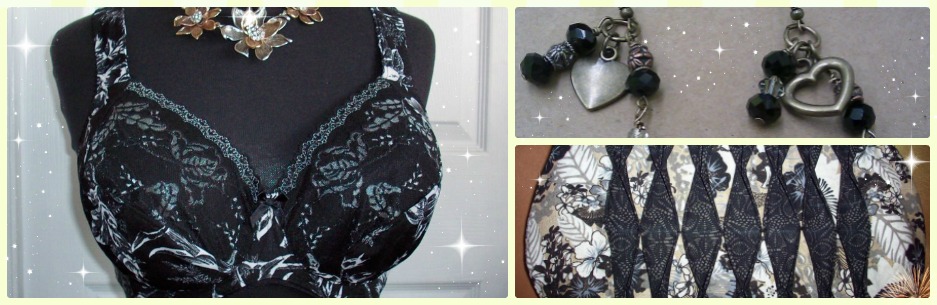
 We also got a full set of Long wires, and a complete set of Classic patterns (all the sizes). There were sample packs of duoplex and power net, a notebook, a binder (shown above), a set of curves, and a bra kit with findings. All in a great bag. I’m pretty sure that was the best swag bag ever.
Fabrics
The first day we learned about all different fabrics that can be used in bra-making or lingerie. Some of them were familiar to me, some were new. We were given samples too, with instructions on how they were best used, and not to be used. It’s all neatly contained in our new binder. One of the students is in a Fashion & Design course, and she said she’d learned more that day than she had in her Textiles class. It really was very useful. By the end of the first day, we’d all been measured and learned how to measure someone else by measuring one another – all under Jeanette’s instruction. We were almost ready for Day Two, but before that, we had homework to do.
Drafting
Day Two was the beginning of a lot of paper and pencil work. We were guided in the art of drafting. We started with our frames. I did something wrong. Jeanette told me what I did wrong, but I was tired and didn’t correct it right away. Let me tell you, all it takes is one little mistake to throw everything off. By the end of the day, we were sent home with homework again. This time we were to practice our drafting. We drafted frames for everyone in the class. Day Three built upon Day Two. We were starting our lower cup draft. Well, we needed our frame to be done correctly at this point, and the one I had with me in the class still wasn’t corrected. Things weren’t fitting together. Again, Jeanette pointed out what I’d done wrong on my frame. I was back to the drawing board. Literally. I’d had a little more practice drawing frames by Day Three after Day Two’s homework, so it went much more quickly. I was on track in no time. We finished the day with a draft of our lower cup, our upper cup, and lots of information on how to do adjustments if needed.
Day Four was similar to Day Three – still more paper, pencils, drafting, and information. Some of us even cut out our newly drafted patterns, and got in some sewing before the end of the day. One woman was almost finished her drafted bra on Day Four. I had my cups finished. I brought them home and put them in my fitting bra frame. I was thinking this would save me the time of completing the whole bra to see how close I was. There was one small little change I needed to make to my draft. That was incredibly encouraging. Something I’ve heard and read repeatedly is: To get accurate measurements you have to start with a well-fitting bra. It’s so true. Jeanette brought fitting bras with her, so we all started with a well-fitting bra to get our measurements. And it works!
Day Five was mostly a sewing day for me. But before I could sew, I had to re-draft my upper and lower cups with that one little change. I worked as quickly as I could so I could get to the sewing. I really wanted to be done by the end of the day. Thinking back, I could have just changed my pattern, but it was a drafting class, and I was getting a LOT of experience with drafting.
The great news is I did it. I finished the Bra Design & Draft course and came away with a perfectly fitting pattern and bra – that I drafted from measurements. On my drafted bra here, I added a couple of features just because I could. I gave this bra a Gothic arch, and a thinned band under the cups. This draft is for a Horizontal seam. This seaming is the basis for the ‘Heather’ bra. The Heather bra is actually a Wacoal bra. It’s the Retro Chic Full Figure Underwire Bra.

You can see this has a horizontal seam going across the cup. It’s so pretty. I’m already planning another ‘Heather’ using my new pattern. If you have the Craftsy Class Sewing Bras Foam, Lace & Beyond, Beverly shares how to make the Heather bra.
It was a great week. I can’t wait for the next course!
Happy creating!
 This is a 48 H Pin-up Girls Classic bra.
 There were a couple of things I didn’t do while sewing this bra. I didn’t do any top-stitching. However, I did do some reinforcing stitching like at the strap and where the band attaches.
 It’s a little hard to see but there’s the seam and then that seam is reinforced with another seam. Those aren’t decorative stitches. Those are to strengthen the straps, and band.
 I wanted to keep the channeling open in case I need to use a different wire size than what is normally used. Trust me, I know very well that a different wire size can be needed. So, I decided it will be better to not finish the channeling on these fitting bras.
 I have a few other sewing projects waiting for me, but they’ll have to fit in and around these Fitting Bras. My goal is to get as many done in February as I can. Let’s see just how many I can do.
 I realized just how quickly these findings will take color. However, the BMS Challenge for January was coming close to an end, so I decided these will do nicely.
 This has me thinking, I might want to do some timed tests with bits of elastic and such and record the results after say 1 minute, 2 minutes, 3 minutes…
 I’ve used 5 x 3 hook and eyes on each side of the bra to attach this back. I can take this off and use another back in the future (When I get another back made.)
 Below is my bra from the front. It doesn’t look any different from a normal bra.
 Lastly, here’s my bra under the sweater on my display.
 What a subtle but lovely little pop of color peeking out!
 I was wearing it while out one day and the wire poked through the top of the channeling – on the left side. I spent the day trying to pushing it back in without drawing attention to myself and my bra woes.
 Oh, I do like this lace. I’ve made an Angie, a Ruby and two pair of panties with this. And after cutting out a second Ruby, there is still more lace left over.
 My New-Same-as-the-Last Ruby
 There are no wrinkles, no puckers, no gathering. It looks clean and professional. Just the way I want my bras to look. I sent off a message to Jeanette telling her (again) how thankful I am for her class and all her little tips.
 It’s almost exactly the same as my previous Ruby.
 I hope I can find a little more time to sew this week. My FIL is almost all moved into his new home, so a little bit more decorating, and I should be able to find time again.
 These are adorable too. I made them in the reverse of the color block I made my first ones.
 And from the back.
 Well, I can say, I definitely don’t like how the bands are flipping up in the photos. Good thing they don’t do that when they’re on me. I’ve got more to fill them out than my display.
 And the back view.
 Oh, they are sweet. And it’s nice to see panties that fit my display perfectly.

 Yes. This was my favorite Challenge make.
 How could I not want to sew something with a little silver and tan pup like mine? There are so many panels coming, but not until Spring. We all will have to wait for a little bit for this adorableness.
 I keep going back to the
 Oh, I’m loving this too.
 You can still see some kitties, but you can also see the black and grey material without the cats that I used for the back. It still gives some visual interest, but doesn’t take away from the front of the bag at all.
 I really like the back of the bag too.
 Don’t they look great? I’ve also used iridescent rivets.
 That adds just a little more bling to the handbag. And this faux leather is lovely to cut. It’s very soft.
 The Handmade tag had to be positioned just so one of the kitties was looking at it.
 A lot more bright colors. All the fabrics I used to make Em’s Miss Maggie’s came from the Cat-i-tude line of fabric.
 Don’t you love all these options? I do. Also, I really like the shape of these. For boyshorts, these actually work for me. There is some curve built in.
 I made these up from some cotton Lycra I had in my stash. I also tested the pattern for Em in CL.
 I really liked this pattern and knew I’d want to make more for myself. Em also requested more. So this style is a hit with both of us. It was time to have some fun with the pattern.
 Here’s my Ruby bra. The same lace I used for this bra, and a previous Angie bra, was now being used to make the Clover Boybriefs.
 I’ve used black and black cherry cotton Lycra for these, and rather than bands or elastic as the pattern calls for, I’m using black lace trim. I’m loving these panties!
 Here they are from the back.
 Oh, this is a lovely set. I need to hurry up and get all my gifts sewn up so I can finish a second pair for me, and for Em.
 I thought it would be fun to see how the same lace can look very different used in different ways. I’ll be using black duoplex and power net for my newest bra.

 I really do love this bra. It’s kind of funny, but my hubby is taking all the credit for this bra because he brought the lace back from Amsterdam. We all know there’s a little more to the bra than just lace. But he’s having fun taking credit.
 It’s a very pretty pop of color.
 Even though I used the same lace on both of these bras, they definitely look different. Do you have a preference? Let me know which one you like best.
 These are a basic black cotton Lycra. And you can see the front opening.
 The sling is a light blue. I chose that so it would show up better in these photos, and so it wouldn’t be a headache to sew black on black, on black, with black thread.
 I altered the front pattern to be a front-opening panel. And I cut two front panels. Then one piece is flipped so it becomes a mirror of the other. The two pieces are basted together, making sure there’s an opening on each side, and on opposite sides. Then they can be used as one piece. After basting them, I add the sling just as I would normally add it according to the pattern.
 And here they are from the back. (Again, lightened. The seams just wouldn’t show otherwise.)
 My son also let me know when I made him his last pair of Michael’s that he didn’t like the band. He found the elastic too firm for his liking. Now to be fair, he’s a personal fitness trainer, so probably doing a little more movement while wearing his. So this time instead of elastic, I simply made a band out of the same cotton Lycra.
 I’m sure he’ll find this more comfortable.
 Here are the Michael underwear showing the front and mirrored inside front openings both opened showing the blue sling behind them.