A sewing friend and I are getting together weekly to work on bodice slopers. She’d taken a class a few years ago, but her weight had changed a bit so she wanted to redo her sloper.
I had done the Suzy Furrer Bodice Sloper class on Craftsy, and it was wonderful. Like my friend my weight had changed since I’d taken that class too.
 So we’ve been getting together for the past month to work on slopers together.
She brough all her class notes, but something wasn’t working out for us, so I thought of the book I had sitting on my shelf.
I have the second edition of the wonderful book Patternmaking for Fashion Design. It’s a great book, but read some reviews before you purchase a newer edition. I did. That’s why I purchased this edition.  This book helped us. It had a few steps included that her class notes didn’t have. So we were off and going.
This week we finished drafting the pattern, tracing it off, and cutting it out. I sewed mine up that evening.  I had to cut into some quilting fabric I had because I didn’t have enough muslin fabric. So I have a very pretty sloper now.
This fits me loosely and I’m not sure if that’s correct or not. I know we did add seam allowances, so I’m thinking it’s correct. In the Suzy Furrer class we made a moulage and it was tight fitting.  I’m actually so happy with how this fits, and how pretty it is. I’m almost thinking of adding sleeves and buttons to the front to make it an actual blouse.
  Ah, but the back… Here it doesn’t look so pretty. I guess a sloper it will stay.
Overall, I’m very happy with how this sloper turned out. I’m sure it can use a few tweaks but it’s very close to wearable as it is.
This isn’t the only project I’ve been working on. I have something fun to share from Porcelynne in the coming weeks.
Happy creating!

 I carefully cut along the side of the lace where it meets the power bar.
 There’s the smallest pucker there, but it will fit better. I can adjust my pattern for next time.
 Although I’m sure the zigzag stitch will hold everything, I did sew a straight stitch on the top at the edge so there was no gape where I’d cut the lace.
 I’ve shared before how I love the golden color of beige. I think it’s so pretty. So with for this bra, I’ve paired it with a gorgeous golden beige lace.
 I can’t even say what it is I love about this lace but I do love it.
 Do you have a favorite lace? Or even a favorite color you just go back to again and again? Let me know.
 I love the golden hue to beige. I think it’s really quite lovely.
 This lace matches so well with the beige as well.
  I had a small problem when I was making this bra. After I attached the strap to the front of the bra something didn’t look quite right. So I checked the front again. No. I’d attached it correctly. I looked at the back again. Gah! I’d sewn the strap elastic to the inside of the band rather than the outside!
 You can see just the slightest difference in the sewing along the eyes where I had to resew that part after reattaching the strap elastic.
 Oh, isn’t that all so very pretty?
 I am in love. Here’s a close up showing just how pretty this fabric is.
  Just gorgeous.
 If you haven’t sewn with cotton poplin, it’s very easy to sew with it. All the cut edges do end up enclosed, so you don’t have to worry about any unraveling of those edges. You don’t need to finish those raw edges in any way. They are all enclosed in the bra. As with most of the seams in a bra, they are sewn over more than once.
 That little cherries charm was too adorable for me not to use. It’s just so sweet!
 This is just incredible to me. This is ALL hand-sewn. Every stitch is by hand!
 Here is the back. She had noticed young women wearing racer back bra styles and modified her pattern again to have more of a racer back look than the straight across design. She made this change to keep her straps from falling off her shoulders.
 However, where no stretch is needed, the stitches don’t have stretch.
 Here is the straight stitch on the side seam along with those stretch stitches.
 I am in love with all the thought and detail in this – from the use of stretch stitches where stretch is needed, to changes in design.
 My friend has made two bras for herself – one with blue thread and one with pink.
 I used some beige duoplex and power net I had in my stash to compliment this lace. I think it’s very pretty together.
 I wanted a little more lace on the bra, so I added some to the side of the bra’s frame. Just a little added color there, and a pop of prettiness.
 I’m still pinning the back to get everything to lay nice and flat.
 It definitely produced a neater look and fit. However, I really need the fullness throughout the bra cup.
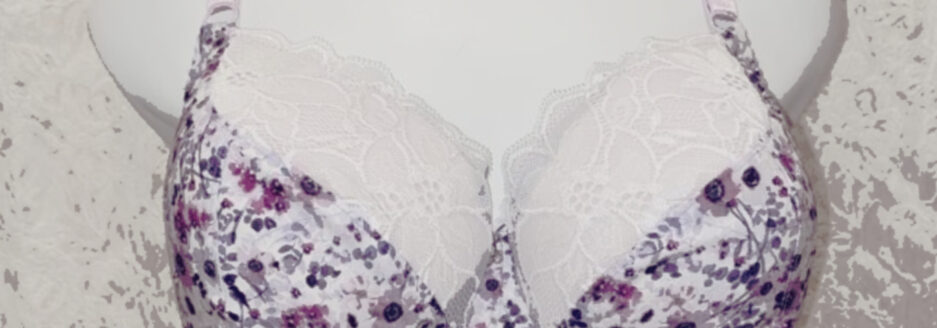
 So as pretty as this is for a basic white bra with lace, it was ultimately a failed experiment.
 It’ll be back to basics after this – what I know works.
 They look a lot like a hipster from the front.
 You can see here they are not hipsters from the side.
  Aren’t they cute little cheeky panties?
  That lace!
 So, some of the changes I’ve made… I raised the bridge. Even though my wires don’t come all the way up to the top, this allows me to raise the upper cup up a bit and give me a little more coverage. Coverage that I need.
 This bra kit was so lovely. I think the lace and lingerie satin go together perfectly.
  Doesn’t that go so well? It’s so pretty.
  And lastly, I didn’t like the looseness and bagginess on the display form. So I’ve pinned it here. You can still see the back well enough – but if you think this looks terrible, please let me know.