The Bra-makers Challenge for May is Shape up for Summer. The Challenge includes shapewear, waist cinchers, bodyshapers and corsets.
Options
I decided to look at my Craftsy classes to see what I could use to help me make something new. Beverly Johnson has a shapewear class: Sewing Shapewear Smooth Silhouettes. This class also includes a pattern for shapewear, which is a bonus. Alison Smith has Sewing Corsets: Essential Techniques (no pattern included). And Linda Sparks has Custom Corsets: Bones, Casings & Busks (again, no pattern included). I started off thinking I’d make shapewear. I was interested in making the Slimming Shorts that are covered in the class. But as I was watching the class, I decided it was too close to the pants I’d just made for the April Challenge. I didn’t want to make another pair of pants right away.
I decided I was going to make a corset. I’ve never made a corset, so this will be completely new to me. And it was a bit intimidating too.
A Brief Class Comparison
The two Craftsy classes on corsets might look similar at first glance, but Alison’s class is really the entry-level class. It’s an Intermediate skill level class, and covers the basics of making a corset. This class is also the older class format Craftsy offers – longer class lessons, and more than six lessons.
Linda’s class is more of a custom class for once you’re familiar with the basics. Her class is an Advanced skill level, and specializes in the bones and bone casings primarily. It also covers the busks. This class is the newer class format with lessons lasting about 20 minutes, and only having six lessons.
Seeing as this will be my first corset, I’m following along with Alison’s class.
Pattern
I’m using the Pin-up Girls Freedom Corset for my pattern.
Making Progress
The corset is quite easy to cut out, and to sew together. I did pause and think about the eyelets for a bit, but then just braced myself and punched holes in my fabric. Once I had the holes in, the rest was easy. There’s just something about putting holes in a brand new garment!
The denim and eyelets were a gift from Marsha. Marsha also gave me some advice as she’s made corsets before.
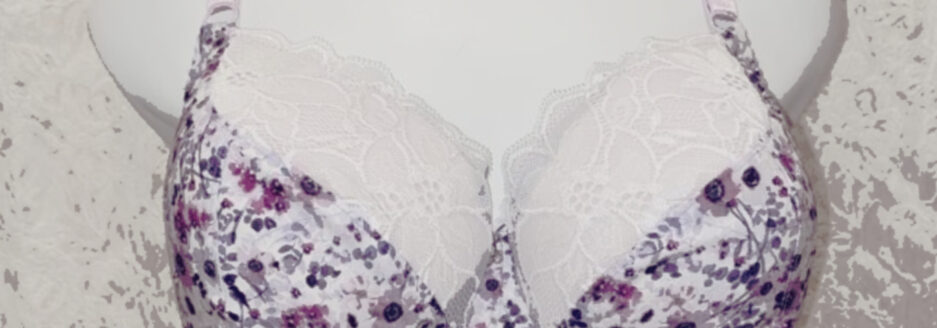
One option for the corset’s front closure is to add a zipper. For that I needed to add a facing to the front of the corset. I had this adorable bra material in my stash and decided it would be perfect for the facing. I’ll be the only one who will ever see if, but it is adorable. I had pulled this material out recently to use to line a handbag. I’ll share more on that a little later.
I found a great rainbow zipper, and it was on sale. I wanted a little bling with the zipper, so really couldn’t resist it.
My Finished Corset
I’m both pleased with my finished corset, and disappointed. Here it is:
I used bias binding tape I purchased to make the boning casings. The fuchsia coordinates with the colors in the zipper.
I do think this is adorable. My disappointment comes with some good news. Since I measured for this, I’ve lost close to 10 pounds. The corset is too big for me now. I wasn’t expecting that, but overall, it’s good news.
Here’s the side view. There’s more channeling on the side and back than on the front. The back shows how lose it is in I’ve had to pull these laces completely closed – and it’s still loose on me. There is supposed to be a two-inch gap at the back. I don’t have a gap at all.
During the sewing, I did try it on. However, it was a few more weeks in May from that first trying on until I finished sewing it.
If this had fit a little better, I would swap out these white laces for fuchsia ribbon.
Overall, I’m thrilled with my challenge entry. This is my first-ever corset, and they’re not as scary as I thought they’d be. I’m sure I’ll make another one, and now that I’d seen they’re not nearly as hard as I thought they’d be, I may try to make a full corset for my next one.
Happy creating!
 For most of what I sew, using this display standing, as it is shown above, will be just fine.
 These were the Barb pants I made a few years ago – pinned to Catherine. I guess it would work somewhat, but I’m not thrilled with this option.
 You can see, they’re basic black cotton Lycra, with a yoga waistband.
 I have a few changes I want to make to this pattern, but it’s mostly good.
 Here’s my drafted cradle and the tester frame. This was pretty good.
 This one is good too. And it will be much easier to use with the added material in the cradle.
 That’s quite a difference the wire makes.
 Everything is exactly where it is supposed to be. The bridge is right up where it needs to be, not pushed down, not coming away from the chest wall. The wires are just right too.
 How is it fitting? In all honesty, this probably would have been fine if I’d made it into a bra. It fit better than any RTW bra I’ve had. But I figured why not go for the brass ring. Seeing as this was still only a tester, I still made a couple of changes to my pattern.
 Another adjustment was deciding if I wanted to lower the upper cups to meet the bridge, or raise the bridge a bit. I pulled out the custom bridge I’d drafted a few years ago, and decided to incorporate that into the frame. That means the cups won’t need to be lowered any more than they are now. The bridge will come up 1/4-inch to meet them. I’ll have to overlap my wires, but I’ve done that before.
 Once again, I’m going for that perfectly matched cradle and cup at the side seam, and once the upper band elastic is added to the underarm of the cup, I’m going to have it!
  Yes, I’m happy with how this is all coming together.


 Here’s my favorite part of them – the side view.
 Here they are from the back. It’s so pretty how the lace wraps around to the back.
 The pattern is adorable. But, sadly, I’m not as in love with my version as I’d hoped.
 The first one illustration looks quite minimal. The second one looks pretty balanced. The third one just has too much going on. What I like about these is they show me I can add the lace trim to the waist and leg openings and still maintain the design I’m wanting.

 That’s the same skirt, same tie, same pockets, same zip in the back. The top is a little different, but that’s it. What a wonderful pattern!
 I bought a lovely stretch velour for the top, which is closer to the original dress’ design which is a knit top. I also bought a gorgeous rich black and red brocade for the skirt.

 The scarf is longer on one side than the other, so I can wear it with the shorter side at the front, or at the back. I can even wear it on a diagonal. Each way I wear it gives a bit of a different look.
 I’m so happy with this.
 Here’s a video showing a bunch of ways to tie a Pirose scarf, all of which would apply to the O Sew Easy scarf as well.
 This is the evening gown she bought for the event. It’s gorgeous and it really flattered her figure.
 I loved this, but it did not love me back. I should know this styling is not flattering to my shape as I’ve been curvy all my life – even when I was a size 5. You can see on my croquis below, it isn’t flattering. It looked worse in real life.


 Here are the dresses side by side:
 I’m so happy I went dress shopping with my friend. We really did have fun! I’m even happier I found this pattern.
 This is
 Along with the Mountie material, I chose a dark red that coordinated, and a Native print to contrast for the lining.
 The inside has another zipper pocket, and a card pocket with a small slip pocket behind it.
 There are lots of pockets! That seems to be a theme of CWD’s bag patterns.
 No pockets here, just Mounties! I really love this bag.
 A little Sewn zipper pull.
 And a leather tassel because I made an extra one with my last bag and it matched this bag too! My hardware came from Emmaline Bags.
 And from the back:
 I love these straps! Adding that extra bit of color takes them from basic and functional to not-at-all-plain, and makes them another feature of the bag.
 I’m hoping they’ll endure a little better. Also seeing where the wear and tear is (no pun intended), I hope a more-padded bottom will prevent that.
 I cut the ‘strings off the old booties to re-use on the new ones. So the straps are looking a bit fuzzier, but they work.
 I also cut off the old Velcro and elastic bits from the worn out boots to use again, because wearing these every day from November until March, I’m sure I’ll be making a new set again next year. I am hoping this set will endure better though.
 The tissue paper tore off easily and for the first time sewing these slippers, I didn’t have to fight with the sole.
 Aren’t they cute? And I know they’ll fit as Em and I wear the same size shoe, or in this case slipper.
 And here’s the inside of the slipper.
 Do you see the little fleece bow? That’s covering up a mistake I made. I didn’t realize from reading the instructions to only cut through one layer of material for the elastic. Whoops! But a little bow over top and it’s all hidden.