It was about 5 or 6 years ago I started following a Paleo diet. It was at the recommendation of my doctor, but it was a big adjustment. However, I saw health improvements right away.
For the most part, I don’t mind eating this way, but I did miss a few things – like pasta.
I have a few Paleo cookbooks, and most of them suggest zoodles or another vegetable in place of pasta. And many of those recipes are good, but they’re not pasta. However, recently I came across a Paleo pasta recipe that’s a game changer!
I found it on the blog southern BYTES. This is a photo from their blog. This was my first glimmer of hope.  This looks like pasta! I had to try it.
It not only looks like pasta, but it tastes like pasta! I was so happy.
My first time making it, I made it the same as shown in the photo. Then I made it this same way again – into noodles.
The third time I made it, well, I’d been thinking about this and if it works as noodles, then it could work as lasagna noodles too. I decided to try it.  I can’t even begin to tell you how wonderful this was. It still is. I’ve frozen half of it, and am enjoying every week or so. I’ll definitely be making this again.
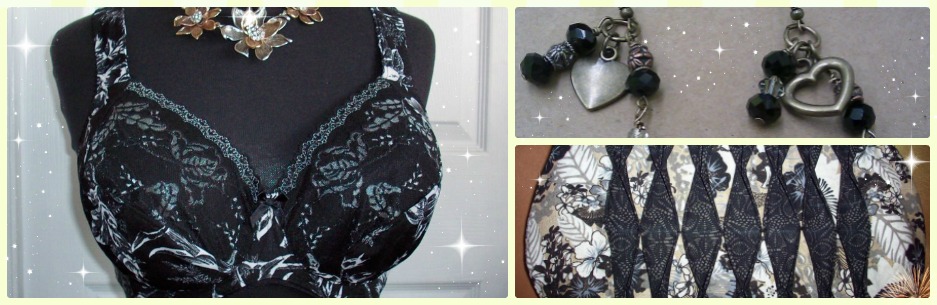
I’ll have another bra or two to share with you next week, but until then, Happy creating!
 Unfortunately, due to covid and lockdowns, I’m having to mail her the bra and then we’ll use video to test the fit. It’s not ideal, but I should still be able to get close to what adjustments I’ll need to make.
 The one benefit I had making her bra is I’ve had so much experience with Omega adjustments. She got most of them, and everything came together quite well.
 I did a little something different on the back this time. I don’t love how the lightening stitch looks on the strap elastic, so I decided to look at my RTW bra. It has the same lightening stitch along the outer edge, but it has a zigzag on the other side.
 Isn’t that nicer?
 She said she likes lace, and black, and well, anything but brown. So I gave her the first two choices on her list.
 This is such a lovely lace. Seeing as she doesn’t have any support issues, I didn’t line this. I did line the cradle though.
 The turned out so well. She comes over next week to try it on. (Yes, we’ll have masks on to make sure no one shares anything we don’t want to share!)
 My little pup is quite camera shy, but this shows his new boots. He still hates the cold and wants to come back home as soon as possible.


 I’m noticing that they are a different shape. Part of my problem all along may have been the shape I’ve been using.
 Oh! I like how thick these wires are! They look SO supportive!
 This photo is the one that got me really thinking about the actual shapes. So rather than compare wires to wires, it was time to look at my trace again.
  Happy creating and may your wires never hurt you!
 I knew my wires weren’t perfect, but the 38s pinched, and the 40s seemed a little too big. As it turns out, the 40s are just a little too big around the base, and the 38s are a touch too narrow at the top.
 There is more to the calculator, but this is just a glimpse. Take a look. It really is very interesting.
 The first bra I ever made, I didn’t keep. To me, it looked terrible! You won’t even find it here on my blog. It was made from a tricot kit. And despite pinning it and taking my time, I had a terrible time sewing with tricot. And I was not new to knits. I just found tricot very hard to sew.
 This kit was from Merckwaerdigh, and I still love her kits. However, Lycra on it’s own was not as supportive for me as duoplex.
 Or these.

 Initially, I was adding little pops of color to my bras using mostly duoplex, but adding in some Lycra over duoplex for color.
 As much as I loved this bra too, I still had those kits that were all Lycra and lace. I had to figure a way to use them too.
 I also wanted to use other fabrics too. Like this lovely red bra below.
 This bra is lingerie satin with sheer cup lining.