I have a couple of really beautiful bra kits with Microduoplex in them. I’ve heard often that it’s very hard to sew, so I ordered some plain white to practice sewing it.
I’d also read as many tips as I could about how to sew it. Those tips are things like: use tear-away paper underneath two layers, use a microtek needle, use So Fine thread, lengthen your stitch length, use a straight stitch plate.
I tried almost all of the suggestions – probably in the same order as above too. There were a lot of skipped stitches and sections where the stitches didn’t take at all the first few times.  Believe it or not, this was sewn all the way across. You can see the skipped stitches, and where there are no stitches in the material at all.
I didn’t find the paper underneath did a thing. Nor was I finding any of the others tips helpful either. That is, until I decided I would buy a straight stitch plate for my machine. Once I had the straight stitch plate on, the microduoplex sewed so easily. It was amazing the difference it made.
It sewed so easily without any paper underneath, and without the longer stitch length. Let me tell you, while I was sewing, I thought that new stitch plate was completely worth the money I paid for it! Once I started sewing, I was excited to finish a bra. This one was only using white mircoduoplex, and then a bit of lace left over.
This is very pretty. I have to say, after trying the straight stitch plate for the cups, the bra came together quite easily.
I can see one problem with my photos though. The foam cups I’ve been using really don’t fit my size now. I’m going to cut out some new foam cups this week.
One bit of experimenting I did on this bra was to add some non-stretch lace to the strap elastic at the front. My thought was many high-end RTW bras use strap elastic only, but have a bit of embelishment on the front strap. I was thinking it’s more than just decoration – it’s to stabilize the straps.
 I would have used a bit more lace, but I was down to scraps and that was all I had left. That lace was very well used.
If you haven’t tried microduoplex, I do encourage you to try it – but make sure you have a straight stitch plate! It really is a lovely material for our bra-making.
Happy creating!


 Oh, I do like these.


 Yes, 10 yards of it will last me a while.
 I may do a whole panty using the fusible elastic, but for my next one, I wanted to see how it was around the leg opening.
 Hmm. I don’t love how narrow this gusset is. That’s something to change on my next try.
 It does give a very neat finish, but sadly, just what I was thinking would happen happened. The back doesn’t hug the way it usually does.
 You can see the difference in the photo below. The lace being applied with a little tension makes a big difference.
 This is the same pattern, same size. It’s the same fabric even. So the only difference is the tension that’s been applied.
 This fusible elastic would be best used on a pattern like this. I think I’ll look through my patterns and see which boyshort patterns I have that will work well with this type of elastic.
 I pulled out one of my favorite panty patterns – Kwik Sew 2286.
 I used the Fusible Iron-on elastic sample Bodil sent on the back of the panties and it bonded perfectly. I used the HeatnBond on the front, and it didn’t bond perfectly. I had to redo it because after handling the panties it was coming undone.
 I’m very happy with my new seamless panties. I can’t wait to have more fun this way.
 I knew I wanted a blue dress. Their wedding colors for the groom are grey and blue. I thought it fitting to wear blue as I’m on the groom’s side. I loved the first dress, the one on the left, but you know how sometimes navy can be so dark it looks black? It looked black. As well, I was going to have to alter the sleeves. I didn’t want long sleeves.
 When I paired it with the navy I had, it looked more purple than blue.
 I was back to square zero, and still needed to find or make a dress. It was the beginning of August by this point.
 My husband thinks it’s wonderful. He loves the color and the style. I love the full skirt. And did I mention pockets? My husband thought I was going to carry around car keys and such in my pockets! He thought pockets were a terrible idea. No, I’m more thinking of a tissue or two.
 Here are a few of my makes.


 This is the
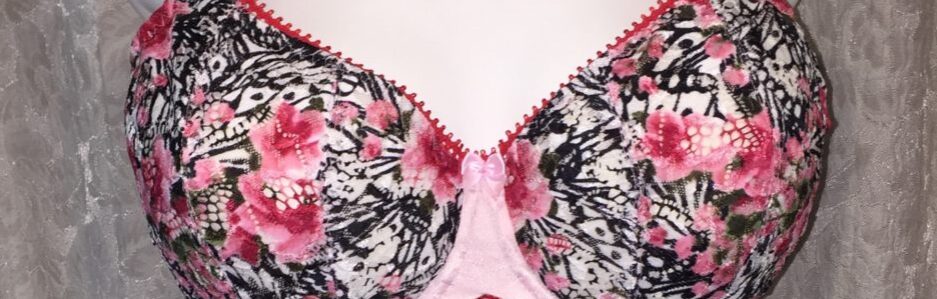
  I used the same lace as from my Summery bra. I love the delicate floral pattern in it. Seeing as it had bright pink, I decided to match it with some fuchsia I had in my stash. My hubby told me he doesn’t like the combo.
 I think it’s a very pretty summery bra.
 My only disappointment at all is the little embroidered flowers aren’t showing on the bridge. One of them is barely showing. Just peeking out from the bottom edge.
 Isn’t this lovely?
 Her work is really lovely. You can see more on her
  Despite this not being available now, it got me looking at her patterns. I found this one on Etsy. This is
 I grabbed some scraps again, and did a quick tester cup. It’s looking good.
 The bridge is the correct width for me, the cups fit, and the bridge also tacks all the way to the top of the bridge. I hated to take this off for photos.
 Oh, these are adorable!
 I’m a happy bra-maker today, and I’m already planning my next one. However, I also have a dress to make for a family wedding. I’ll have to fit in some time for me too and make a few more pretty Josey bras.
 It’s very pretty, but it’s a tad too small across the cup.
 Just as the inside of the cup doesn’t cover all of the foam cup underneath it, it doesn’t reach all the way across to where it would meet my bridge.