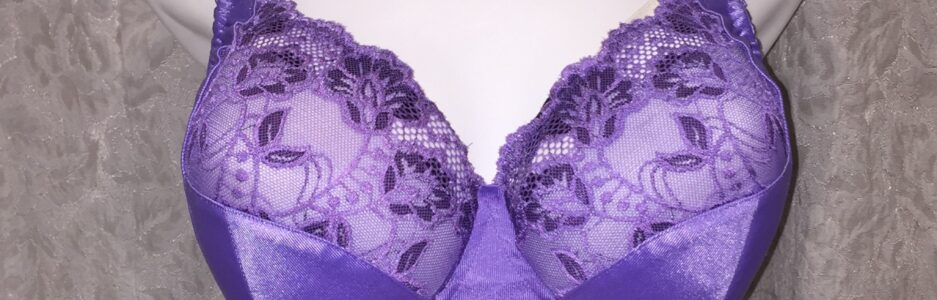
Since my last post, I have to say that I have worn my new bra a few times, and it’s wearable. It’s not pinching all the time. I think the Flexi-wires are helping with that.
After my last post when I planned to work on my draft some more, things went in a different direction. I went to my sewing room planning to draft up a hybrid cradle. Then walked out again, It was time to do a root cast. No more getting close, or thinking I had the correct shape. Out came the masking tape. I was making a root cast.
I taped piece after piece after piece on myself. I wanted it at least four layers thick so when I removed it, it didn’t distort at all when pulled away from my skin. I got it. Now to test this against all the wires I have.
Here it is with the Orange 38 wire. This is the wire I thought was closest to my shape, and it’s not totally off. However, it’s not exactly the same either. This was so odd because when I traced my root with a wire and compared it to the different wire shapes, this was the closest in size and shape. Below is the photo I took of my root trace over the Orange wires.
 However, after wearing this wire, I can tell you it’s not the right wire for me.
Next up was the 38 XL wire from BMS. This is the wire I’ve been told more than once is the correct wire for me. However, like the Orange wire, I knew from wearing this wire that it wasn’t correct. I didn’t have to see this wire-root comparison to know this wire wasn’t the right size or shape. I knew this wire pinched on the sides. Again, this is not the right wire for me.
A few months back when I was working on my wire trace, I bent a BMS 38 XL wire out to my correct size. So, of course I needed to see how this wire would compare to my root trace.
  This is about as good as it gets. My only hesitation with this is I’ve heard the wires aren’t always as stable (can break) with washing and wearing after they’ve been bent. I had to bend it a fair amount. So, although this is an option, I still had one other wire to try.
Here’s the Flexi-wire. Hmm. About the same as the bent wire above, but I don’t have to bend anything. It will flex and take my shape.
I did try the 38 Flexi-wire too, but it’s just a bit too short for me, but as you can see, the 40 Flexi-wire is the better fit. If you’re interested in reading more about bending wires, and what can happen, Jennifer (Porcelynne) mentions that in her recent blog post.
Now to take that root trace, and draft a cradle for exactly my shape.
Happy creating!
 Right there where the pink arrow is pointing.
 When I was first looking at wires with my root trace, I could see the 40 wire fit the top of my trace.
  Above is a cradle that fits a 38 wire drawn in pencil. Then the pink is the cradle that fits a 40 wire. The darker dotted line is the blending of the two.
 Oh, I love this lace. It’s so pretty.
 This is the BMS Ruby pattern, adjusted for an Omega shape.
 You can see here where the wires aren’t coming to the top of the bridge. There’s maybe 2 cm, or better yet 1.5 cm and a touch of wiggle room for the wires. It’s a very small adjustment after some of the others I’ve had to make.
 Oh, I’m so happy with this. I used a trick I learned in one of my classes with Jeannette to help my large cup fit into my smaller band – I stretched the frame on the outside, and ‘eased’ the cup in. It works so well.
 I’m so thrilled to have finally found my correct sized wire, and figured out just how to fix my band as well. I have my next bra kit all picked out, and I’m going to sew some more bras!
 This is a
  This isn’t exactly what I had in mind. But I kept it because I really like the swim dress.
 No, this was definitely not what I was thinking. This is a shelf bra that has wires. I’m thinking an actual bra.
 I saw this great vintage slip on Etsy.
  Again, this is like the Land’s End suit, the back is like a shelf bra. I’m still thinking of wanting the actual bra clasp at the back though.

 The first thing I did after I got her was curl her hair.
  Then I made her a sweet little slip dress with some pantaloons underneath.
 I’ve been very happy with her transformations, but there was one thing I still wanted to change. My eyes have some brown in them but overall they’re green. I wanted my preemie baby to have green eyes too.
 Yes, they’re a little bit brighter and lighter. She’s just perfect to me now.
 This is my drafted frame and the cups from B, Wear’s Angie pattern.
 Something I really like about the Angie pattern is how rounded the cups are. They give such a nice shape when wearing the bra too. However, using the smaller wire size and narrower frame, the rounder shape didn’t seem to be fitting into my frame as well.
 The back is fine. The band is too. It was comfortable, and stayed in place. However, I’m very disappointed this is not wearable.
 Here’s the square I’m blocking right now. It rolls under, and it isn’t actually square.
 After it’s all pinned it’s square. Then I spray it really well with water and leave it to dry. I really am enjoying this. It’s wonderful to unpin each square and see how nice it looks.
 I’ll be honest. I bought one of these after reading it would help to do a root trace. It didn’t help me with that at all. Not one little bit. At least it didn’t help me at all.
 So after a week of watching along, I knew I still needed help. Both instructors were offering one-on-one sessions. I signed up with both of them, and I’m really glad I did. They both come at the process differently, and I think things are finally starting to click.
 I can’t even begin to say how helpful this is. Every mathematical measurement is given here for your draft. You put in your measurements and it does it automatically. You just have to refer back to your numbers to do your draft. It’s very helpful.
 It’s so lovely! It’s also so very comfortable. Everything about this bra is the same as a ‘normal’ bra – channeling, underwire, but it’s all soft cotton jersey.
 To account for the stretchiness of the jersey, the original sewer went down a full size to make her jersey bra. I did the same, and it fits very well. I do need to make a couple of adjustments for my Omega shape, but other than that, this is a very good fit.
 There isn’t anything different about the back except I used jersey again. The whole bra is jersey except for the elastics, and the underwire and wires. As well, to keep this very soft and comfortable, I did not stabilize the frame.