A New Drafting Method
Something I’ve wanted to do for the past year is learn Porcelynne‘s method of drafting bras. It looks quite different from the BMS method I’ve learned and I was intrigued.
Watching a few of Jennifer’s classes in the Great Bra Sewing Bee helped give me the push I needed to try this.
First things first, as I mentioned my last post, I needed to do a root trace to determine my wire size. Well, I actually didn’t think I really needed to do a root trace because I have all the wire sizes from BMS – they came with the Drafting course I took.  Still, I wanted the experience of doing a root trace with copper wire. And I’m very glad I did.
My Results
This is my copper wire root trace on laid over a 38 Extra Long wire from BMS. And in case you’re wondering, the copper wire is much longer than my root trace. This is pretty close. I’d say it would be an exact fit – except for the upper part of the wire. This would explain why I felt the 38 wires were pinching me.
Here’s the same copper wire trace over a 40 Long wire from BMS. My trace is smaller at the bottom, but it matches the width at the top of the wire.
So, it seems I am in-between wire sizes.
After asking for some help in the Support for Bare Essentials group, it was suggested I watch this video.
After realizing I could bend my wires, I tried gently bending one of my 38 wires. I really didn’t want it to snap while doing this, so gentle was the way to go. And I have my perfect wire! And I have a whole bunch of 38 Extra Long wires, so this will be very handy to do so I can still use them.
I was also given another great tip in the Support group: Emerald Erin carries wires that are a little wider at the top.
I printed out her wire chart for her Orange wires, and perfection! And without me bending anything. The next part of the course is to make a fitting band.
Happy creating!
 Above is the one I’ve been using.
 And I chose this Watson for my new header. Do you have a preference?
 Oh, this mesh!
 This is also the last of my lovely Café au lait beige. It’s a little darker than a lot of the beige cotton Lycras I’ve seen, and I like it too.
 The lace trim matches the cotton Lycra perfectly, and both are the same Café au lait as in the burn-out mesh.

 Oh, I like this. I also like the Angie’s Twin pattern. Other than a few adjustments for an Omega shape – smaller wires & frame, and a larger cup – I didn’t have to change anything on this pattern.
 There was just a tiny bit of lace left over to add to the sides. Just to add a bit more detail.
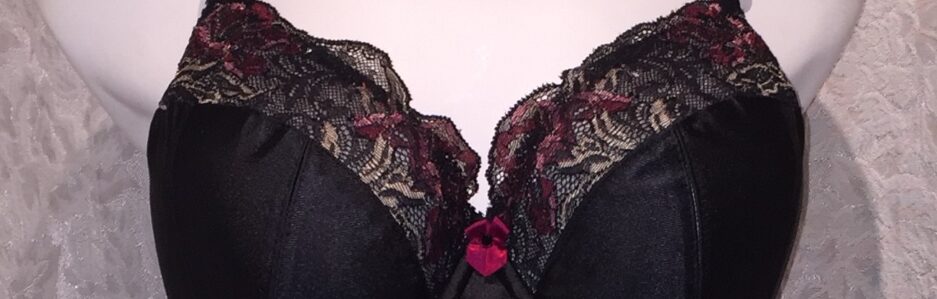
 All that red really pops here.
 Oh, such pretty lace!
 I tried a couple of different bows on the front to see what color I liked the best. I decided, even though the pink blends in, it was the only one that didn’t seem to pull the attention away from the lace. I love it too.
 One of the reasons I hadn’t tried the Jessica pattern is I have to make adjustments to my bra cups so they’ll fit in a smaller frame. Omega: larger cups, with a smaller frame and wires.
 This is what I tried, and I have to say, I was pretty close. I still need to take in the underarm a little, but other than that, I got a great fit.
 Well, maybe it’s not so clear. Here’s a close up.
 You can see I just have a little bit folded under there. Probably 1/4″ x 2 removed from the underarm there and it will fit absolutely perfectly. Not bad for a first time testing the pattern. And isn’t that purple elastic so pretty with the navy?
 This is a great adjustment when you don’t want the cup size to be smaller, but just the amount of fabric in the underarm area. This works perfectly!
 I really am happy with this. I didn’t think I could make a cup with only one seam work for me.
 On the bra for the BMS challenge, I used the burn-out mesh on it’s own. On this one, I’ve used it over power net. I wasn’t looking for sheer on this bra.
 It’s so fun! When I first started sewing bras, I experimented a little and I tried using Lycra and mesh over power net. It gives a wonderfully supportive feel. It adds support, but it isn’t too much like two layers of power net would feel. This isn’t too much. It feels a little more supportive.
 When I tried this on to see how the adjustments I’d made were, it fit so perfectly and was so comfortable, I didn’t want to take it off for photos. I did, but there was no way I was going to put on my old bra. I need to sew a few more too. I was down to a RTW stretch-cup bra when my size changed.
 You can only find this used now. It’s been discontinued. Although the description on Etsy calls this a bikini, it fits like a hipster on me. And this has been my TNT pattern.
 I used Beverly Johnson’s Craftsy class to draft these, and they’re similar to my Kwik Sew favorite.
 Oh, I love this too! I might have to get some more of this material. It’s a cotton Lycra from Smoogie Fabics. It is SO pretty!

 Other than the size being different, I didn’t change a lot else. I used different neckline trim, and made the straps differently this time.
 Here’s Angie’s Twin from the side. I used some of the same tricks and tips I’d learned taking Jeanette’s classes to get my Omega cup into a smaller frame. I like how it’s looking. No wrinkles. It looks like it was made to fit together.
  And the back.
 I sewed non-stretch

 These are my 2nd Sigrid panties. My first were the test pair, which I didn’t finish. The very big difference between my waist and hips made that pair unwearable. Whenever I’m testing a pattern, I make it as is the first time to see how things go together. Often that means things will not fit that first time though, but it gives me a good idea of the pattern.
 You can see a bit of the gathering at the waist on the back more than you can on the front.
 If it does run a bit, the three-step zigzag will help it not fray too much.
 I think these are so fun, and I love the lace trim at the waist.
 Oh, that’s pretty. I got this from
  Isn’t that a gorgeous knit? I really like these. I didn’t have any narrow trim, so I followed the design in the lace and cut it in half to use for the legs.
 Here’s a close-up of the lace at the waist. You can see the line going through the design. It made it very easy to cut and use for the legs. I’d probably put the scallops on the inside next time though. It was a challenge to match them at the seams this way.
 For these ones, it was a basic grey heather for the back and white lace trim at the legs and waist.