Have you heard of Collage Quilting? I hadn’t. I’ll be the first to admit, I’m not much of a quilter. I think I started a quilt many years ago. I have no idea what happened to it. I do have a bunch of squares cut out too. I’m slowly adding more squares to that little stash, but I’ve never made a quilt. I have made a number of very simple lap quilts and quillows, but I don’t consider that quilting.
There are a few things that have grabbed my attention from one look, and collage quilting is one of them.
Look at this! I took one look at this and I started searching. This is a Laura Heine collage quilt pattern, and it’s so adorable! I love how unique it is.
When I looked for her patterns, look what I found: Oh! I LOVE it!
The links to the patterns are in the photos in case you fall in love like I did. And I’m only showing you a few of her patterns.
I had to get the pincushion! In fact, I found a local one-day course and have been working on this pincushion quilt. I was cutting out flowers for it when I was in the mountains last month.
This one is adorable. But I can’t buy them all. So I’m working on the pincushion for now. Just gorgeous!
Even though I’m working on the pincushion, there’s one pattern I love even more. But I wanted to start smaller and get a little practice in first. Look at this! This is over-the-top gorgeous. I did buy the pattern for this one, and will slowly (not as slowly as I’m amassing quilt squares) buy fabrics to make this gorgeous quilt.
My Pincushion
Again, never having quilted before, I was intimidated to even start this. There was some prep work that needed to be done ahead of the class. Cutting out flowers and other elements to add to our quilts. That wasn’t hard. Then there was making the background. That was daunting.
I finally gave myself a mental push and made a simple pieced background. It turns out I did more work for this background than I needed. The backgrounds can be collaged too.
Here’s how my Pincushion was taking shape before the class.
One of the neat things about these collage quilts is this pincushion isn’t stuck down yet. It has Steam-a-Seam 2 on the back which makes it tacky, and it sticks. But until I iron it down, it can be moved around! That was very helpful in the class.
Collage Class
Last weekend was the collage class. It was taught by Terry Rowland. She’s amazing. She brought a number of her quilts to show us, and was so helpful instructing us all individually, and as a class. One of the things she told me right away was no straight lines.
I had straight lines in my pincushion. I’ve learned my lesson, and to cover this up, I’ve collaged over those straight edges.
 No more straight lines. At least not visible ones.
A collage quilt is definitely not a project you can complete in a day. I had a simple background done, most of my pincushion, and all my collage elements fused with Steam-a-Seam 2 and cut out. After working on it all day in class, I was only to the point of ironing it all in place.
Here’s my collage quilt after the class. It will take a little longer to finish it up. I’m so very happy with it so far. There’s quite a difference in the quilt already. The before-class, and after-class photos are below.
 This still needs a backing, some basic quilting done to it, and the edges bound. I’m not quite sure when I’ll have this finished, but I’m loving it already and look forward to working on it more.
Happy creating!


 Unfortunately, the band on this is just a little bit too tight for Em. She could use one size larger for the band. She still took it home with her though. She thought it was so pretty.
 I really love how neat it is on the inside.
 Below is a photo showing the inside of a bra. It’s showing the Gothic arch, but it also shows the elastics I use along my upper cup.
 I first used this elastic when making the Sewy Rebecca pattern. I really liked how the upper cup fit this way, so I do this for all my lace-cupped bras.
 It’s very narrow, and fine. I’ve checked everywhere for it. I have a little left from a grab bag I bought years ago from Merckwaerdigh’s now-closed Ebay store. Seeing as I use it all the time, I don’t want to run out. So I’ve been looking. All I have left in that grab bag are colors I’m not so thrilled about using.
 I wonder how long all this will last?
 The second lace he brought me is this one:
 He also picked out three kits with me. He kept holding them up and asking me if I liked them. Well, silly. I liked them all. And he spoiled me even a little more than I asked. I asked for two kits, and he said he was there, so we should get three.
 It’s so pretty.
 And the third kit is a coral pink and grey lace with coral Lycra – with pink sheer cup lining. Oh my!
 They’re all so lovely! My hubby did really well.
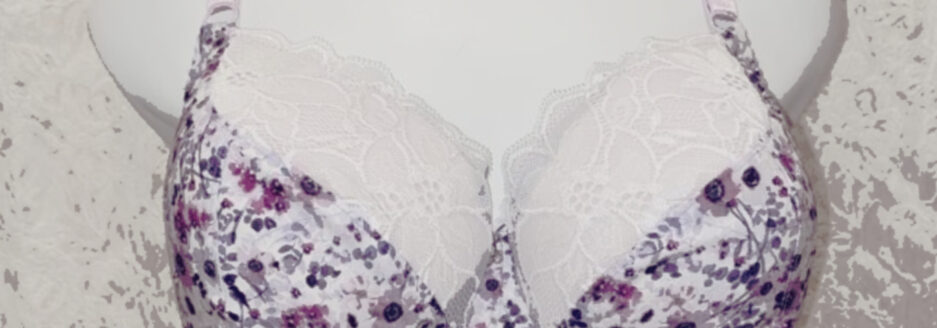
 These are my Hipster draft. I made these from black cotton Lycra, and two laces. The multi-colored lace is very light-weight, so that is backed with CL, but the pink/mauve lace is a firmer lace and is on its own with no backing. Because it’s firmer, I didn’t add elastic to the waist at the front either.
 I fully meant to finish the back of the panty the same as the front, with both laces. However, I sewed these up on my trip to the mountains and didn’t remember to either: a) cut the lace out and pack it, or b) pack it. So these will only have the one lace on the back.
 For this Poppy, I made a smaller band and larger cup size than the first two. This one fits me perfectly.
 Poppy is an easy sew, with generous sizing. And it’s really comfortable and although this one is stretch lace and power mesh, it’s still supportive.
 I really wondered how I would like two laces together, but I really like this. And only having one lace on the back of the panty? Well seeing it from the back with the bralette, it works much better this way!
 Oh! These are lovely.

 The Panache is in-between these two patterns, but is a bit closer in shape to the Betty. If you haven’t taken Beverly Johnson’s panty class on Craftsy and aren’t comfortable drafting your own pattern, either of these patterns would get you close.
 Although these come up to the form’s waist, they’re hipsters on me.
 Lastly, I added seam allowances to those new seams, and traced off my new pattern pieces.
 I was so excited to bring my sewing machine with me! I’ve never taken it on a trip before. Probably because, as I said, we usually only get away for a couple of days.
 Believe it or not, that table looked a lot worse at the time I wrote this – with all my hubby’s work piled all over it. We got it cleared off enough for me to do some sewing.
 Although I do plan to sew and get some work done, I know we’ll also spend some time outdoors.
 It all worked very well.
 When I was sewing the lace panel onto the front of the panty, I realized I hadn’t brought any elastic for the inside of the waist. On a soft lace like this, it needs some support at the waist. Without elastic, I had to think of an alternative. A strip of cotton Lycra worked just fine.
 Here they are with my Angie. First, the basic pair with Angie.
 And here’s the lace panel with Angie. I only took the front photo for these as the sides and back are basically the same.
 Yes, that cream is really close to ivory. I’m so happy with both of these sets.
 I love this. It looks like a painting!
 I was glad I brought an indoor activity when the air quality became so poor.
 The Angie pattern doesn’t have an upper cup like so many bra patterns. In fact, I can’t think of another pattern that doesn’t have an upper cup. There are four pattern pieces to the cups, but none of them are upper or lower. The cup is completely different due to it being all vertical seams.
 These Lavender and Lace bras are lovely, but back to Angie for this post.
 I was also happy with the adjustments I made to the cup to make this fit me and make it fit in the frame so neatly. No more puckering on the cups! I’m not going to get tired of that any time soon.
 If a bra I’ve made has a bow on it, you know I’m happy with it! It’s bow-worthy.


 Recognize this? I just used this gorgeous cotton Lycra to make my
  I think it’s adorable! However, it’s a smidge small in the cups.
 I need to gather the elastic under the arm more. I’m very shallow there, and have to make that adjustment on almost every bra I sew.
 Look at this nice deep back.
 This photo shows the side seam and the under-bust seam. Both are enclosed. It’s a very nice feature. The only seam not enclosed is the center front.
 Do you see that nice wide elastic at the bottom edge? That’s 3/4″/19 mm elastic. Another supportive feature of this bralette.
 This looks the same on the outside, but the inside is lovely soft cotton Lycra.
 Soft, comfortable, and those lovely enclosed seams. It’s really nice.
 What a cute set!
 This pattern has quite a few options listed. Foam-lined or all fabric. Underwired or wire-free. The bras I’ve seen sewn up are lovely! Here’s one from the BMS website:
 I’ve made this with sheer cup lining, and black elastics. I think it works very well together.
 Ruby has a lovely shape. It’s definitely a rounder shape to the cups.
 This pattern calls for 1/2-inch elastic for the bottom band, which is a bit of a change for me. I usually use 3/4-inch elastic. However, this is still supportive.
 Ruby doesn’t have fabric straps. For mine, because this is a tester to see how it will fit, I only used strap elastic. However, the pattern suggests sewing some ribbon over the elastic at the front for more support.
 How the straps attach on the Ruby is different too. The strap is attached to the ring at the front, giving it a lovely modern look.
 It’s so sleek and modern-looking!
 She’s lovely.
 This adjustment I’m showing would shave off 1/4-inch from the wire line, but leave the fullness of the cup. You could shave off a 1/4-inch from other cup pieces too – as many as you needed.
 Hello? What’s this? Remember? Remember what? I didn’t read this anywhere!
 I saw, ‘Thank you…’, and skipped right past that paragraph to get to work.