I’m working on my plans to go through the Tomkat Stitchery Pattern Fitting 101 course again. It starts with getting your measurements anew, and then picking a woven top.
I had my new measurements. I knew which pattern company I wanted to use. So it was time to look through which patterns I have from Love Notions.  The Timbre Peasant Top appealed to me. With the gathered neckline, I thought it might look better with the large hip adjustments I need. I hope so anyway.
I had some gorgeous eyelet in my stash from Fabricville. I washed it and got it ready to cut out.
Because the Love Notions Laundry Day Tee was a bit small through the bust and underarm in a M, I went with the size L for the Timbre with an 2X for my hips. I was thinking because this is a woven top, it won’t have any stretch, and I would need the larger sizes.
Unfortunately, my first Timbre top turned out to be too big – all over. I felt like it was just floating around me.
I do think I’ll be able to take in the sides so it’s wearable, and that will be wonderful. I do like this fabric, and don’t want it to be something I just give away.
The things I’ll change on this for my next Timbre will be to use a size M with a full bust, and grade to the XL for my hips. That should work out much better.
Happy creating!
 Oh, I just love Pistachio. I do hope there are more lovely kits like this in the future.
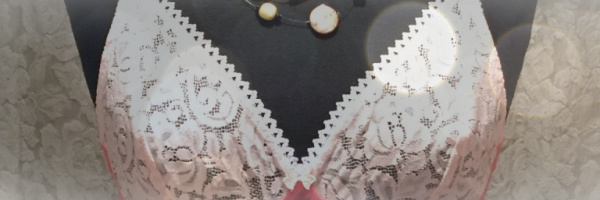
 This is so pretty!
 I adore the hot pink findings that came with this kit and think they really add a pop to the bra.
  The back is where those findings really shine. This is so lovely, and so Springy. You’d never know it by the weather outside though. It’s snowing and -10C!
 I have enough lace I can make an all lace bra like this, but I still probably won’t make it a long line. Isn’t this just stunning? I think I even have a Pistachio findings kit in my stash.
 I really liked this tee. I love the fabric and I wore it often. However, once I started working out with a personal trainer, this wasn’t fitting any more.

 I think I could add a little more ease at the hip line. Just so the garment flowed a little more there.
 Fitting wise, the bust is fine, and the neckline and shoulders are fine. I did a FBA (full bicept adjustment) for the sleeves and they’re fitting fine. There’s enough room under the arm now.
  You’ve seen the front already, but here it is all finished. Neckline done, hems done. It looks much better.
 I did have a fairly major hiccup trying to finish this tee. I was using my Cover Pro and of course sewing on the right side of the garment. It wasn’t until I had finished the neckline that I saw this:
  Those are some terrible looking stitches! I’d had this problem before and called the shop where I purchased this. This was only the 2nd time I was using it. They said adjust the tension. Well I did. The test strip seemed fine. I’m going to have to look into this problem more.
 It was the perfect solution. I finished the tee’s hem, neckline, and sleeves all with a wobble stitch.
  The close up shows the small zigzag but from a distance it looks fine.
 Doesn’t this look great? It makes a comfortable lightly supportive bralette.
 The cup seam is looking wrinkly on the dress form, but not on me. Whew.
 I do think this is the updated Sweet 16 that I made because the cups have more definition at the center front. I actually preferred the first shape a little more once I started wearing these.
 I cut out a straight size M, and did an adjustment for the arms. That was it.
 I didn’t finish the hems or the neckline. I simply used bits of fabric I had saved in my stash to make this. This was simply a test.
  My hubby commented that he didn’t love the mix of fabrics. I told him I was using up bits. He did like that better.
 Right there. Talking with my son he told me which of our exercises was building the muscles there. 🙂
 My plan for this is to see how it fits and then move on to the
  I love this dress, and a fit and flare dress really suits me.
 Isn’t this lovely? It’s so delicate.
 I was thinking of starting my post with this photo and teasing that I’d made a plain beige bra. But that lace was just too pretty not to share right off.
  Lastly, look at how delicate and sheer this is. It’s so lovely.
 I paired this gorgeous lace with beige duoplex and power net. I couldn’t resist adding some of the lace to the frame. I just love this lace!
  Above is the side of the bra showing the lace along the side of the frame.
  Above I’ve cut some of those trailing embroidered details out and adding them to the front bridge. They’re just too pretty and I felt a bow would take away from the leaf and leopard details.
 I added one more little leaf detail to cover that snip. It should protect the cup fabric and keep it from fraying or expanding.